#
Switchoff allelectricalconsumers.
#
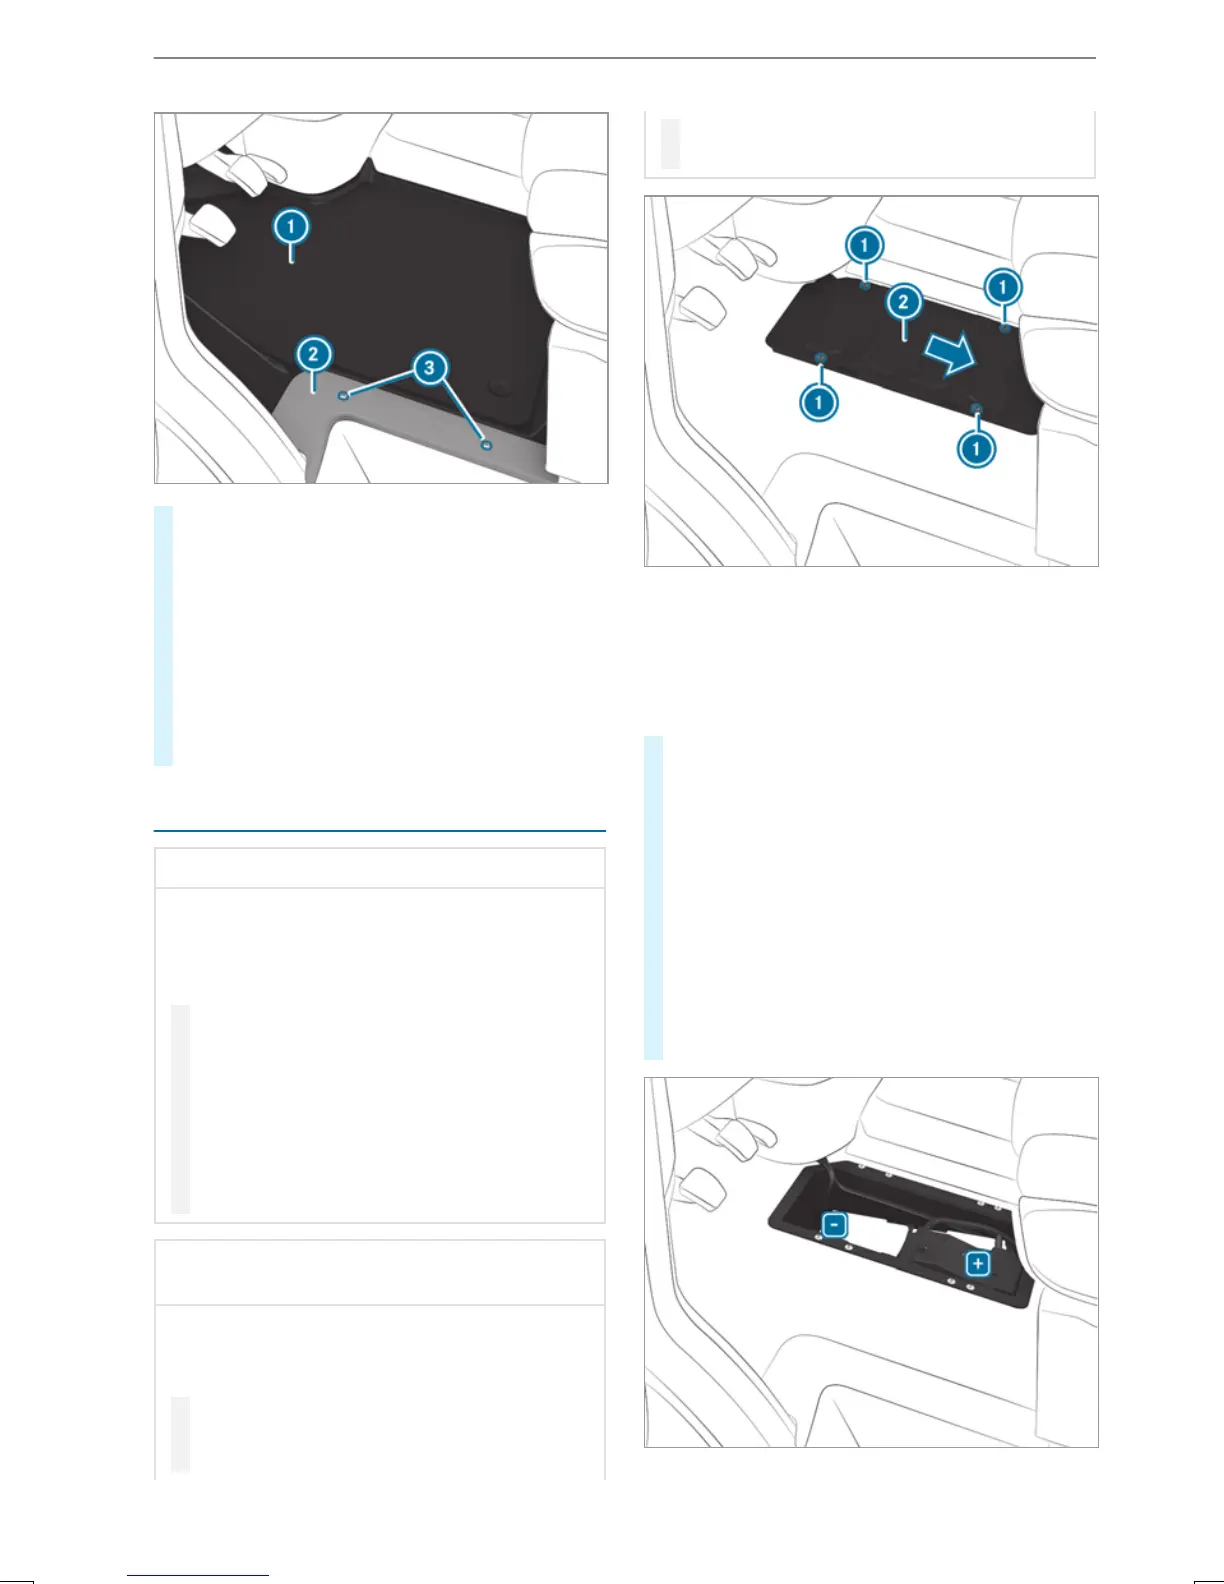
To remove: unscrew screws 3 and remove
trim 2.
#
Remove floor covering 1.
#
To install: insertfloor covering 1 and align
it at thebase of thedriver's seat and at the
door sill.
#
Put trim 2 in place and screw screws 3
backin.
Disconnecting thestarterbattery
*
NOTE Damage to theelectrical assembly
By disconnectingthe starterbatterybefore
theengine is switched offand thekey is
removedfromthe ignition lock, electrical
assemblies could be damaged.
#
Switchoff theengine and remove the
keyfromthe ignition lock. Then, release
thebatteryclamps of thestarter bat‐
tery.
#
Alwaysdisconnect thestarterbatteryin
thebatterycase in theleftfootwell first.
Otherwise, electricalassemblies, e.g.
thealternator,could be damaged.
*
NOTE Damage to thevehicle's electron‐
ics
If youdonot disconnectthe batteryasdescri‐
bed here, thevehicle's electronics could be
damaged.
#
Alwaysdisconnect thestarterbatteryin
following thesequence, and do not
reversethe batteryterminals under any
circumstances. Otherwise, thevehicle's
electronics could be damaged.
Vehicles withrear wheel drive
If thevehicle is expected to be parkeduporout
of use foroverthree weeks, disconnect thebat‐
teries. This will prevent batterydischarge caused
by quiescent current consumers.
#
Vehicles with abatterymain switch:
switchoff themain switchofthe battery.
#
Vehicles without abatterymain switch:
switchoff all electrical consumers.
#
Switchoff theengine and thepower supply.
#
Remove thefloor covering (/ page 283).
#
Remove screws 1 and slide batterycover
2 in thedirection of thearrow.
The screwsmustprotrudeoverthe larger
recesses.
#
Remove batterycover 2 upwards.
284
Breakdown assistance

 Loading...