SECTION 4
4-111
Proceed as follows:
1. Remove bolt W, taking care not to lose the two
spacers and washers.
2. Turn the knife or install a new one.
3. Insert bolt W from the right-hand side (facing the
direction of travel).
4. Tighten nut Z to a torque of 64 Nm.
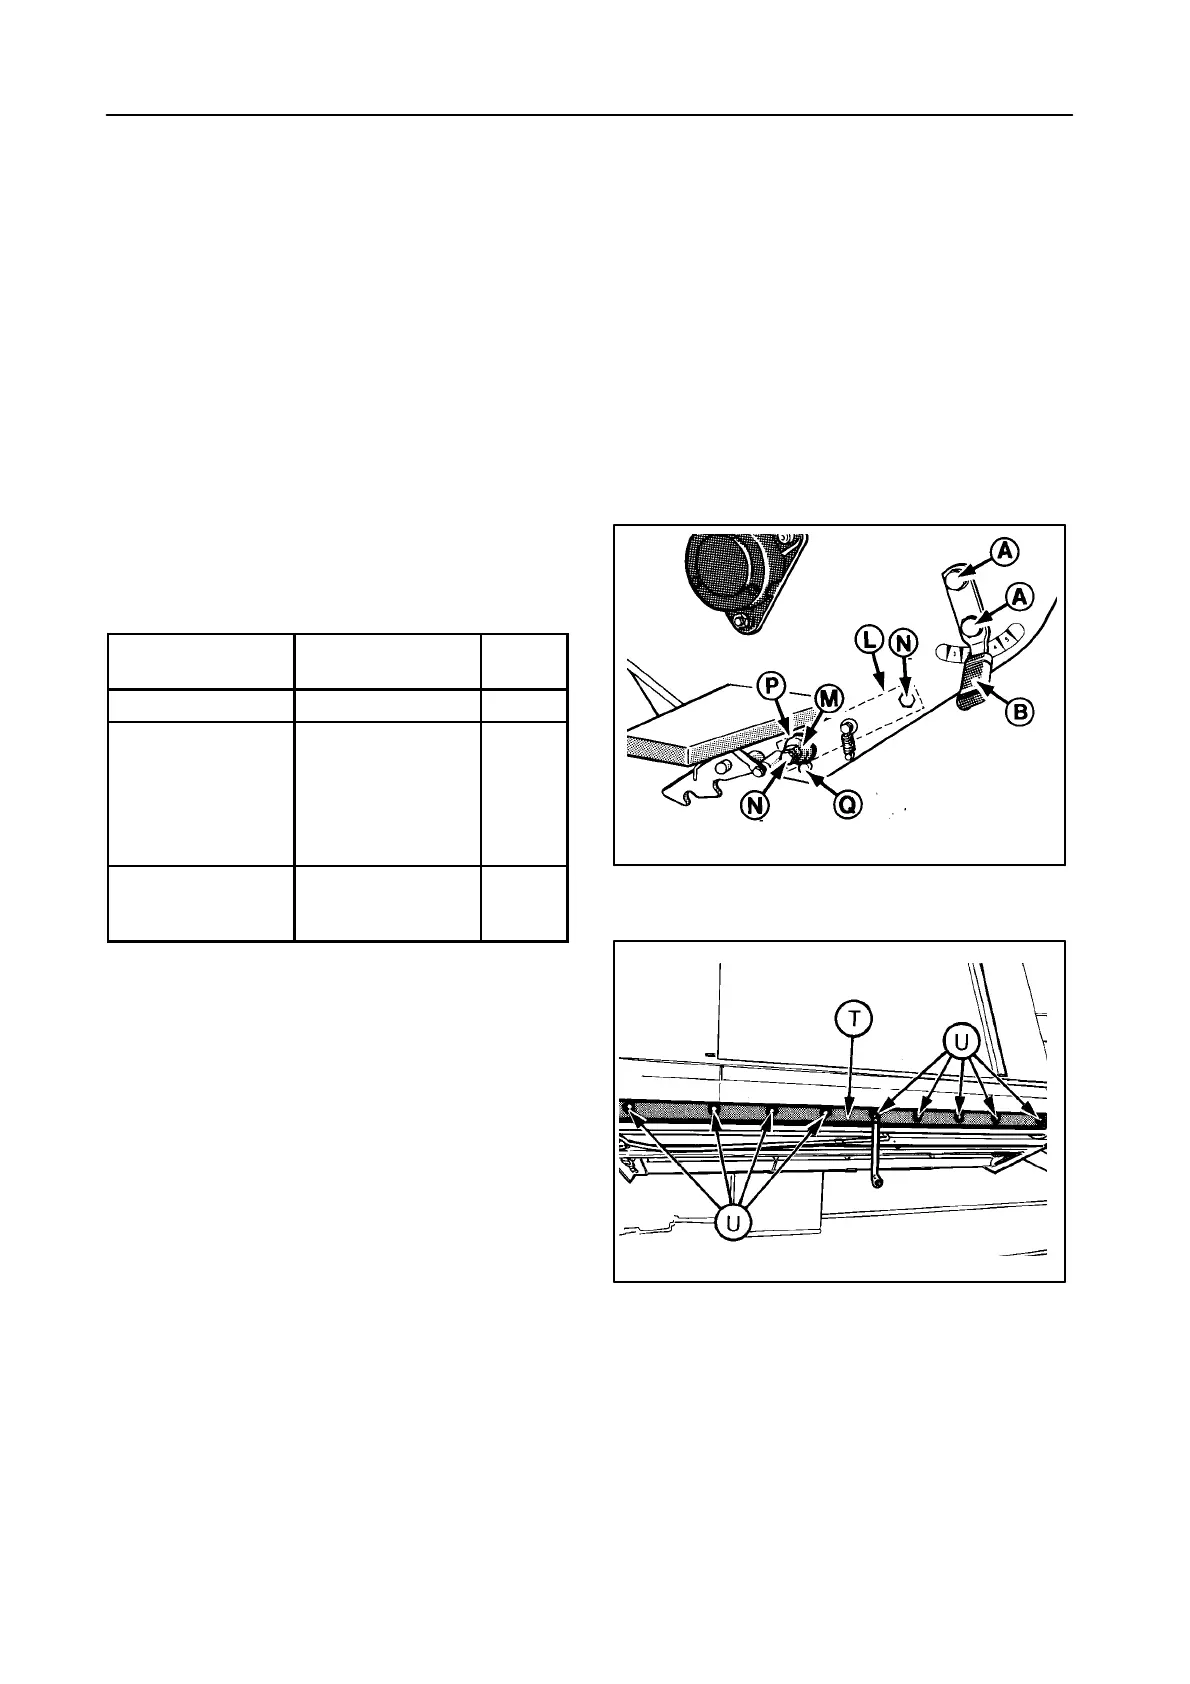
COUNTER KNIVES -- Figure 165
The counter knives must be set as follows:
Crop and/or
condition
Counter knife
setting
Posi-
tion
Dry straw Fully advanced 1
Damp crop: Towards the rear:
S Heavy straw S Approximately
halfway
3
S Oil seed rape,
peas and beans
S Fully retracted 5
Maize and sun-
flower
Remove knives
completely
(one by one)
--
To reposition the counter knives, loosen nuts A on
both sides, move the counter knives bar to the desired
position with lever B and retighten nuts A.
REPLACEMENT OR REMOVAL OF THE COUNT-
ER KNIVES -- Figures 165 and 166
To remove the counter knives, proceed as follows:
1. Set the counter knives in position 1 using bolts A
on both sides.
2. Remove nine bolts U and cover T.
The counter knives can now be pulled out one by one
for replacement or removal.
IMPORTANT:
Do not remove the counter knife block itself
when chopping maize.
30347
165
55149
166
 Loading...