CHAPTER 13 TROUBLESHOOTING
COPYRIGHT
©
2002 CANON INC. 2000 CANON iR1600/iR2000 REV.1 JAN. 2002
13-1
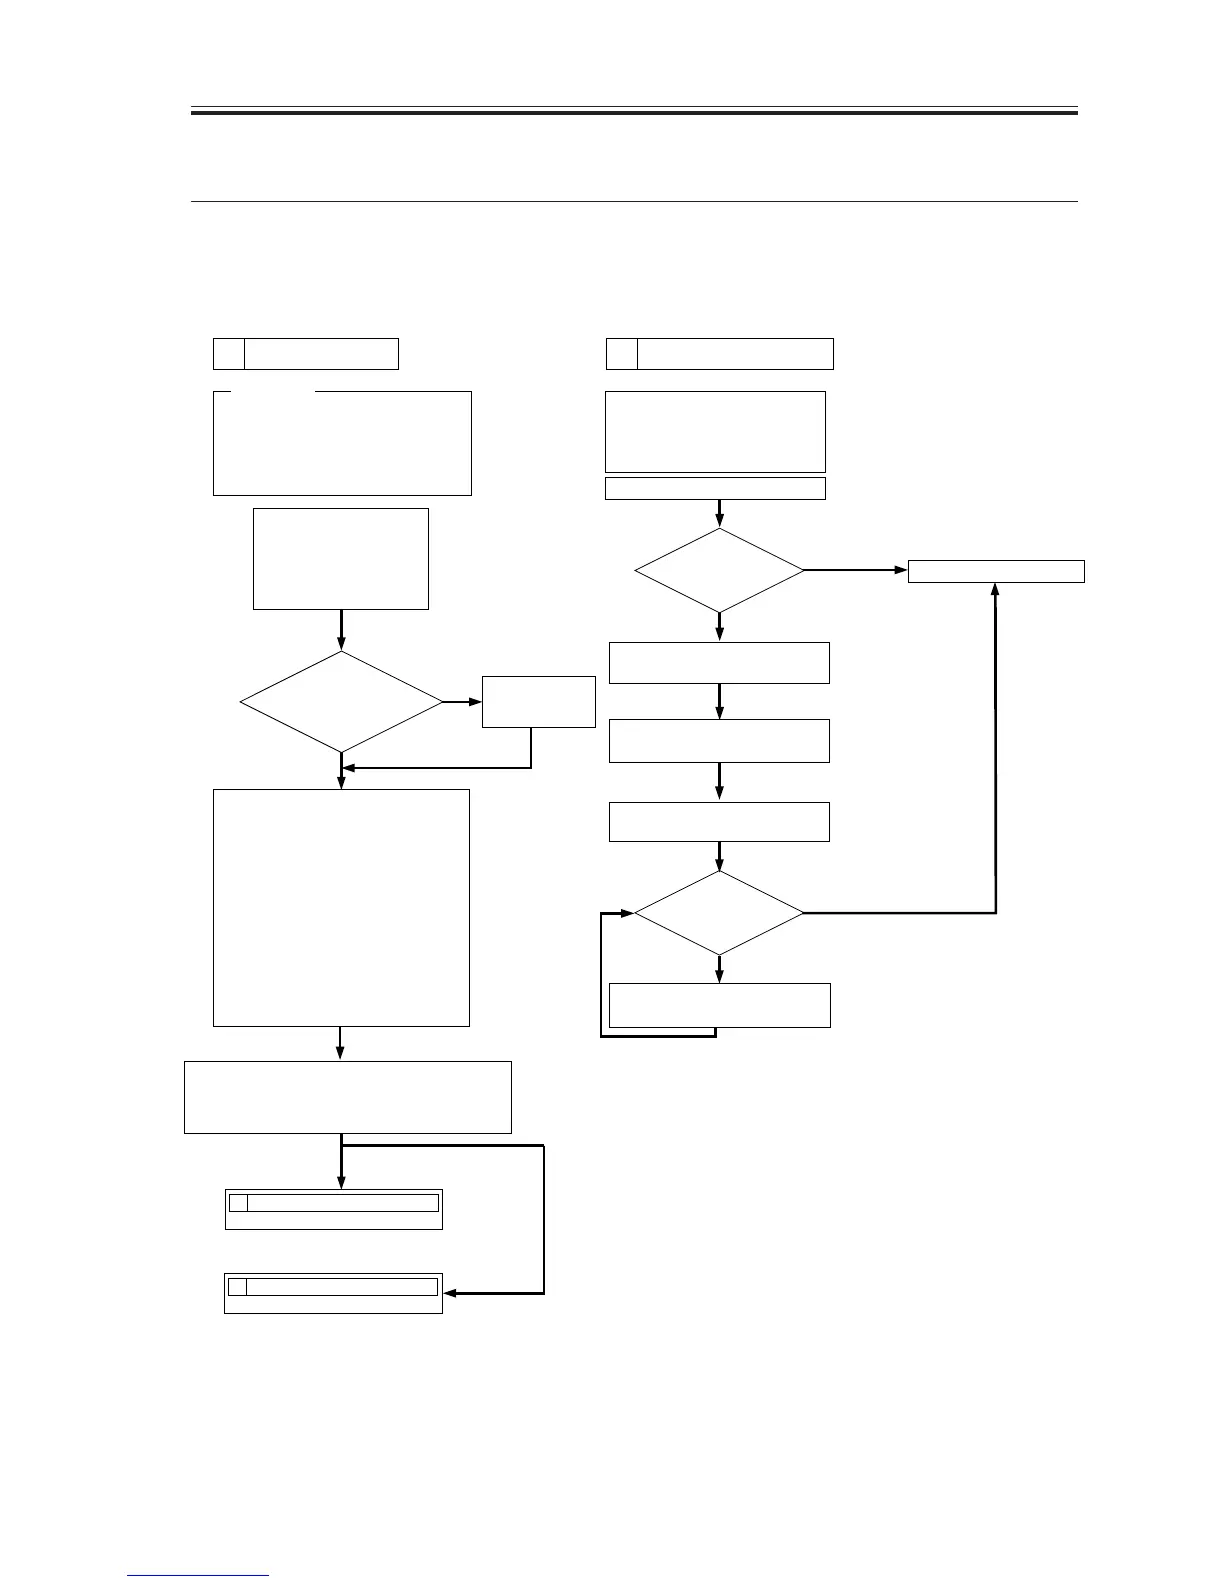
1 Image Adjustment Basic Procedure
1.1 Image Adjustment Basic Procedure
Go through the following to make basic adjustments:
F13-101-01
Check/clean the following:
1.contact sensor
2.copyboard glass, reading
glass, copyboard cover
Make a copy in test mode.
YES
YES
NO
Is there
a fault in the
image?
NO
Output Conditions
F value=7
If there is a fault in the
copy images,
If there is a fault in the
print images.
1. Use paper fresh out of package.
(If moist, if makes image quality
evaluation difficult.)
2. Use paper with an appreciably high
degree of whiteness.
3. Whenever possible, use A3/11x17.
Prerequisites
Set the setting
to the middle
index.
1 Checking the Scanner Side
Check the scanner side.
2 Checking the printer side.
Check the printer side.
NO
YES
1 Making Initial Checks 2 Checking the Scanner Side
1. Using the NA3 Test Chart, make 2
copies in the following mode: text
mode
Ref.: At the optimum setting, gray
scale
No. 0 should barely visible.
2. Make 2 test prints each of the
following: start service mode, and
select 'TEST MODE'; then, press
'3' on the keypad to select 'PRINT
TEST'. Press '2' on the keypad to
execute 'BLACK' (solid black).
Press '6' on the keypad to select
'ENDURANCE' (black band).
Check the print image.
Is the image density optimum?
Is the density the same between front and rear?
Is the white background free of fogging?
By referring to 4. of
Chapter 12, clean the
following: reading system
pickup/feeding system
image formation system
Execute gain auto adjustment.
(Note 1)
Execute gain auto adjustment.
(Note 1)
Clean the copyboard
glass/contact sensor.
Make a copy in text mode
using the copyboard.
Is there
a fault in the image?
End
Is the
density setting set to
the middle index?
Note 1: Execute the following:
TEST MODE>2 CCD TEST>8
(gain auto adjustment).
'OK' will be indicated at the end of adjustment.

 Loading...