COPYRIGHT
©
2002 CANON INC. 2001 2001 2001 2001 CANON Printer Board-N1/iN-E5 REV.0 JAN. 2002
4-5
CHAPTER 4 INSTALLATION
1.3 Making Checks After Installation
1) Connect the power plug to the power
outlet, and turn on the host machine’s
power switch.
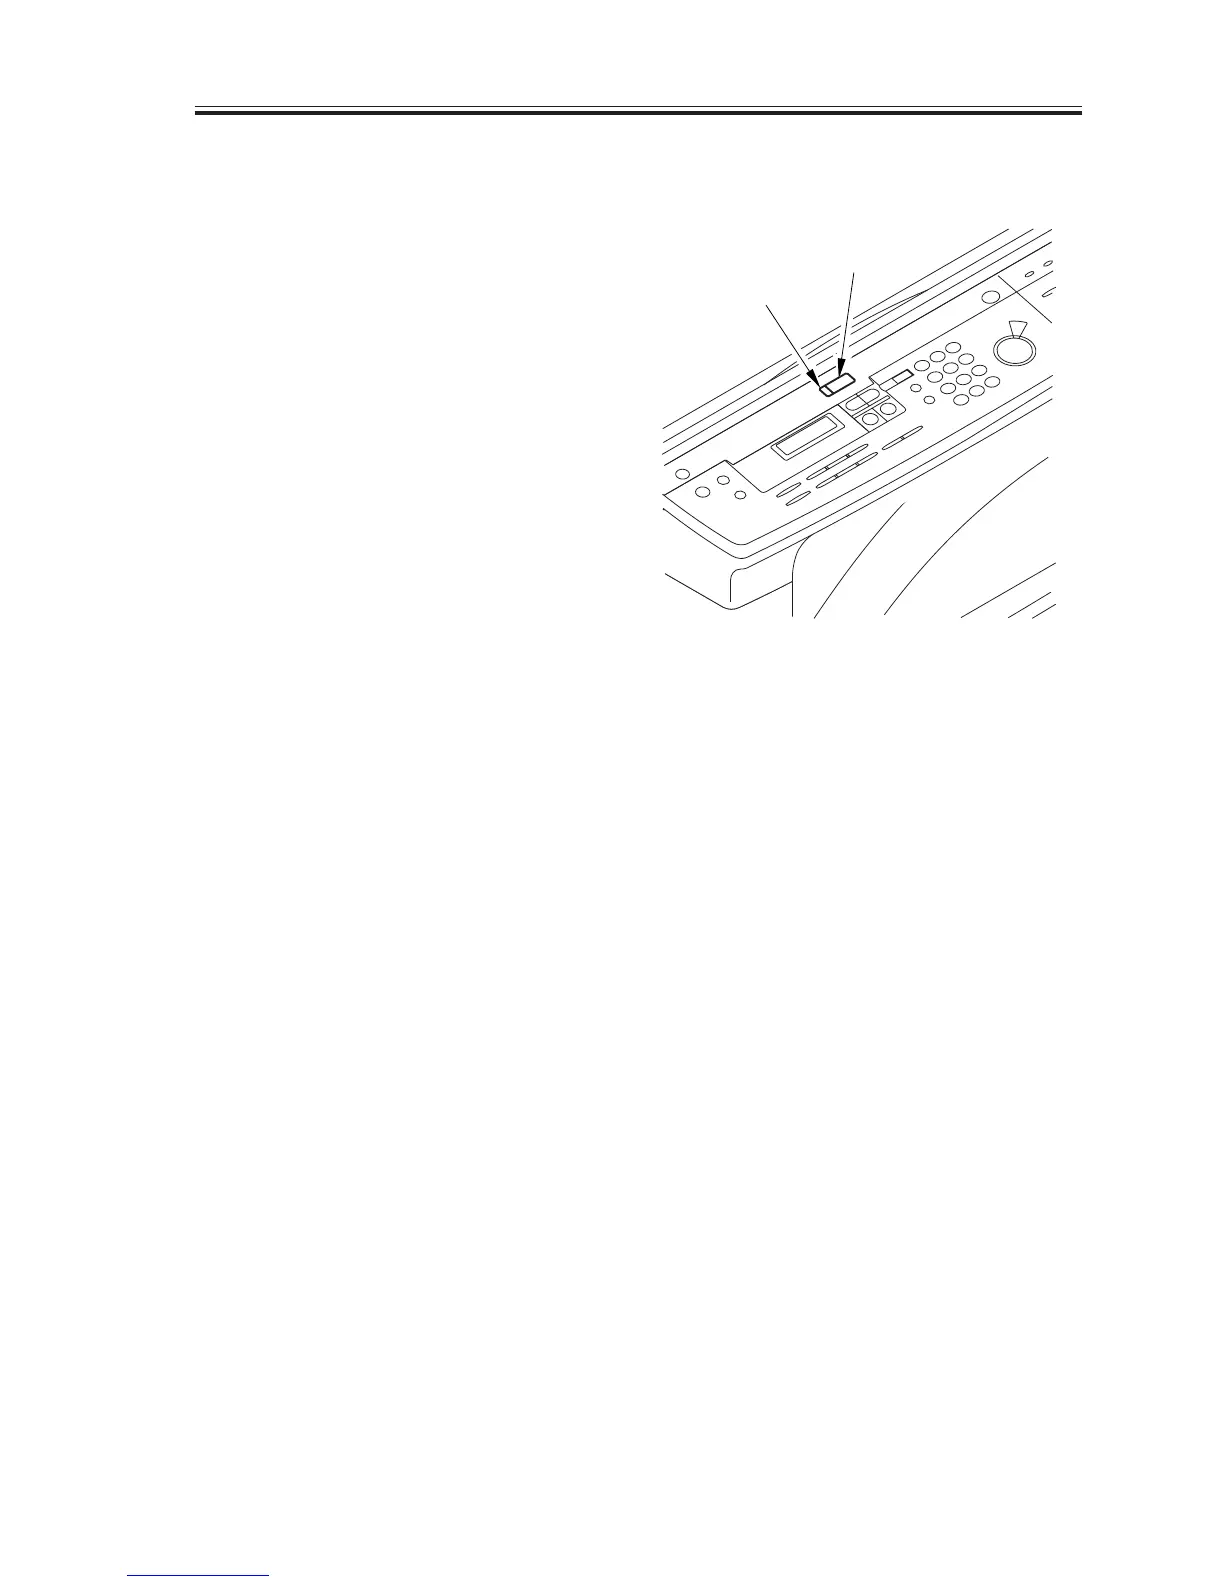
2) Press the “System” key in the control
panel, and check to be sure that the
LED indictor has gone ON. If the LED
indicator fails to go ON, check to see if
the printer board has been correctly
mounted.
F04-103-01
3) Go through the following to generate
“TEST PRINT” for the printer board,
and check to make sure that the output
is normal.
In the control panel, operate as fol-
lows: “System” key>“Go” key (so that
“PAUSE” is indicated)>“Menu” key
(so that “TEST MENU” is
indicated)>“Item” key to select “TEST
PRINT”; then, press the “Enter/Can-
cel” key.
If the connection is correct, the output
should indicate the name/version of the
printer board.
"System"key
LED

 Loading...