U2
scribe. Hold your thumb
ove
r onc edge
of
the clip
when removing
it
to
prevcnI
the clip from springing
out.
5.
Usc a proper size wooden dowel or socket
extension and push out the piston pin.
CAUTION
Be
ca
r
ef
lll when r
emQ\·
j"8
th
e pin to
(II'oid (/amaging llle connecting rod. If
if
is
1I
ecessary to gently
rap
the pin
to
remOl't! it. be SIIre that the
pisto/l
is
properly supported so Ihat lateral
shock is
110/
transmilled
to
the
fowu
cOl/necting
rOll
bearing.
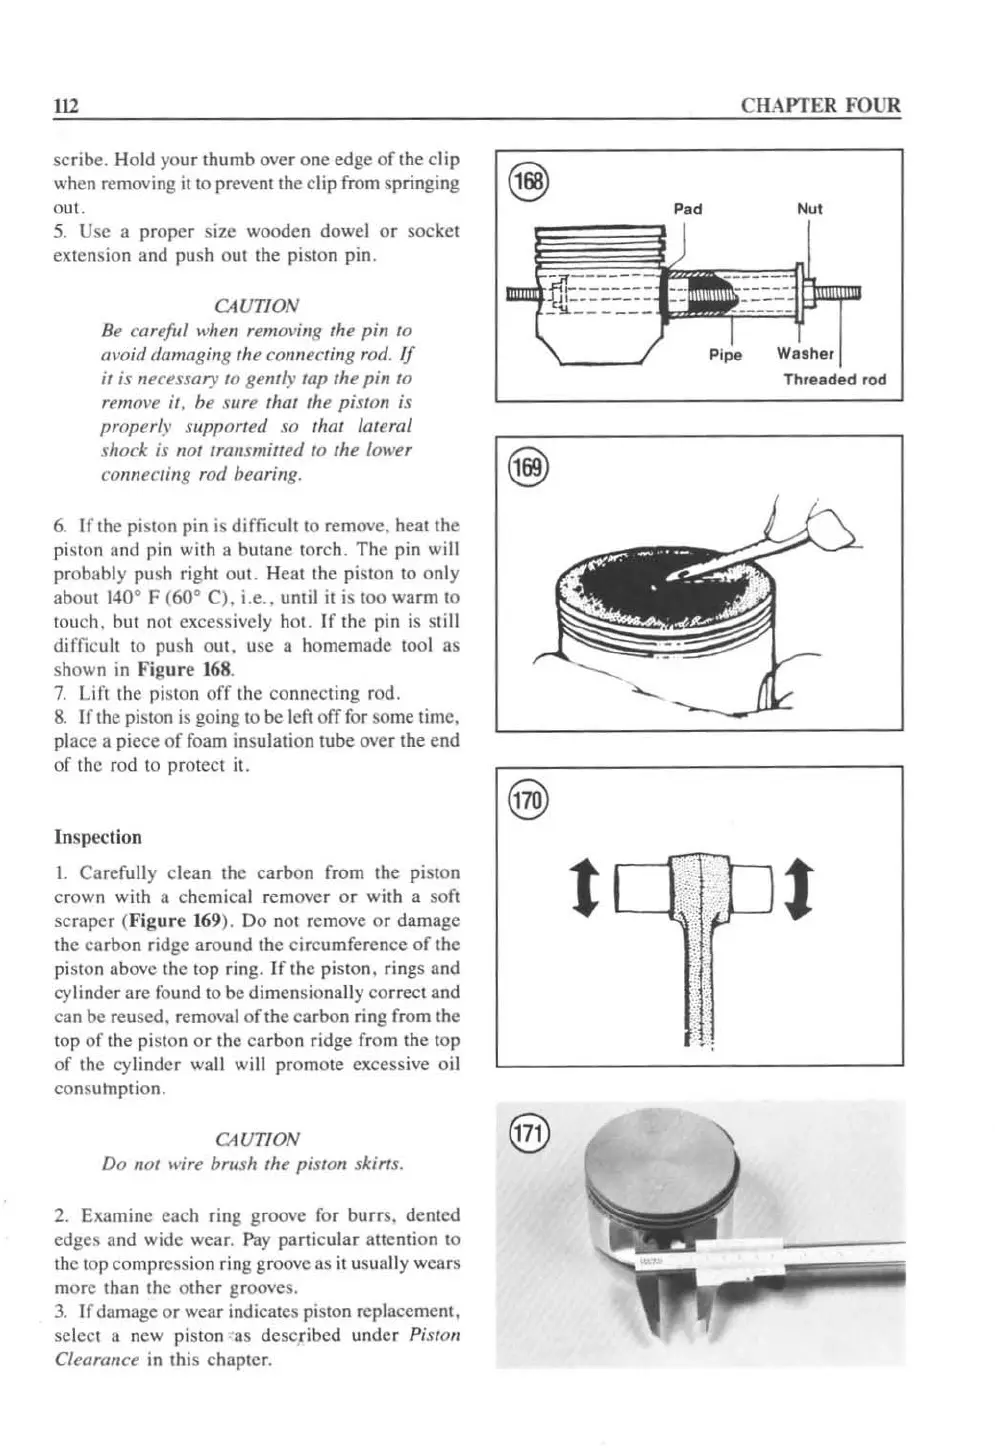
6.
If the piston pin is difficult to remove. heat the
piston and pin with a butane torch. The pin will
probably push right
OUI.
Heal the piston to o
nl
y
about \40" F (60" C). i.e .. until
it
is 100 warm to
lOuch, but not excessi
ve
ly hot. If the pin
is
still
difficult to push out. use a homemade tool as
shown
in
Figure
168
.
7.
Lift the piston
off
the co
nn
ecting rod.
S.
If
th
e
pi
ston
is
going to be left off
for
some lime.
pl
ace a piece of foam insulation tube
ove
r the end
of
the rod to protect it.
Inspection
I.
Ca
refully clean the carbon
fr
om the piston
crown with a chemical remover or with a soft
scraper (I'
igure
16
9). Do not remove or damage
the carbon ridge arou
nd
the circumference
of
the
piston above the top rin
g.
If the
pi
ston. rings and
cylinder are found to be dimensio
na
ll
y correct and
can
be
reused. rem
ova
l
of
the carbon ring from the
top
of
the piston or the carbon ridge from
th
e
tOp
of
the
cy
linder wall will promote excess
iv
e oil
consutnption.
CAUT
IO
N
Do not wire brush the piston skirt
s.
2. Examine each ring groove for burrs. dented
edges a
nd
wide wear.
Pa
y particular anent ion to
the
lOp
compression ring groove as it usua
ll
y wears
more than the
other
grooves.
3.
If da
ma
ge or wear indicates piston replaceme
nt
.
select a new
pi
ston ·as described under Piston
Clearance
in
this chaptcr.
CHAPTER FOUR
P
••
""
Threaded rod
Df
. ,
 Loading...


