BRAKES
activate the front brake lever as many times as
it
takes to refill the cylinder
in
the ca liper and
correc
tl
y locate the pad
s.
WARNING
Use
brake fluid clearly marked DOT 3
or
DOT 4 from a seale,l comai
lll!r.
Other types may mporize and cause
brake failure,
AllI'ays use the same
brand name; do
//ot
intermix as many
brands are
11
01
compatibl
e.
Do
1101
imermix
silicO
lle
based
(D
OT 5) brake
fluid as
it
can cause brake component
(iamage leading
10
brake system
failure.
301
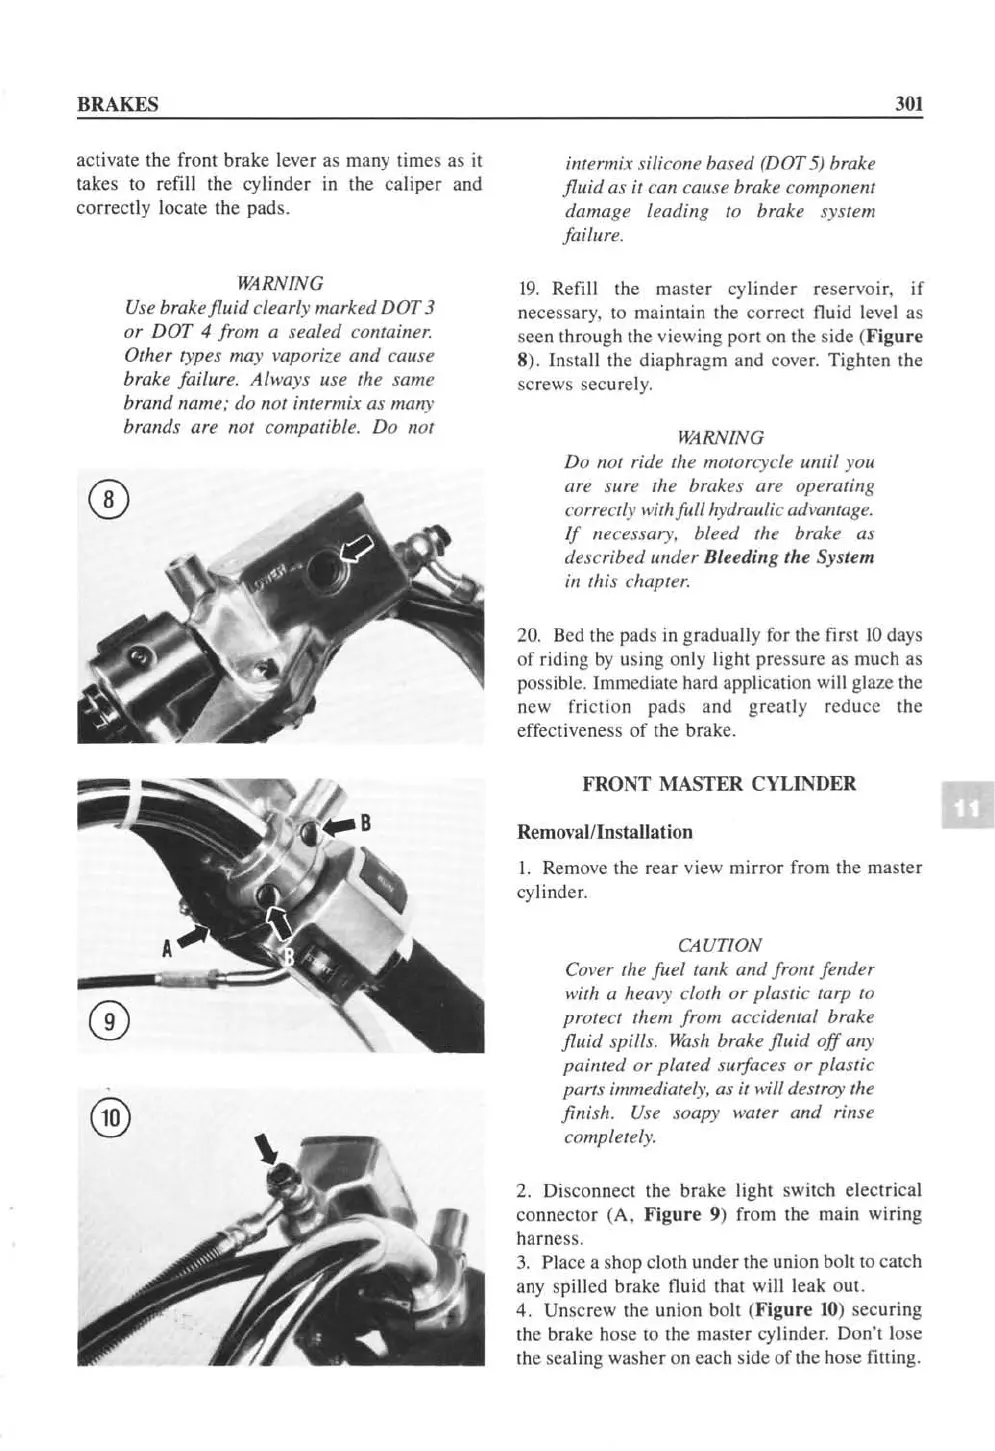
19.
Refill the
ma
ster cylinder reservoir. if
necessary.
to maintain the correct fluid level as
seen through the viewing port on the s
id
e (
Figure
8). Install the diaphragm and cover. Tighten the
screws securely.
WARNING
Do
1I0t
ride the motorcycle until you
are sure the brakes are operating
correctly
with
full hydraulic
adl'(lfItage,
If
ne
ceSS
Ql)"
bleed the brake as
described
lIIul
er Bleeding
Ih
e
Sysum
in
Illis
chaptN.
20,
Bcd the pads
in
gradually for the first 10 days
of
riding
by
using o
nl
y light pressure as much as
possible. Immediate hard application
will
glaze
the
new friction pads and greatly reduce the
effectiveness of the brake.
FRONT MASTER
CY
LINDER
Removal/Installation
I. Remove the rea r view mirr
or
from the master
cylinder.
CWTlON
Cover the fuel tank and from fender
with a heavy clolh or plastic tarp to
protect them from accidental brake
fluh/ spills.
Wash
brake fluid
off
any
painted or plated surfaces or plastic
parts immediately, as
it
will destroy the
finish.
Use
soapy warer and rinse
completely,
2.
Di
sconnect the brake light switch electrical
connector (A.
Figur
e 9) from the main wiring
harness,
3,
Place a shop cloth under the union bo
lt
to catch
any spilled brake fluid that will leak
OUI.
4. Unscrew the union bolt (
Figure
10
) securing
the brake hose to the master cylinder. Don't lose
t
he
scaling washer on each si
de
of
the hose fitting.
 Loading...


