252
NOTE
Insert a piece
afvinyl
tubing or wood
in the caliper in
pla
ce
of,Ile
brake disc.
That
wa
y
if
the brake fever is
ifllldl'erlenily
squeezed, the
1);
SIOn
wifl
110/
be/arced
OUI
of/he
cylinder.
If/h
is
does happen , the caliper may
hOI'e
to
be
disa
sse
mbled
to
restal
th
e piston
and Ihe
$}
'S
fem
will
hOI
'e
10
be
bled.
By
using
th
e wood. bleeding
th
e brake is
n
o/
necessa
ry
when
installing
th
e
wheel.
In
sta
ll
ation
I. Make s
ur
e
the
ax
le bearing surfa
ces
oflhe
fork
sliders and axle
ar
c free from
burr
s and n
ic
ks.
2. Remove the vinyllubing or
pi
eces of wood from
the brake caliper.
3.
Position the wheel
in
place and carefully insert
th
e brake disc between the brake pads in the caliper
asse
mbly
.
4. Make sure the wheel spac
er
is
in
place on
eac
h
side
of
th
e hub.
5.
Apply a light coat
of
grease to the front altle.
In
sert the front axle from the left-hand side through
the wheel hub.
6.
Tighten the front axle to the torque speci
fi
cation
listed
in
Table
I.
7.
In
stall the front caliper assembly as described
under
Fr
o
nt
Brake Caliper RemoWll/lnstaliation
in
Chapter Ele
ve
n.
8. Remove the wood block(s) from under the
engine and frame.
9.
With the front brake applied, push do
wn
hard
on the handlebars and pump the forks several times
to
se
at the front altle.
10.
Tighten the front axle and front axle pinch bolt
to the torque specification listed in Table
I.
11.
After the wheel
is
completely installed. rotate
it several times to make sure that
it rotates freely.
Apply the front
brake as many times as necessary
to make sure the brake pads are against the brake
disc correctly.
WHEEL INSPECTION
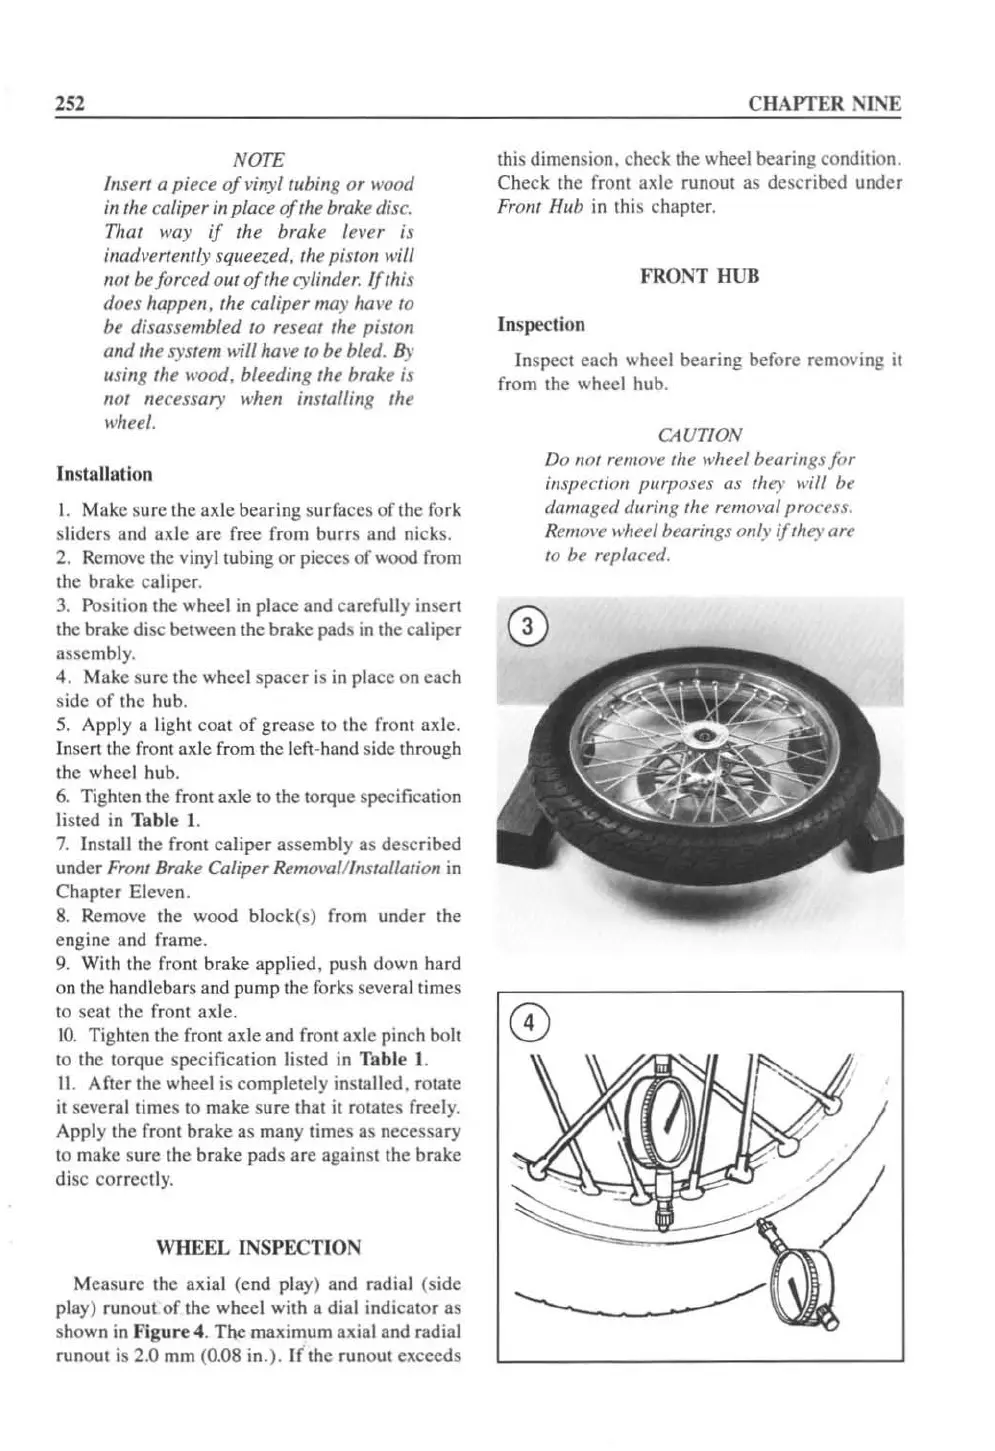
Meas
ur
e the axial
(e
nd play) and radi
al
(side
play)
runoul
of
the wheel with a dial indicator as
sho
wn
in
Figure
4.
The
maximum axial and radial
runout is
2.0 mm (0.08
in
.). If the runout eltceeds
CHAPTER NINE
this dimension, check the wheel bea
ri
ng
condition.
Check the front axle runout as described under
Fro
nt
Hub
in
this chapter.
FRONT
HUB
Inspection
In
spect each wheel bearing before removing
it
from the wheel hub.
CAUTION
Do
1101
remOl·e Ihe wheel
hearings/or
inspection
purposes
as
Ill
ey will
be
(lomo
ged
during llle rem
om/,Jrocess.
Remove wi/eel
beari
ll
gs only
if
tltey
are
10
be
replace(J.
 Loading...


