BRAK
ES
If
the brake feels "spongy," Ihis usually means
there are air bubbles
in
the system and
it
must bled.
For safe operation, refer to
Blud;n8,he
System
in
this chaple
r.
CAUTION
Disc brake components rarely require
disassembl
y,
so do
ri
ot disassemble
rhem
IInless necessary. Do not use
soll'ems
of
any kind on the brake
system's internal components. Soh'ems
""ill
cause the seals !Oswell and dislOn
and
require replacemellt. When
disassembling and cleaning brake
compollems (except brake pads), lise
new brake fluid.
FRONT BR
AKE
PAD
REPLA
CEl\.1ENT
299
There is no recommended mileage interval for
changing
th
e friction pads in the disc brake. Pad
wear depends greatly on riding habits and
conditions. The pads should be checked for wear
every 6 months and replaced when the wear
indicator reaches the edge
of
the brake disc. To
maintain an even brake pressure on the disc. always
repla
ce
both pads in the
caliper
at the same lime.
Di
sco
nn
ecting the hydraulic brake hose from the
brake
caliper
is not necessary for brake pad
replacement. Disconnect the hose only
if
the
caliper assembly is going to
be
removed.
CAUTION
Check the
pads
more
frequently when
the wear line approaches the 'lise. On
some pads, the
wear
line
is
\'ery
dose
10
the metal backing plate. If
pad
lI'ear
happens to be
IInn
'e
nfor
some reason,
the backing
plate may
come
in contact
lI'ith the disc
and
calise damage.
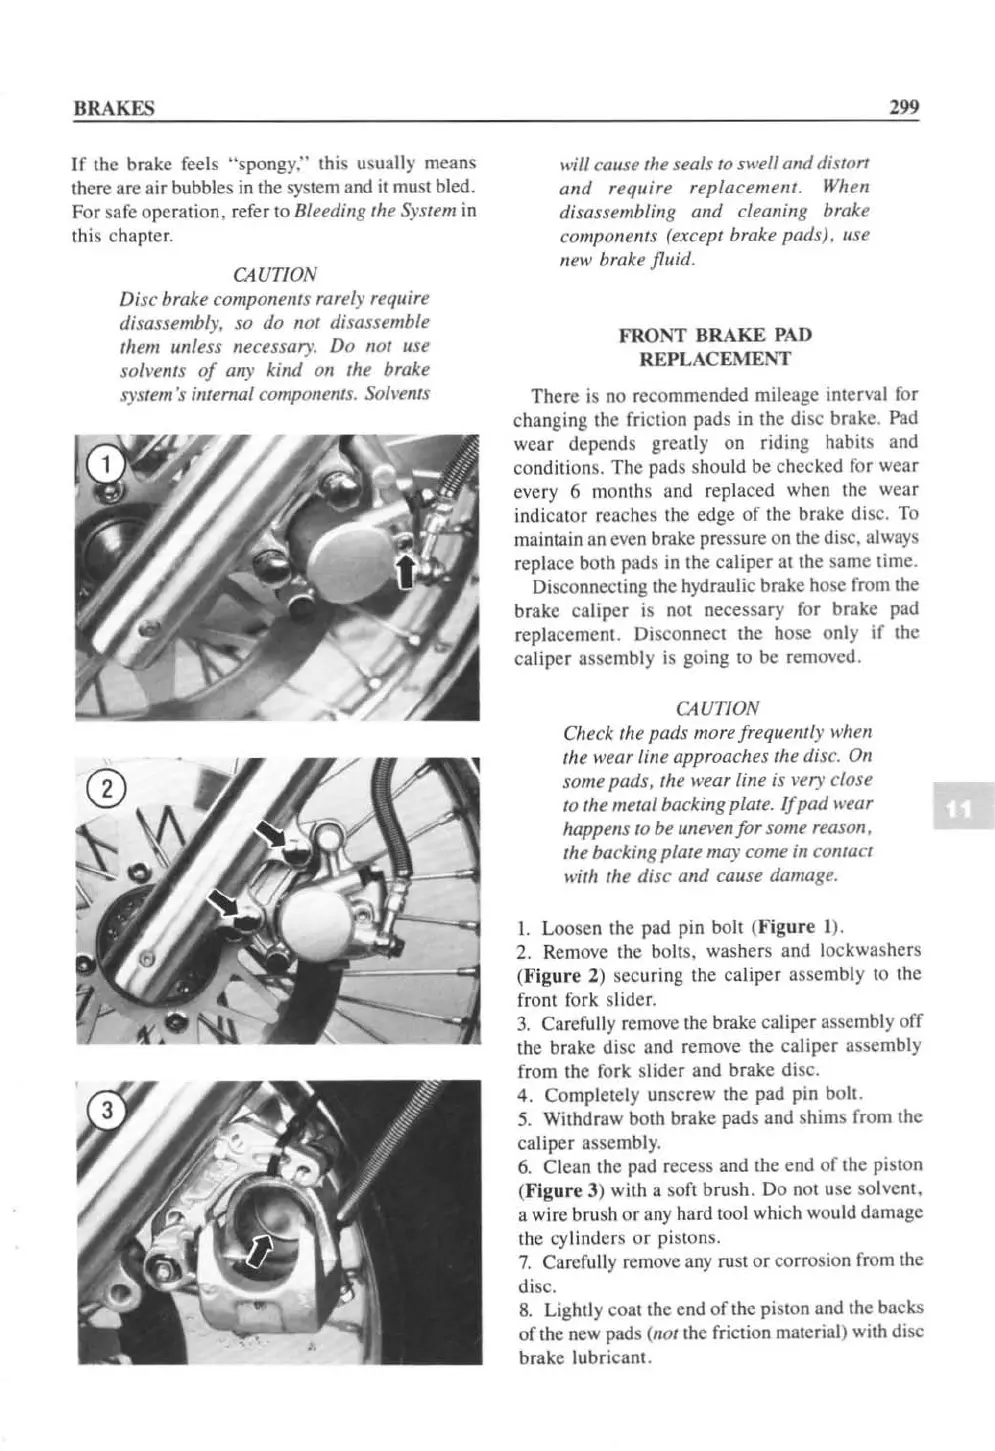
I.
Loosen the pad pin bolt (
Figure
1).
2. Remove the bolts,
wa
shers and loekwashers
(
Figur
e 2) securing the caliper assembly to the
front f
ork
slider.
3.
Carefully remove the brake ca
li
per assembly off
the brake disc and remove the
caliper
assembly
from the fork
slider and brake disc.
4.
Complelely unscrew the pad pin bolt.
5.
Withdraw both brake pads and shims from the
ca
liper assembly.
6.
Clean the pad recess and the
end
of
the piston
(
Figure
3) with a
so
ft
brush. Do not use solvent,
a wire brush or any hard tool which would damage
the cylinders
or
pistons.
7.
Carefully
re
move any rust or corrosion from the
disc.
8.
Lightly coat the end
of
the pislOn and the backs
of
th
e new pads (nol the friction material) with disc
brake lubricant.
 Loading...


