230
6.
To
remove the headlight lens unit. perform the
following:
a.
Remove the adjustment screws (
Figure
60).
b.
Remove the screws. washers and spacers
(
Figure
61
) securing the lens unit to the
mounting ring and remove the mounting ring
and trim ring from the lens unit.
7.
In
stall by reversing these removal steps. Note
the following during installation.
8.
Install the rubber cover with the TOP arrow
(.' igure 62) facing upward.
9.
Make sure the electrical connector is on tight
and that the rubber cover is properly installed to
keep out moisture.
10.
Adjust the headlight as described
in
this
chapter.
Headlight Case
Removal!1 nstallat
ion
1.
Remove the screw
(F
ig
ure
55) on each side at
the bottom
of
the headlight case.
2.
Pullout
on
the bollom
of
the headlight trim ring
and disengage
it
from the headlight case. Remove
the trim ring and headlight lens unit assembl
y.
3.
Disconnect the electrical connector
(F
igure 56)
from the backside
of
the
bu
l
b.
4.
Di
sconnect the electrical wire connectors (A,
Figure
63
) within the headlight case and withdraw
the
wi
res from the case
(8,
Figure
63).
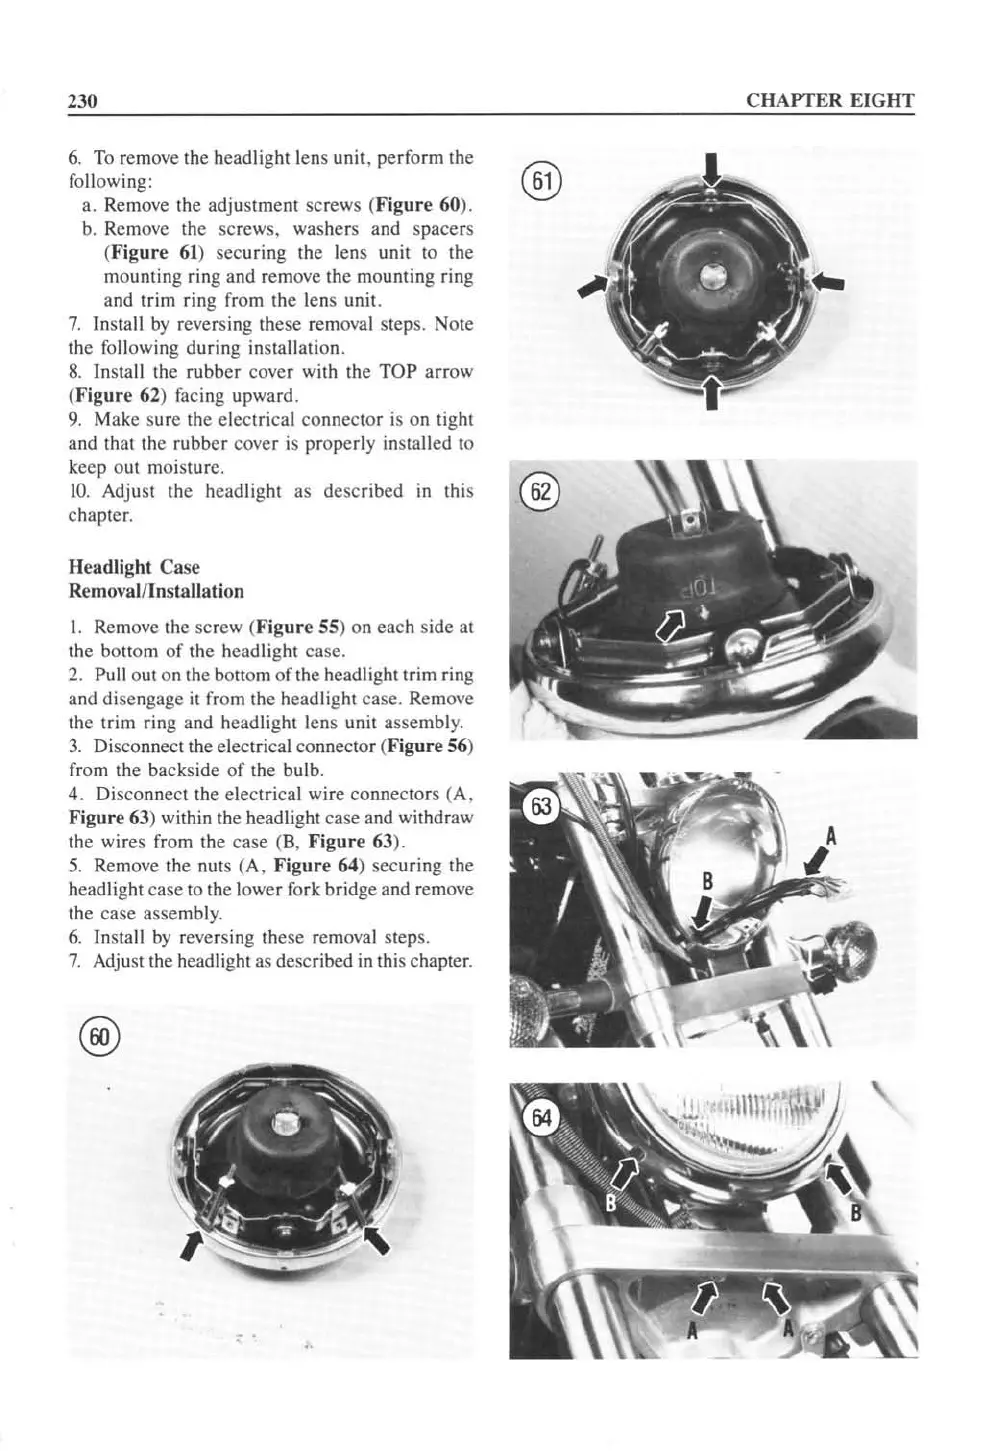
5.
Rem
ove
the nuts (A,
Figure
64) securing the
headlight case to the lower fork bridge and remove
the case assembl
y.
6.
Insta
ll
by
reversing these removal step
s.
7.
Adjust the headlight as described
in
this chapter.
, .
CHAPTER EIGHT
®
®
 Loading...


