ENGINE
121
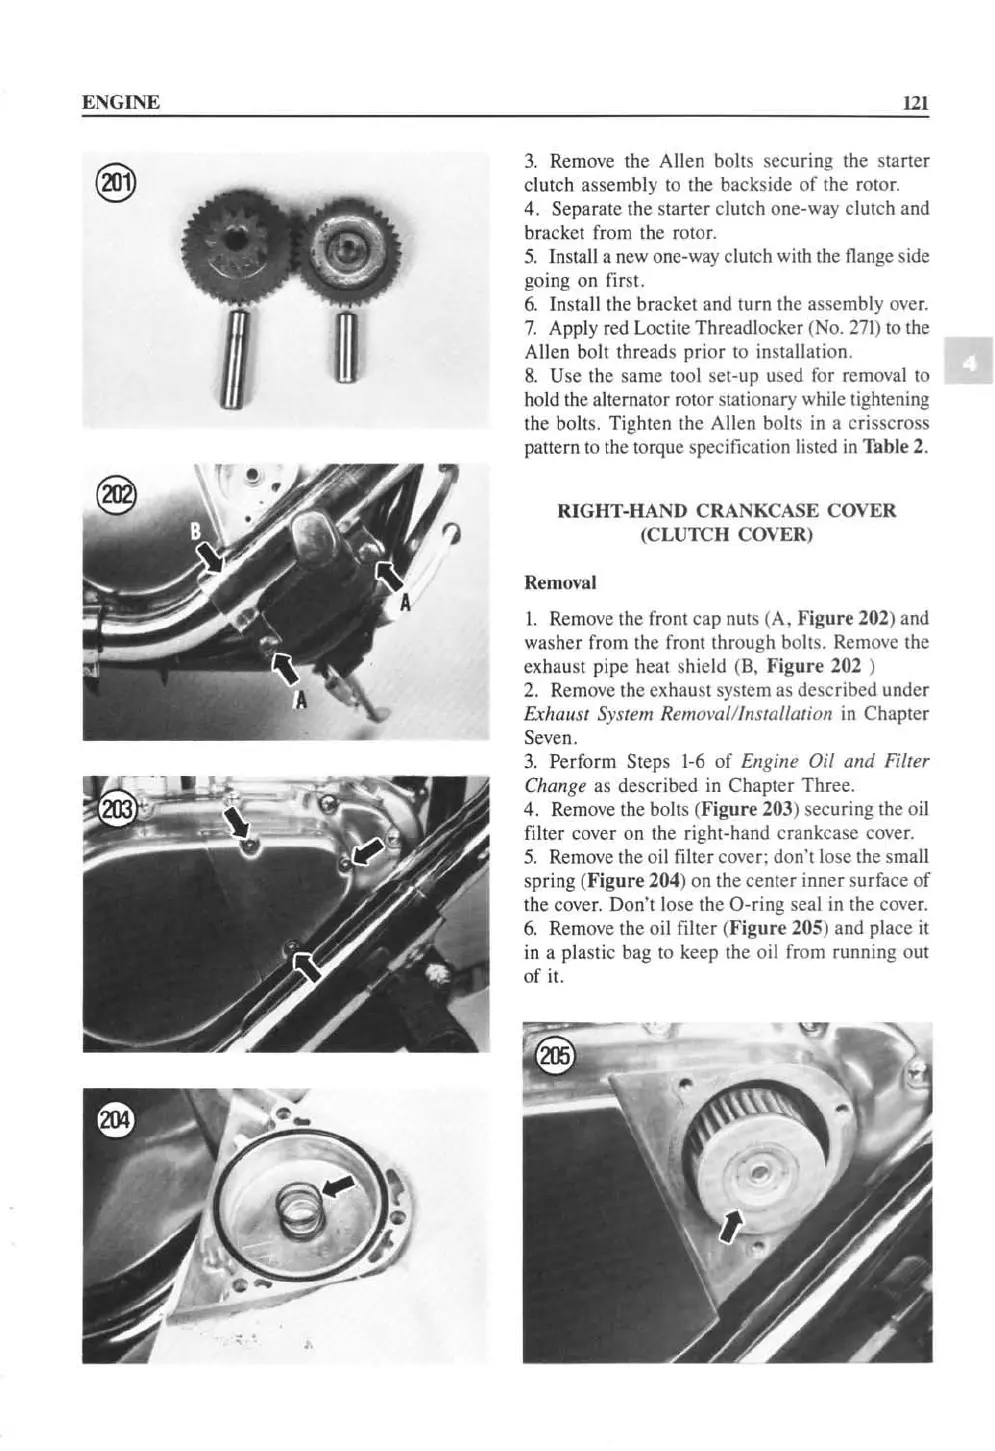
3.
Remo
ve
the Allen bolts securing the starler
clutch assembly to the backside
of
the rotor.
4. Separate the starter clutch one-way clutch and
bracket from the rotor.
5.
Install a
new
one-way clutch with the flange side
go
in
g on firs
t.
6.
In
stall the b
ra
cket and turn the assembly over.
7.
Apply red Loctite Thread locker (No.
271)
to
the
Allen bolt threads prior
to
installation.
8.
Use the sa
me
tool set-up used
for
removal to
hold the alternator
rolOr
stationary while tightening
the bolts. Tighten the
Allen bolts
in
a
cr
isscross
pattern
to
the torque specification listed
in
Table
2.
RIGHT-HAND CRANKCASE COVER
(CLUTCH COVER)
Removal
I. Remove the
frOnl
cap nuts (A. Figure 202) and
washer from the fronl through
bolts.
Rem
ove the
exhaust pipe heat shield
(
B,
Figure 202 )
2.
Remo
ve
th
e exhaust
sys
tem as described under
Exhallst System RemOl'alllllstalfation
in
Chapler
Seven.
3.
Perform Steps
1-6
of
Engine Oil alld Filter
Change
as
described in Chapter Three,
4. R
em
o
ve
the bolts (Figure 203) securing the oil
filter cover on the right-hand crankcase cover.
5,
Remove t
he
oil filter cover: don·t lose the small
spring (Figure
204) on the cenler inner
su
rface of
the cover. Don't lose the
O-ring seal
in
the cover.
6.
Rem
ove the oil filter (Figure
205
) and place
it
in
a plastic bag 10 keep the oil
fr
om running out
of
it.
 Loading...


