194
16.
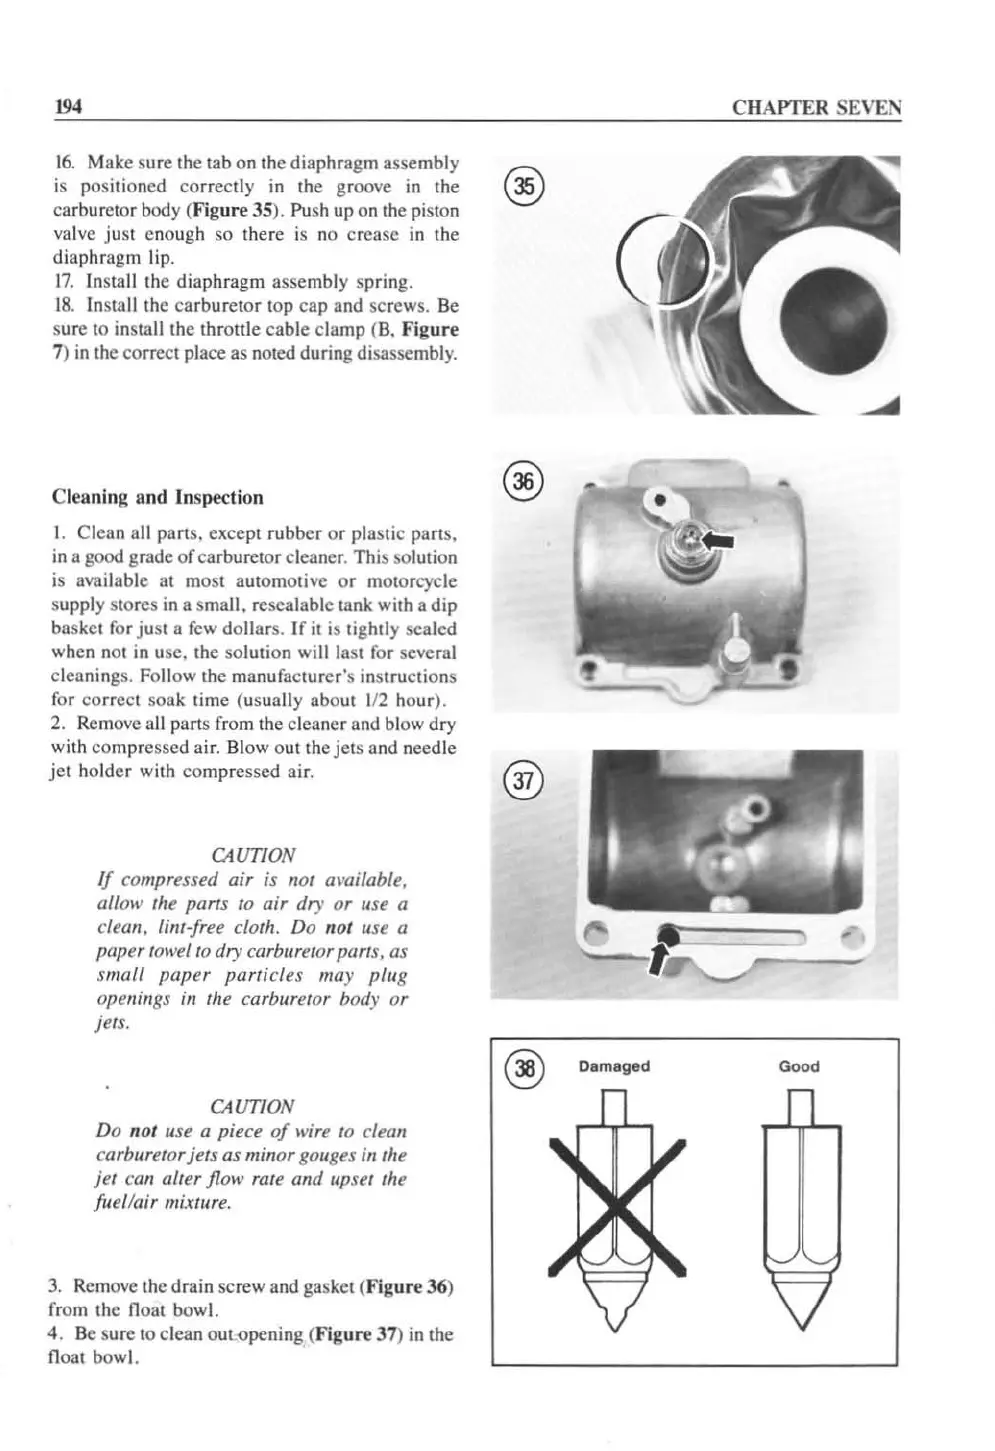
Make sure the tab on the diaphragm assembly
is positioned correctly in the groo
ve
in
the
ca
rburetor body (
Figure
35).
Pu
sh up
on
the
pislon
valve
JUSt
cnough so the re
is
no crease in the
diaphragm lip.
1
7.
Insta
ll
the diaphragm assembly spring.
18.
Install the carburetor
lOp
cap and screws. Be
sure
to
install the throttle cable clamp
(B.
Figure
7)
in
the correct place
as
nOled
during disassembly.
Cleaning
and
Inspection
I. Clean all parts, except rubber
or
plastic parts.
in
a good grade
of
carburetor cleaner. This soluti
on
is available at most automotive
or
motorcycle
supply slores
in
a small. resealable tank with a dip
basket for just a
few
dollars. If
it
is
tightly sealed
when
nOi
in use. the solution will
la
st for several
cleanings.
Fo
llow the manufacturer's instructions
for correct soak time
(usually about 1/2 hour).
2.
Rcmove a
ll
parts from the cleaner and blow dry
with compressed air.
Blow out the
je
ts and needle
jet hold
er
with compressed air. ®
CAUTION
If
compressed air
is
not ami/able,
allow the parts to air dry or use a
clean, lint-free cloth. Do not use a
paper
towel
to
dry
carburetor parts, as
small paper particles may plug
openings
in
the
ca
rburetor body or
jets.
CAUTION
Do nol use a piece
of
wire
to
clean
carburetor jets as minor
gouges
in
the
je
t can alter flow rate and
up
set the
fllellair
mixtllre.
3.
Remove the drain screw and gaSket (Fig
ure
36
)
from the float bowl.
4.
Be
sure
10
clean outopening (
Figure
37)
in
the
float
bowl.
CHAPTER SEVEN
Damagad Good
 Loading...


