LUBRICATION, MAINTENANCE
AND
TUNE-UP
63
2.
Insert a wire feeler gauge between the center
and the side electrode
of
the plug (Figure U3). The
correct gap
is
listed
in
Table 6.
3.
If the gap
is
correct.
you
will
feel
a slight drag
as
you
pull the wire through. If there
is
no drag
or
the gauge won't pass through. bend the side
electrode
with the gapping tool (
Figur
e
114
)
10
set
the proper gap.
4. Put a small drop of oil
or
aluminum anti-seize
compound on the threads
of
the spark plug.
5.
Screw the spark plug
in
by
hand until
it
seats.
Very
little effort
is
required. If force is necessary.
you
have
the plug cross-threaded: unscrew
it
and
try again.
6.
Ti
ghten the spark plug
an
additional
112
turn
after the gasket has made
co
nta
ct with the head.
If
you
are reinstalling old. regapped plug and are
reusing the old gasket. only tighten an additional
114
turn.
NOTE
Do
1/01
o\·ertighten.
This
will only
squash the gasket and
destr(TY
its
sealing abilit)'.
7.
Install the spark plug lead: make sure the lead
is on tight.
8.
Insta
ll
the cylinder head left-hand cover and
boh
and nut. Tighten the bolt and
nut
securel
y.
9.
Install the fu
el
tank as described
in
Chapter
Seven.
Rea ding
Spark
Plu
gs
Much information about engine and spark plug
performance can
be
determined by careful exami-
nation
of
the spark plu
g.
This infonnation is more
\alid
after
perf
orming the following step
s.
I. Ride the bike a short distance at
fu
ll
throttle
in
any gear.
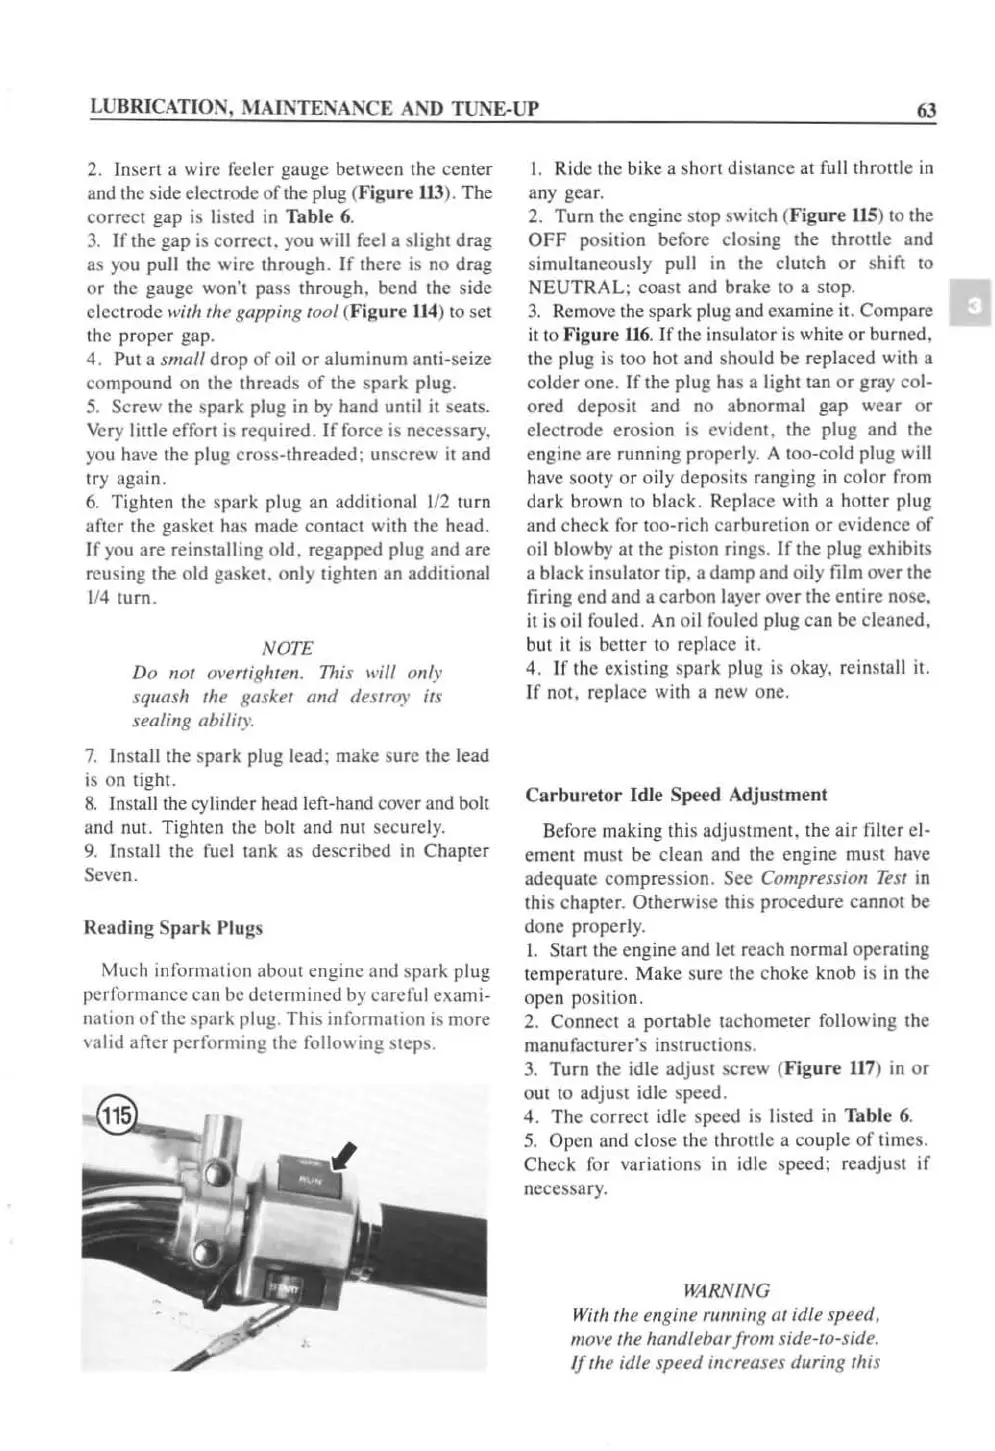
2.
Turn the engine
Stop
switch (Figure
115
)
to
the
OFF position before closing the throllie and
si
multaneously pull
in
the clutch
or
shift
to
NEUTRAL: coast and brake
to
a
Stop.
3.
Removc the spark pl
ug
and exam
ine
it. Compare
it
10
Figur
e
116
. If the
in
sulator
is
white or burned.
the plug
is
too hot and should
be
replaced with a
colder one. T
fthe
plug has a light tan
or
gray col-
ored deposit and
no
abnormal gap wear
or
electrode erosion is evident. the plug and the
engine are running properly.
A too-cold plug will
ha
ve
sooty or o
il
y deposits ranging
in
col
or
from
dark brown
to
black.
Repl
ace with a hotte r plug
a
nd
check for too-rich carburet ion
or
evidence
of
oil blowby at the
pi
ston rings. If the plug exhibits
a black insulator tip. a damp and oi
ly
film
O\
'
er
the
firing end and a carbon
la
ye
r over the entire nose.
it
is
oi
l
fou
led.
An
oil fouled plug can
be
cleaned.
but it is better
to
replace it.
4. If the exist
ing
spark plug
is
okay. reinstall it.
If
not, replace with a new one.
Carburetor
Idle Speed Adjus
tm
ent
Before making this adjustment. the air filter
el-
ement must be clean and the engine
mu
st
have
adequate compression.
Sec Compression
Test
in
thi
s cha
pt
er. Otherwise this procedure cannot
be
done properly.
I. Start the engine and let reach normal operati
ng
temperature. Make sure the choke knob is
in
the
open position.
2.
Connect a portable tachometer
fo
ll
owing the
manufacturer's instructions.
3.
Turn
th
e idle adjust sc rew (Figure
117
) in or
out to adjust idle speed.
4. The correct idle speed is listed in Table 6.
5.
Open and close the thro
tt
le
a couple
of
times.
Check for variations
in
idle speed: readjust if
necessary.
WARNING
Wi,h the engine "/fIni
/l
g
at
idle speed.
move the handlebar frolll side
-t
o-sh
l
e.
If the idle speel/ increases during this
 Loading...


