292
2, Mesh the drive be
lt
onto the drive pulley and
install the
se
2 parts as an assembly onto the
transmission
mainshaft.
3.
Before installing the new lockwasher. partially
bend up one side (
Figure
45).
4. Install a new lockwasher and the drive
pulley
nut.
5.
Ha
ve an assistant apply the r
ear
brake. Tighten
the drive pulley nut to the torque speci
fi
cation
listed
in
Table
I.
6. Continue
10
bend up one section
of
the
nt'w
lock washer onto one
of
th
e nats on the drive pulley
nut.
7.
Insta
ll
the drive belt upper cover (
Figure
38
).
8.
Install the left-hand shock absorber as described
in
this chapter.
9.
Install the bolt (.'
igure
37)
securing the drive
belt
upper cover
at
the rear and tighten securely
(
Figure
46).
10.
In
sta
ll
the lower cover (
B.
Figure
36
).
II.
Install the bolt and washer (A, .'
igur
e
36
)
securing the front
of
both the drive belt upper and
lower covers at the front.
12
. Insta
ll
the bolt (.'
igure
35) securing the drive
belt lower cover at the
rear
and tighten securel
y.
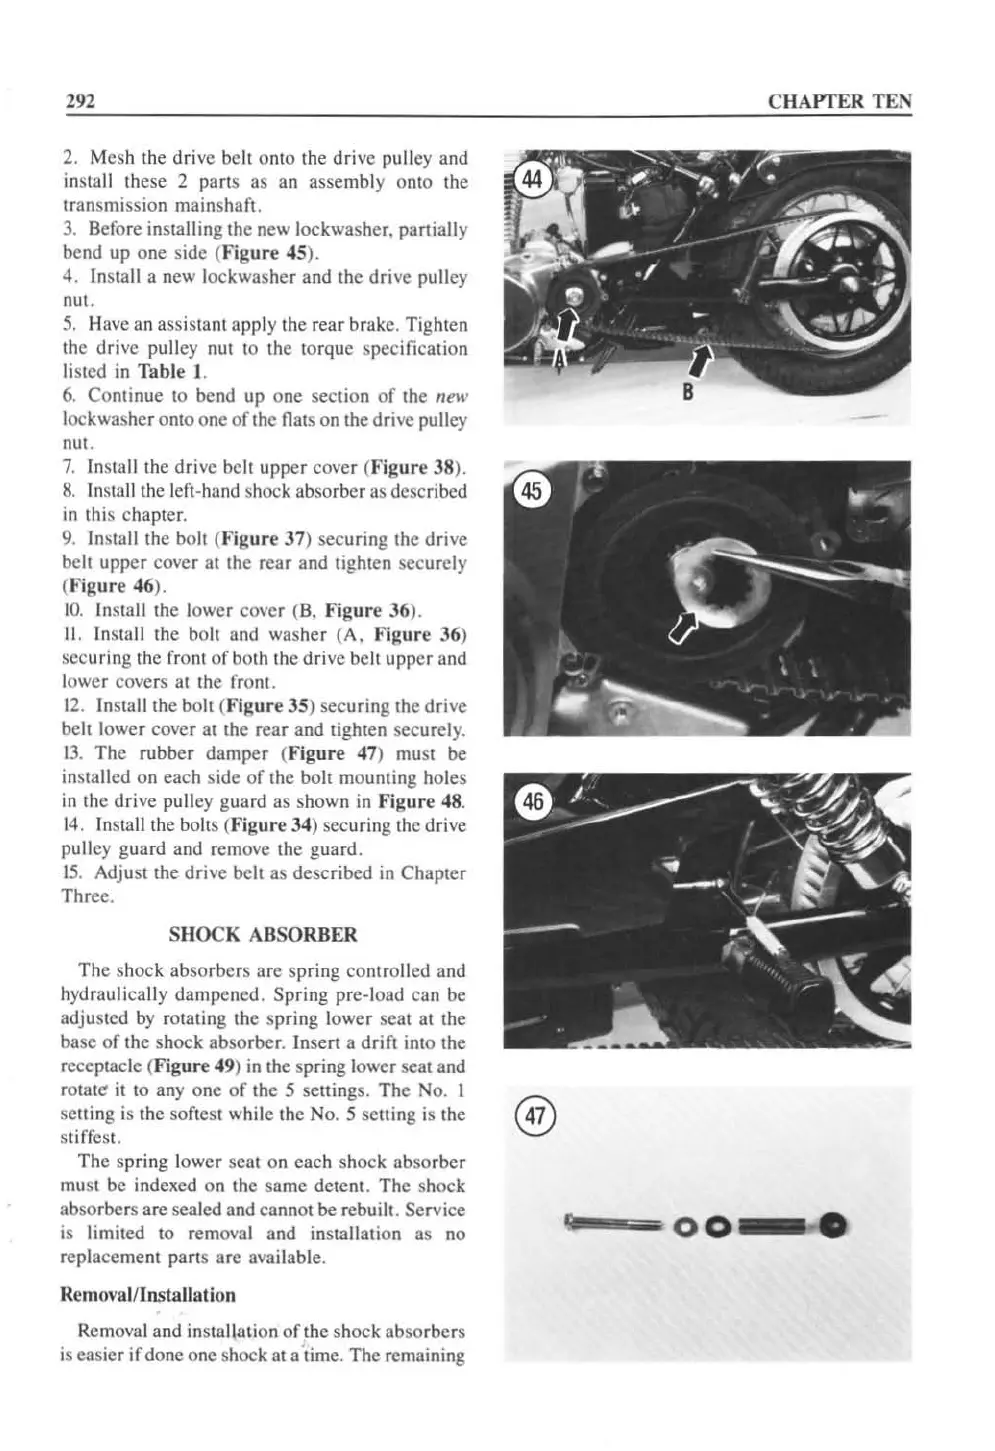
13.
Th
e rubber
damper
(Fi
gu
re 47) must
be
in
stalled on
eac
h side
of
the bolt mounting holes
in
the drive pu
ll
ey guard as shown
in
Fi
gure
48
.
14. Insta
ll
the bolts
(F
igure 34) securing
th
e drive
pulley gua
rd
and remove the guard.
1
5.
Adjust the drive belt as described in Chapter
Three
.
SHOCK ABSORBER
Th
e shock absorbcrs
are
spring controlled and
hydraulica
ll
y dampened. Spring pre-load can be
adjusted
by
rotating the spring lower seat at the
base of the shock
absorber
.
In
sert a drift into the
receptacle (
Figure
49)
in
the spring lower seat and
rotat~
it to
anyone
of
the 5 settings. The No. I
setting is the softest while the
No.5
setting
is
the ®
stiffest.
The spring lower seat on each shock absorber
mUSt
be indexed on the same detcnt.
The
shock
absorbers are scaled and cannot
be
rebuilt. Service
is limited to removal and
installation as no
replacement
pans
arc available.
Removal/Installation
Removal and
insta
ll
ation
of
the shock absorbers
is
easier
if
done one shock at a ·time.
Th
e remaining
C
HAPTER
TEN
9009
--
0
0-
"'.
 Loading...


