60
15.
Repeat Step
14
for the intake
\al\'(~s.
16.
Rotate thc engine
sc\c
raJ
complete n!\olulions
and recheck the
\'al\c
clearances. Readjust
if
neces-
sary.
17.
After the
\ah
'cs arc adjusted correctly, recheck
and adjust
if
necessary the automalic
dccomprc~
sion cable as described
in
this chapler.
18.
Inspect the seal (
Figur
e
10..1
) on the
\ahe
ad-
juster covers. rcpl3cc
if
necessary. Install both
co\-
en. and lighten thc bolts securely.
19.
In
spect the O-ring seal on
\al\
c timing inspec-
lion
co\
cr
(Fig
u re
lO
S). replace
if
necessary. Install
the
co\er
on thc left-hand crankcase
co\er
and
tighten securely.
20.
Install the spa
rk
plug and reconnect thc spark
plug leud.
11. Make sure thc mbbcr cushions (
fi
g
ur
e 106)
:lTe
in
place on thc
cylindcrhcad
Icft-hand
cO\crand
lIlslalithc cO\cr.
22.
In
s
tallthc
bolt and
cap
nUl
sccuring the eylin-
dcr
hcad Icft-hand
co\er
(
FiJ!u
re 91). Tightcn thc
bolt and
cap
nUl
sccurcly.
23
. Install thc fucl tank as dcscribed in
Chaptcr
Scvcn.
24.
Install thc scat
as
described
in
ChapterTwelvc.
Co
mpr
ession Test
Pcriodically chcck the cylindcr compression. Re-
cord thc results in thc maintcnance log and
comparc
thcm
to
the results at the ncxt intefval. A
nmning
re-
cord \\
ill shO\\ trends in detcrioration
so
that correc-
tivc
action can be takcn bcforc completc failurc.
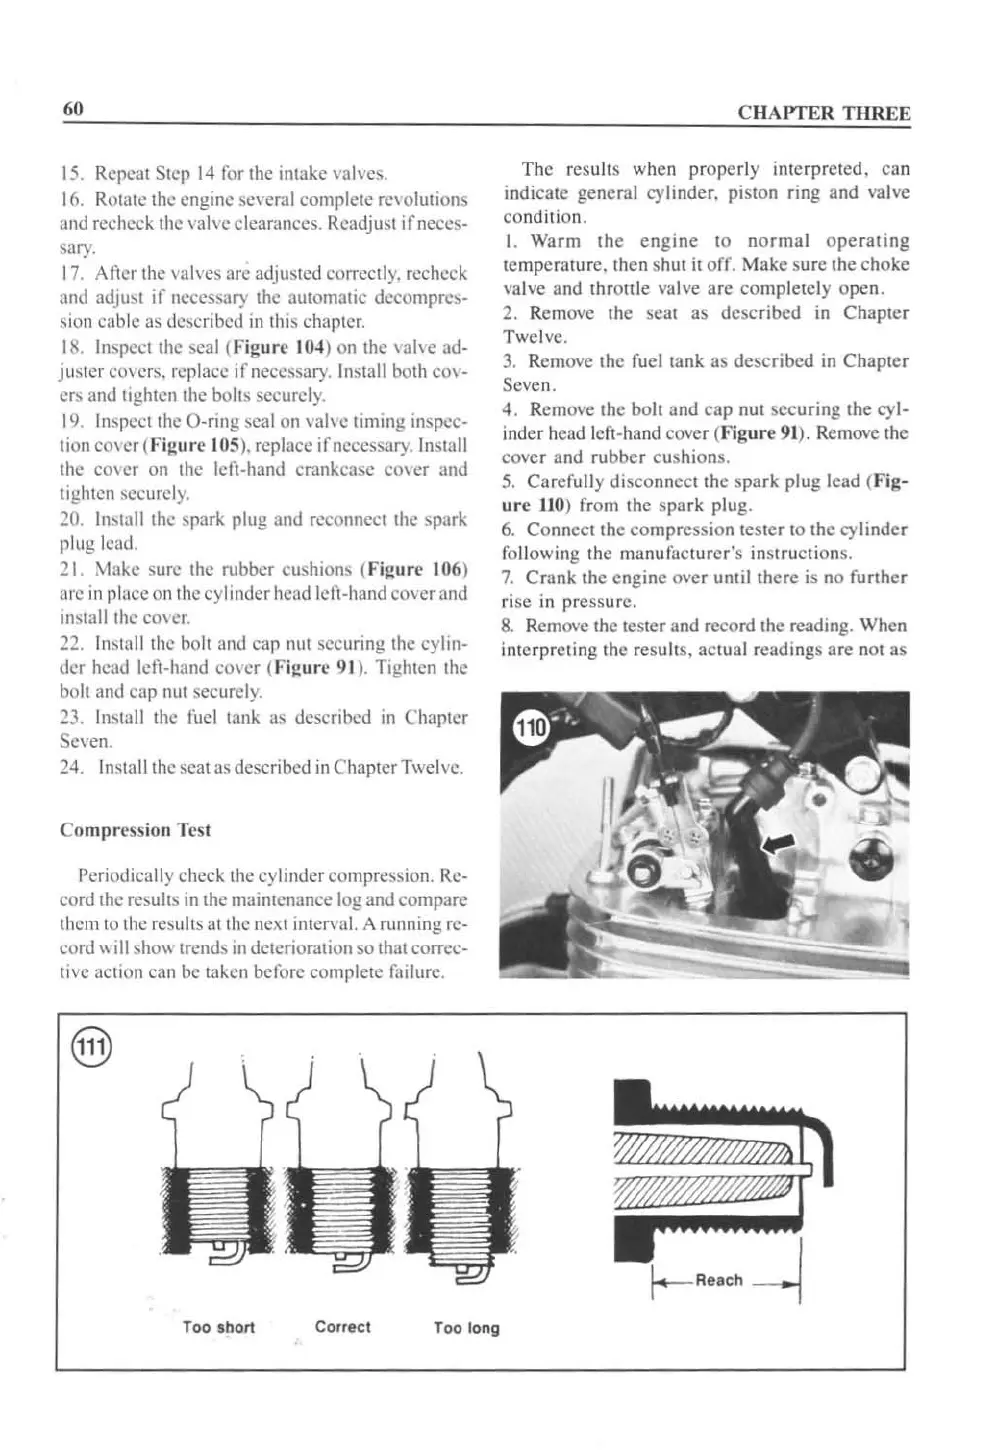
Too short
Corr
ect
Too
tong
CHAPTER THREE
The
results wh
en
properly
int
erprete
d .
ca
n
indicate
gene
ral cylinder.
piston
ring and
vah'e
co
nditi
on.
I.
Warm
the
engine
to
norma
l
ope
ra ting
temp
erature.
then sh
ut
it off.
Make
SUfe
the
choke
valve and
throttle
valve
are
comp
letely
ope
n.
2. R
emove
the
seat
as
desc
ribed in
Chapter
Twelve.
3.
Remove
the
fuel lank as
described
in
Chapte
r
Seven.
4. Remove
the
bolt and
cap
nut
securing
the cyl-
inder head left-hand
cover (Figure
91
). Remove
the
cover and
rubber
cushions.
5.
Caref
ully
disconnect
the
spark
plug l
ead
(Fig-
ure
110
) from
thc
spark
plug.
6.
Connect
thc
compression
test
er
to
thc
cylinder
fo
ll
owing
the manufacture
r'
s inst ructions.
7.
Crank
t
he
enginc
over until
there
is
no
further
rise in pressurc.
8.
Remove the tester and record the reading.
When
intcrprcting the res
ul
ts,
ac
tual readings are
nO!
as
 Loading...


