258
After tightening the spokes. check rim runoul
to be sure you
ha
ve
n', pulled
the
rim out
of
shape.
Onc way 10 check rim runout
is
10 mount a dial
indicator to the front fork (or sw
in
g
arm)
so
that
it
bea
rs
on
the
rim
.
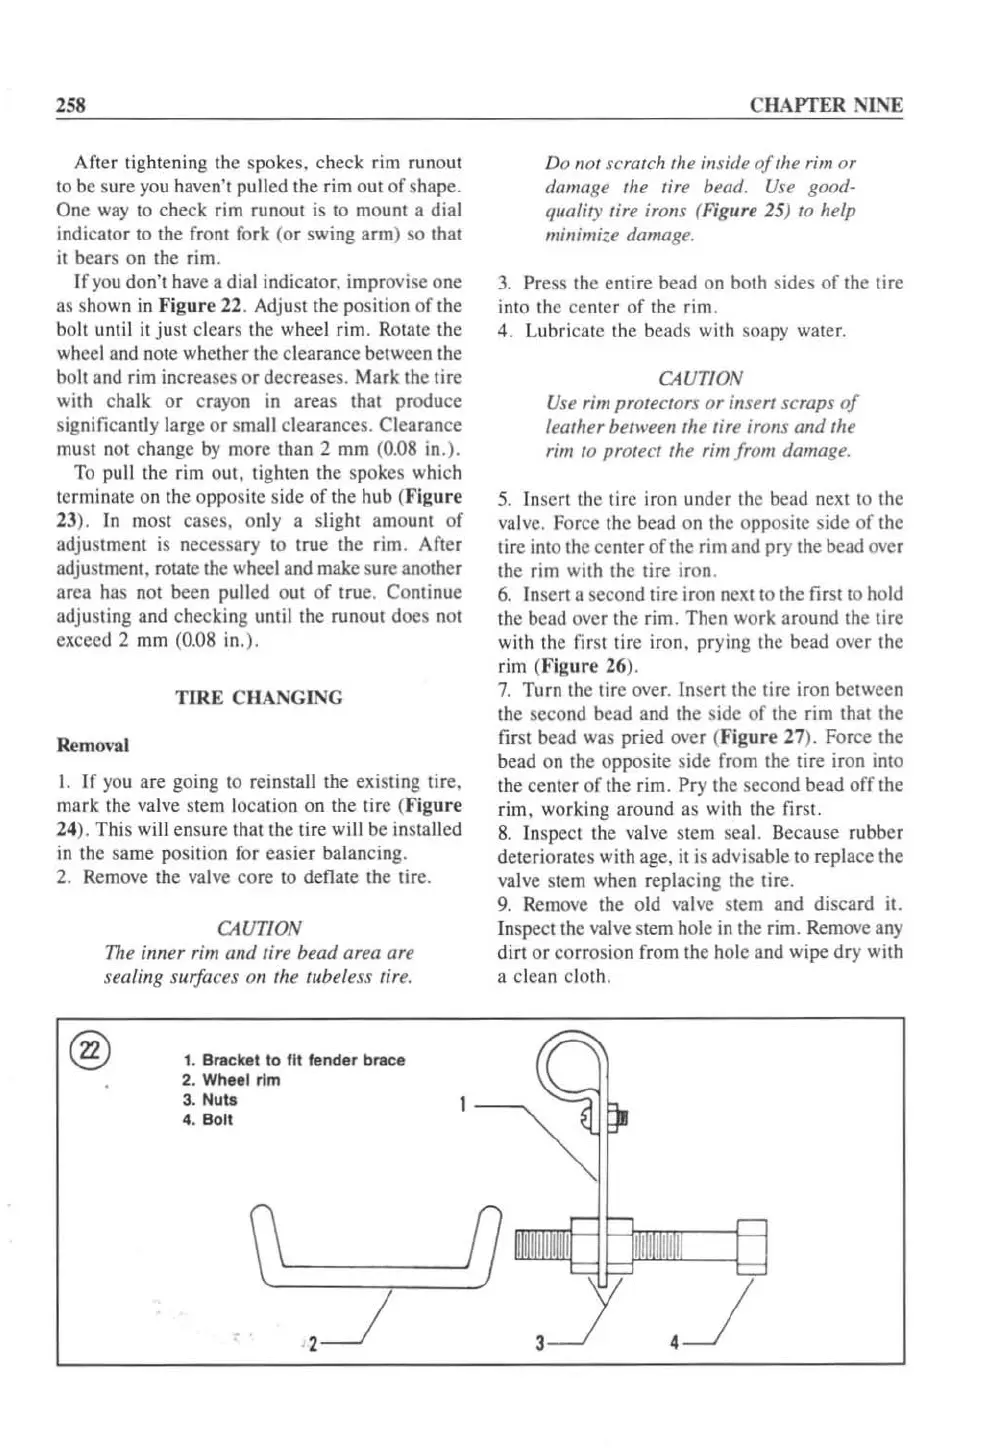
If
yo
u don't have a dial indicator, improvise
one
as shown
in
Figure
22. Adjust the position
of
the
bolt until it
ju
st cl
ea
rs the wheel rim. Rotate the
wh
ee
l and note whether the clearance between the
boll and rim increases or decreases. M
ark
the
ti
re
with chalk
or
crayon in ar
eas
that produce
significan
tl
y large or small clearances. Clearance
mu
st
not c
han
ge
by
more than 2
mm
(
0.08
in.).
To pull the
rim
out. tighten
the
spo
k
es
which
terminate on
th
e opposite
side
of
the hub
Wigure
23).
In
most cases, o
nl
y a s
li
ght
amo
u
nt
of
adjustment is necessary to true the rim. After
adjustment. rotate the wheel and make sure another
area has not been
pulled out
of
true. Continue
adjusting and checking until the runout does n
ot
exceed 2 mm
(0.08
in.).
TIRE C
HANGING
Remonl
I. If you arc going to re
in
stall the existing tire,
mark the
va
lve stem loca
ti
on on the tire (
Figure
24). This will ensure that the
ti
re will be installed
in
the same position for
easier
balanc
in
g.
2. Remove the valve
co
re to
denate
the tire.
CAUT
IO
N
Th
e inn
er
rim
and
tire bead area are
sealing
surfaces O
rt
tlte tubeless tire.
@
1. Braeket to
lit
fender
brace
2. Wheel rim
3.
Null
4.
Bolt
2
~
CHAPTER
NINE
Do not scratclt the insille
of
the rim
or
damage the tire bead.
Use
good-
quality
tire irons (Figure 25)
to
help
minimize damage.
3.
Press the entire bead on both sides
of
the tire
i
nt
o the
ce
nt
er of the rim.
4. Lubricate the beads with soapy water.
CAUTION
Use
rim
prOtecrors
or
insert scraps
of
leather between the tire irons and the
rim to prOtect
th
e rim from damage.
5.
In
ser
t the tire iron
under
the bead next to the
valve. Force the bead on the opposite si
de
of
the
ti
re into
th
e center
of
the
ri
m and pry the bead over
the rim with
the
ti
re iron.
6.
I
nsen
a second tire iron next to the first to hold
th
e bead over the rim. Then work around the tire
with
th
e first tire iron. prying the bead over the
rim
(.'
igur
e 26).
7.
Turn the tire over.
In
se
rt
the
ti
re iron between
the second bead and the side
of
the rim that the
fi
rst bead was pried over (
Figure
27). Force the
bead on the opposite side from the tire iron into
the
ce
nter
of
the rim.
Pr
y the second bead
off
the
rim, working around as with the first.
8. Inspect the val
ve
stem sea
l.
Because rubber
deteriorat
es
with age.
it
is
advisable to replace the
val
ve
st
em
when replacing the lire.
9.
Remove
th
e old valve stem and
disca
rd
iL
In
spec
tlhe
valve stem hole in the rim. Remove any
dirt or
co
rrosion from the hole and wipe
dry
with
a clean cloth.
o
 Loading...


