Hydro:Evolved User Manual
October 2022 © 2022 Smartrise Engineering, Inc. All Rights Reserved Page 87
Has the Tape Clip Assembly been placed as needed after the DZ blade has been moved
up and down?
a. If there are still obstructions, an extension arm is required. Go to step 8.
b. If there are no obstructions, go to step 9.
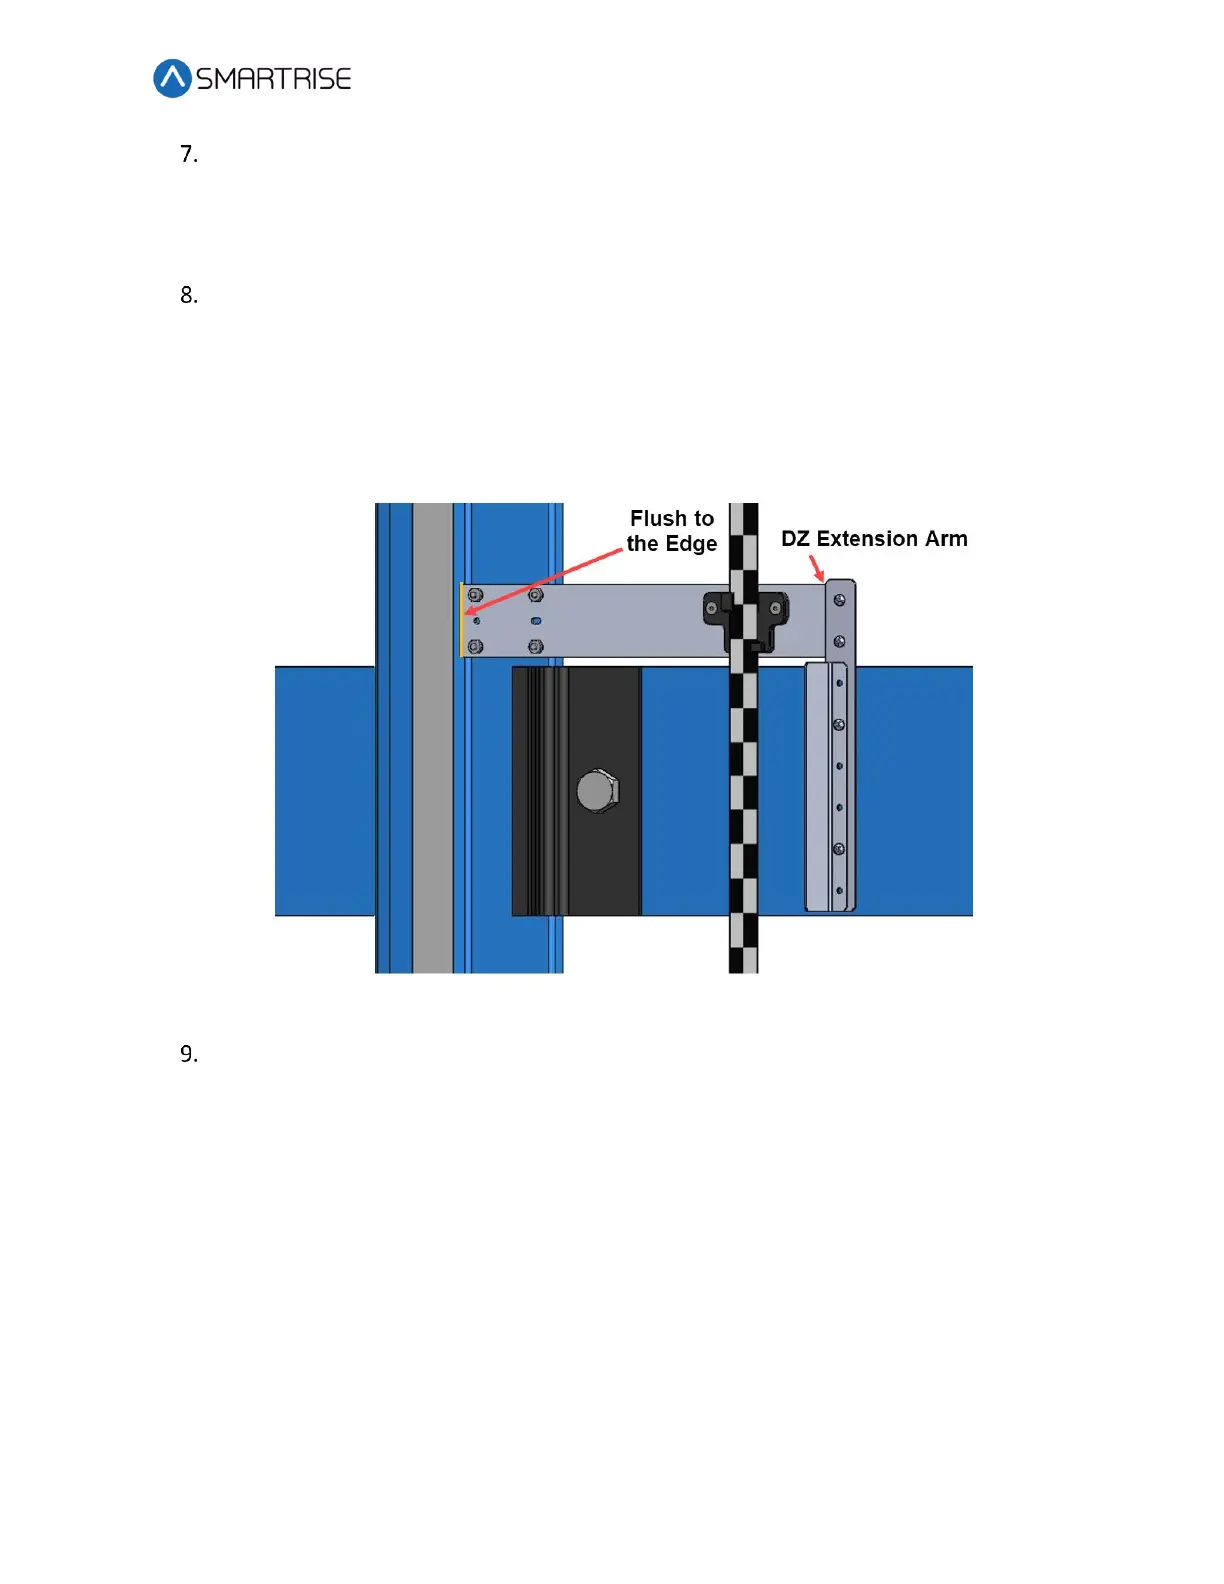
Install extension arm as follows:
• Remove the DZ blade from the Tape Clip Assembly.
• Install the door zone extension arm using the same screws, nuts, and washers. See
Figure 97.
• Using two more screws, nuts and washers provided in the install kit, mount the DZ
blade to the DZ extension arm at the desired location.
Figure 97: Tape Clip Assembly Alignment
Continue down the hoistway, placing the Tape Clip Assembly at each landing.
 Loading...