1J-14 Charging System:
Battery Removal and Installation
B823H11A06009
Removal
1) Remove the seat. Refer to “Exterior Parts Removal
and Installation in Section 9D (Page 9D-14)”.
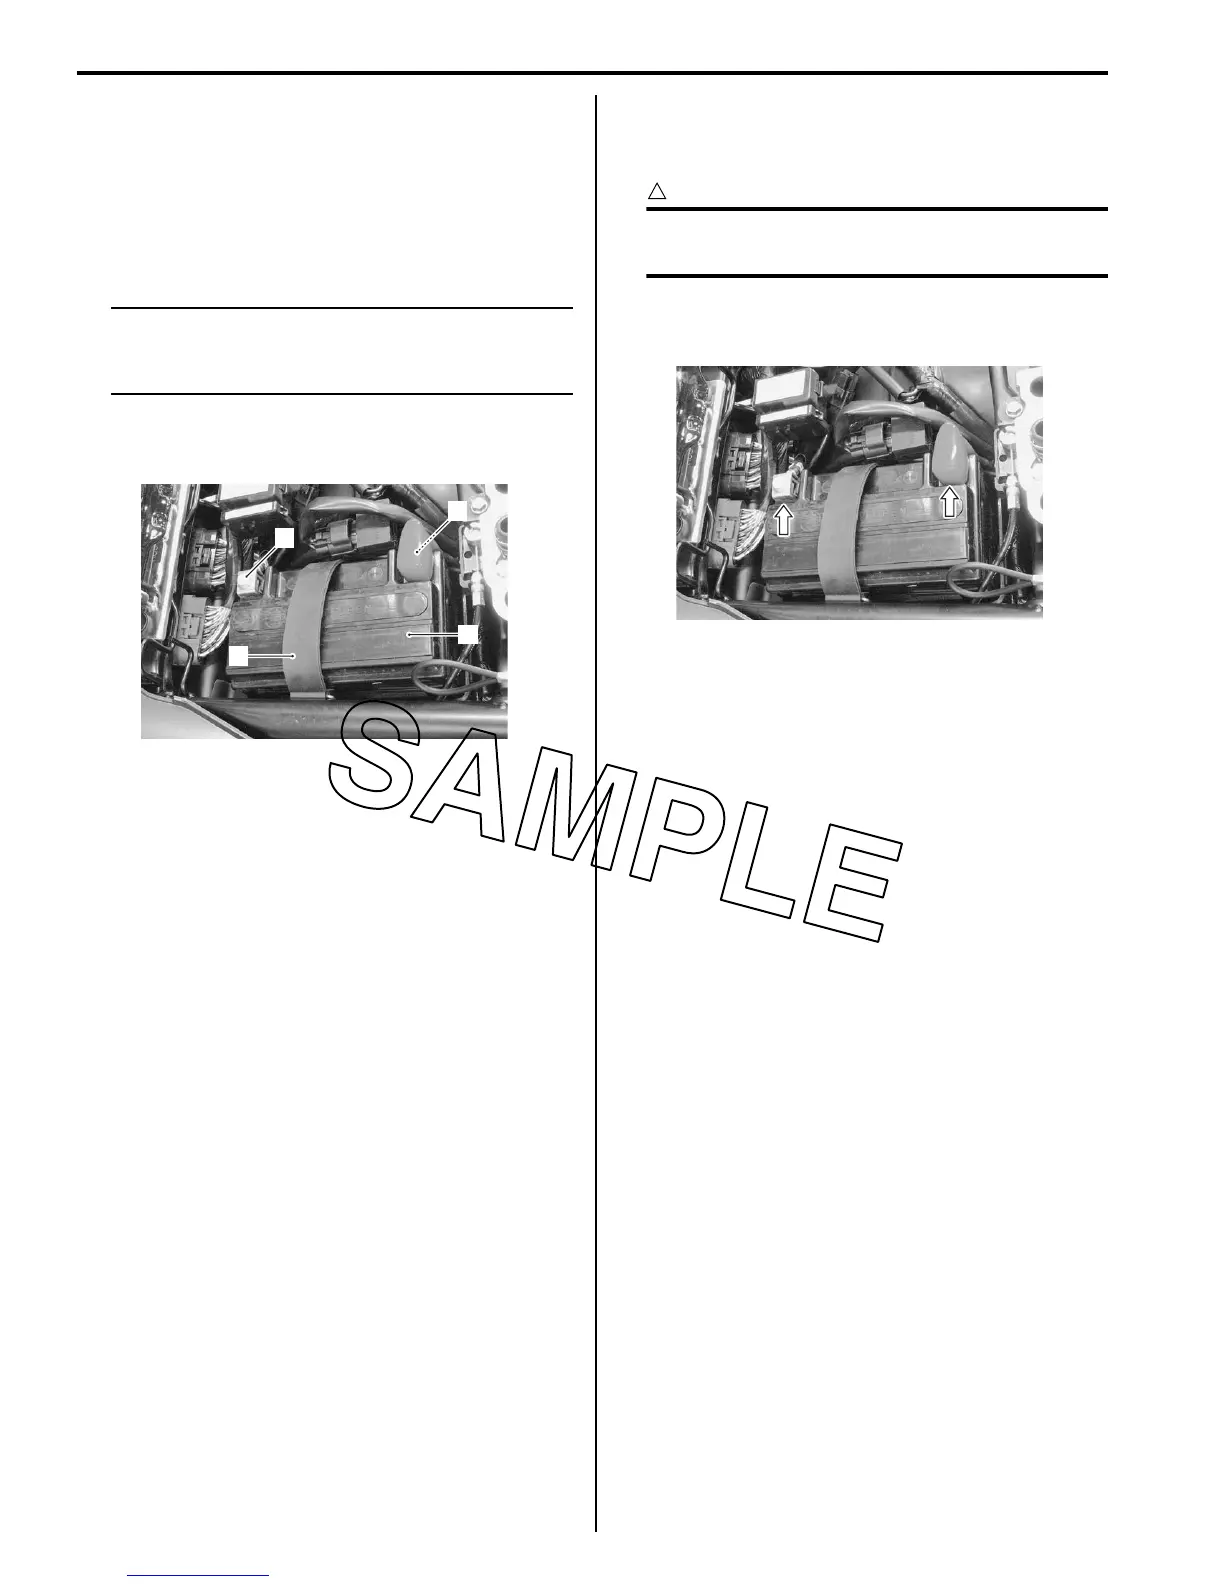
2) Disconnect the battery (–) lead wire (1).
3) Disconnect the battery (+) lead wire (2).
NOTE
Be sure to disconnect the battery (–) lead
wire (1) first, then disconnect the battery (+)
lead wire (2).
4) Remove the rubber band (3).
5) Remove the battery (4) from the motorcycle.
Installation
Install the battery in the reverse order of removal.
Pay attention to following points:
CAUTION
!
Never use anything except the specified
battery.
• Install the rubber band.
• Tighten the battery lead wire mounting bolts securely.
Battery Visual Inspection
B823H11A06010
Inspect the battery in the following procedures:
1) Remove the seat. Refer to “Exterior Parts Removal
and Installation in Section 9D (Page 9D-14)”.
2) Visually inspect the surface of the battery container.
If any signs of cracking or electrolyte leakage from
the sides of the battery have occurred, replace the
battery with a new one.
If the battery terminals are found to be coated with
rust or an acidic white powdery substance, clean the
battery terminals with sandpaper.
3) Install the seat. Refer to “Exterior Parts Removal and
Installation in Section 9D (Page 9D-14)”.
1
2
3
4
I823H11A0004-01
I823H11A0021-01
 Loading...