9C-19 Instrumentation / Driver Info. / Horn:
Installation
Reverse removal procedure noting the following.
• When installing each part, be careful not to catch any
cable or wiring harness.
• Tighten instrument panel mounting bolts to specified
torque
Tightening torque
Instrument panel mounting bolt (a): 23 N·m (2.3
kgf-m, 17.0 lb-ft)
• Tighten steering column mounting nuts referring to
“Steering Column Removal and Installation in Section
6B”.
• Enable air bag system referring to “Enabling Air Bag
System in Section 8B”.
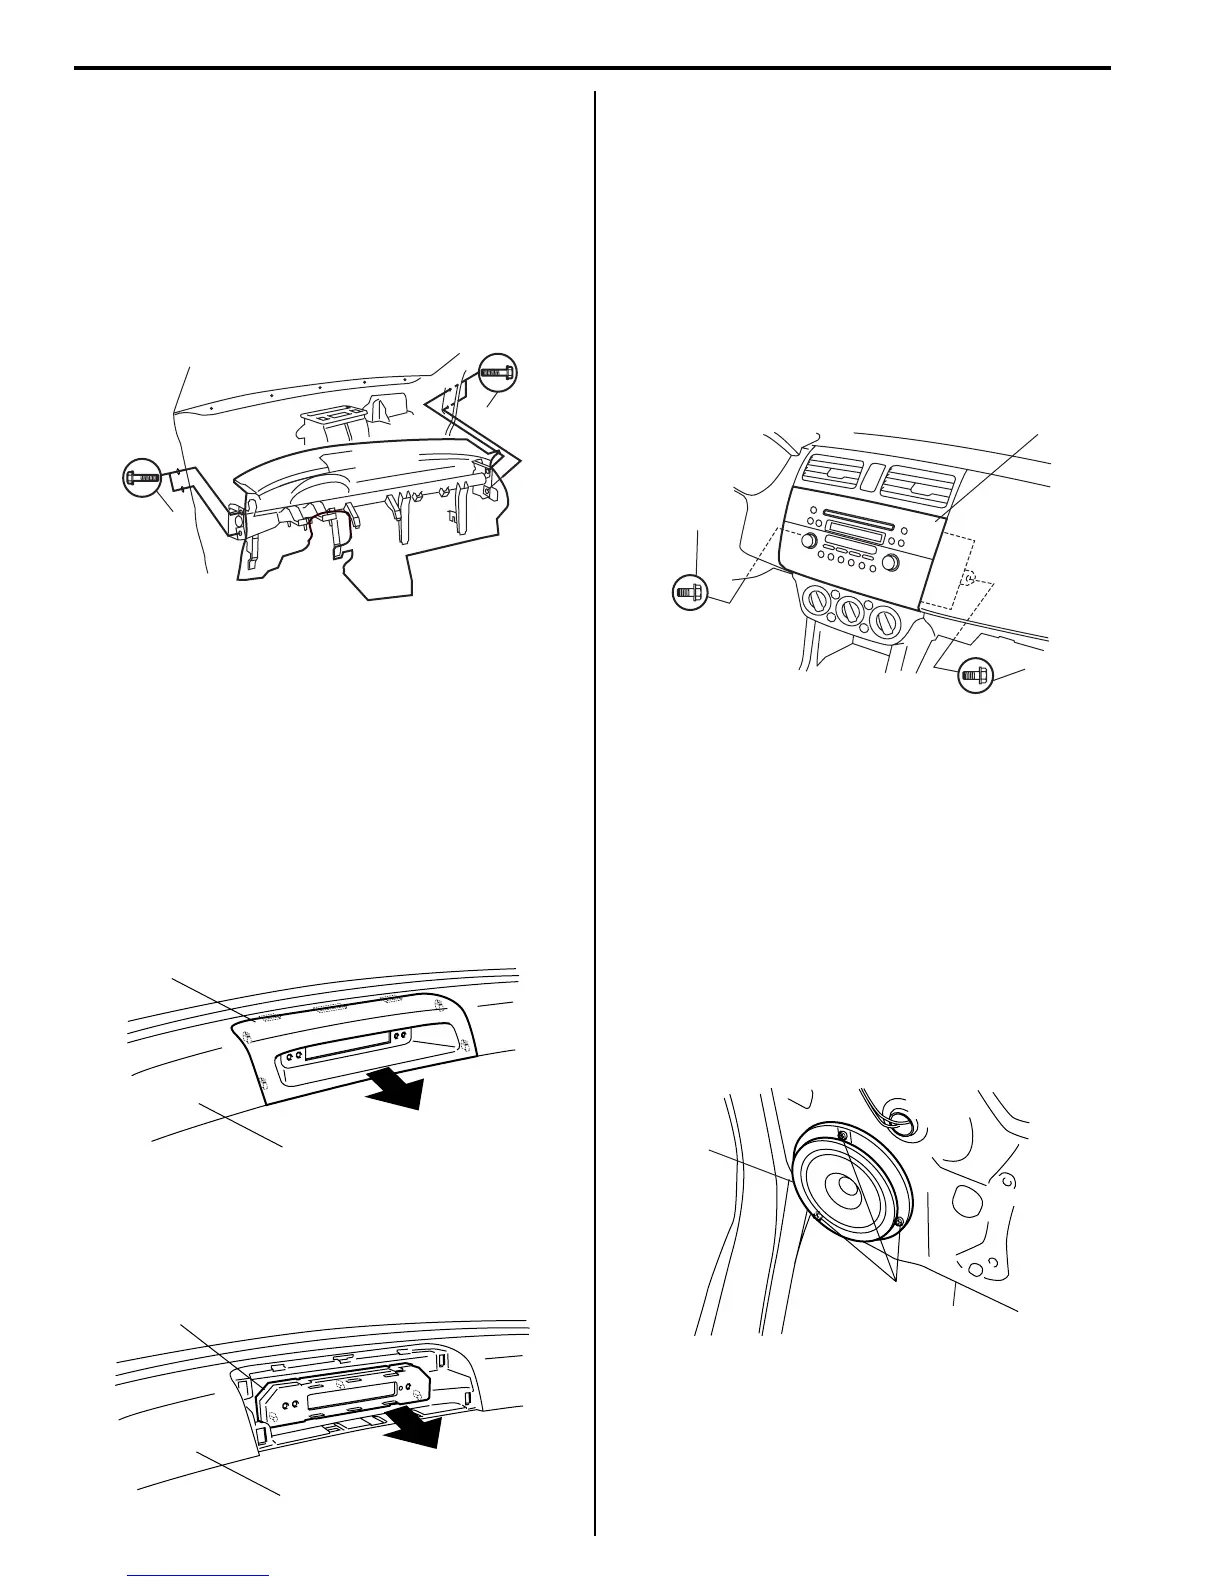
Information Display (Clock) Removal and
Installation
S7RS0B9306016
Removal
1) Remove information display (clock) garnish (1) from
instrument panel (2) pulling it arrow direction as
shown.
2) Remove information display (clock) (3) from
instrument panel (2) pulling it in arrow direction
shown in figure.
3) Disconnect information display (clock) coupler.
Installation
Reverse removal procedure.
Audio Unit Removal and Installation
S7RS0B9306017
Removal
1) Disconnect negative (–) cable at battery.
2) Remove globe box referring to Step 6) of “Instrument
Panel Removal and Installation”.
3) Remove 2 mounting bolts (1).
4) Disconnect electrical connectors from audio unit.
5) Remove audio unit (2) from instrument panel.
Installation
Reverse removal procedure.
Front Speaker Removal and Installation
S7RS0B9306018
Removal
1) Remove front door trim referring to Step 1) to 3) of
“Front Door Glass Removal and Installation in
Section 9E”.
2) Remove 3 front speaker mounting screws (1).
3) Remove front speaker (2) from front door panel (3).
4) Disconnect front speaker coupler from front speaker
(2).
Installation
Reverse removal procedure.
(a)
(a)
I4RS0B930013-01
1
2
I4RS0A930032-01
3
2
I4RS0A930025-01
2
1
1
I4RS0B930014-01
1
2
3
I4RS0A930027-01

 Loading...