Interior Trim: 9H-1
Body, Cab and Accessories
Interior Trim
Repair Instructions
Floor Carpet Removal and Installation
S7RS0B9806001
WARNING
!
Refer to “Air Bag Warning in Section 00”
before starting service work.
Removal
1) Remove front seats and rear seats referring to “Front
Seat Removal and Installation in Section 9G” and
“Rear Seat Removal and Installation in Section 9G”.
2) Remove seat belt lower anchor bolt.
3) Remove dash side trims, front side sill scuffs, center
pillar inner lower trims, quarter inner front trims and
rear side sill scuffs.
4) Remove console box.
5) Remove floor carpet.
Installation
Reverse removal sequence to install floor carpet, noting
the following instruction.
• For tightening torque of rear seat mounting bolt, refer
to “Rear Seat Components in Section 9G”.
• For tightening torque of front seat mounting bolt, refer
to “Front Seat Components in Section 9G”.
Head Lining Removal and Installation
S7RS0B9806002
WARNING
!
Refer to “Air Bag Warning in Section 00”
before starting service work.
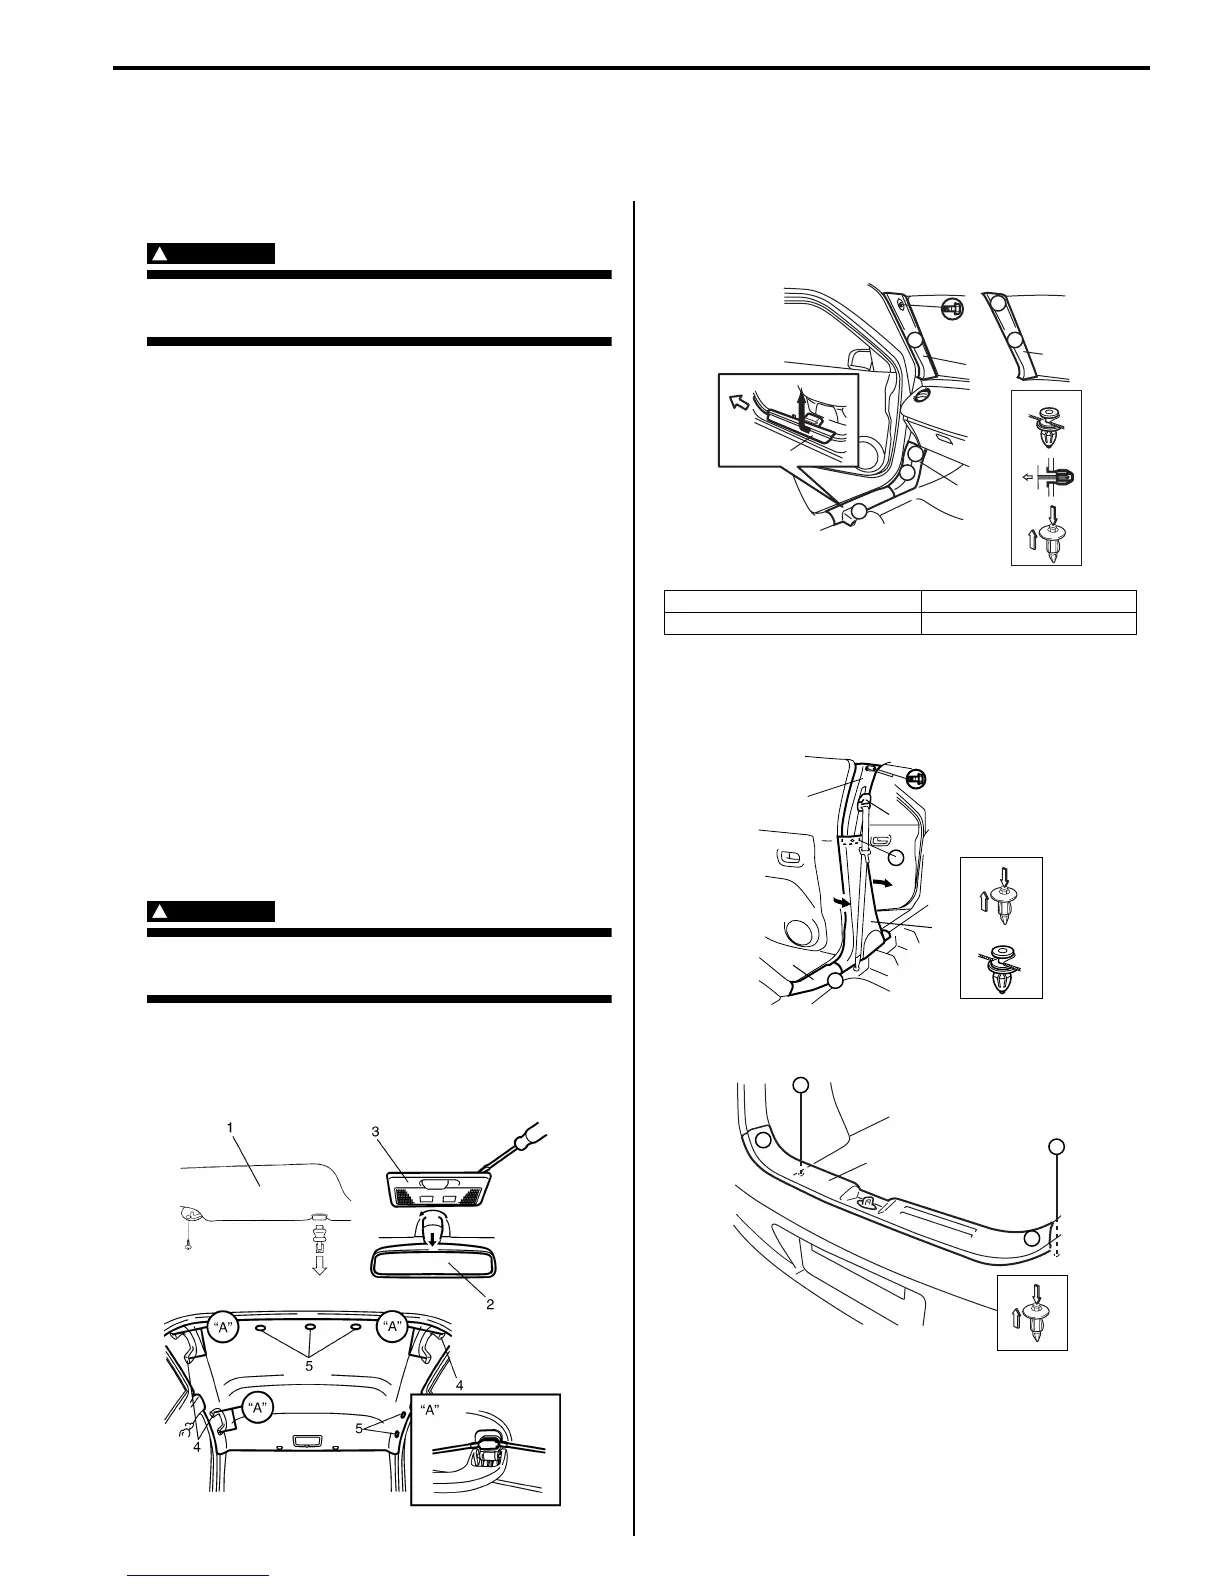
Removal
1) Remove sun visor (1), room mirror (2), dome light
(3), assistant grip (4) and head lining clips (5).
2) Remove front pillar trim (1), front side sill scuff (2)
and dash side trim (3).
3) Remove front seat belt upper anchor (1), center pillar
inner trim (2), center pillar inner upper trim (3) and
rear side sill scuff (4).
4) Remove tail end member trim (1).
I6RS0C980001-02
[A]: With curtain air bag 4. Forward
[B]: Without curtain air bag
“A”“A”
“A”
2
4
1
3
“A”
“A”
1
[B][A]
“B”
“B”
“C”
“C”
I6RS0C980002-01
“A”
“B”
“A”
“B”
1
3
2
4
I4RS0A980002-01
“A”
“A”
“A”
“A”
“A”
1
I4RS0A980003-01

 Loading...