• Never execute print head flushing until you have executed print head cleaning at least 3
times.
12. Touch [Flush Print-heads].
13. Follow the prompts to complete print head flushing.
14. Print another Nozzle Check Pattern.
• If the patterns have no broken lines, you have finished.
• If there are still broken lines in the patterns, go to the next section.
When an Unbroken Nozzle Check Pattern Cannot be Produced
Do this procedure if three cleanings and one flushing have failed to produce an unbroken Nozzle
Check Pattern.
1. Make sure that the ambient temperature and humidity are within the acceptable range:
• Temperature Range: 10°C to 27°C (50 °F to 81°F)
• Humidity Range: 15% to 80% Rh
2. Clean the print heads again, and then print another Nozzle Check Pattern.
3. If the Nozzle Check Pattern is still abnormal, let the machine remain idle for 10 minutes.
4. Execute two more cleanings and one flushing.
• Be sure to print a Nozzle Check Pattern after each cleaning and flushing.
• If you have produced an unbroken Nozzle Check Pattern, you can stop.
5. After the flushing, if the Nozzle Check Pattern is still not perfect, let the machine remain
idle for 8 hours.
6. Execute three more cleanings and one flushing.
• Be sure to print a Nozzle Check Pattern after each cleaning and the flushing.
• When you have produced an unbroken Nozzle Check Pattern, you can stop.
Halftone Check
Leftover priming fluid can cause streaking in halftone areas. Do this check to confirm that all of the primer
fluid has been drained from the ink sub tanks and ink supply tubes.
1. Touch [Home] at the bottom of the screen in the center.
2. Flick the screen to the left, and then touch the User Tools icon.
3. Touch [Machine Features].
4. Touch [Maintenance] > [Printer Features].
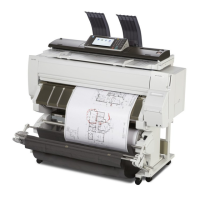
Main Machine Installation
139
 Loading...