4. Return the settings for the following SPs to the default.
• SP4-012-007 (Scanner Edge Margin: DF: left)
• SP4-012-008 (Scanner Edge Margin: DF: right)
LED
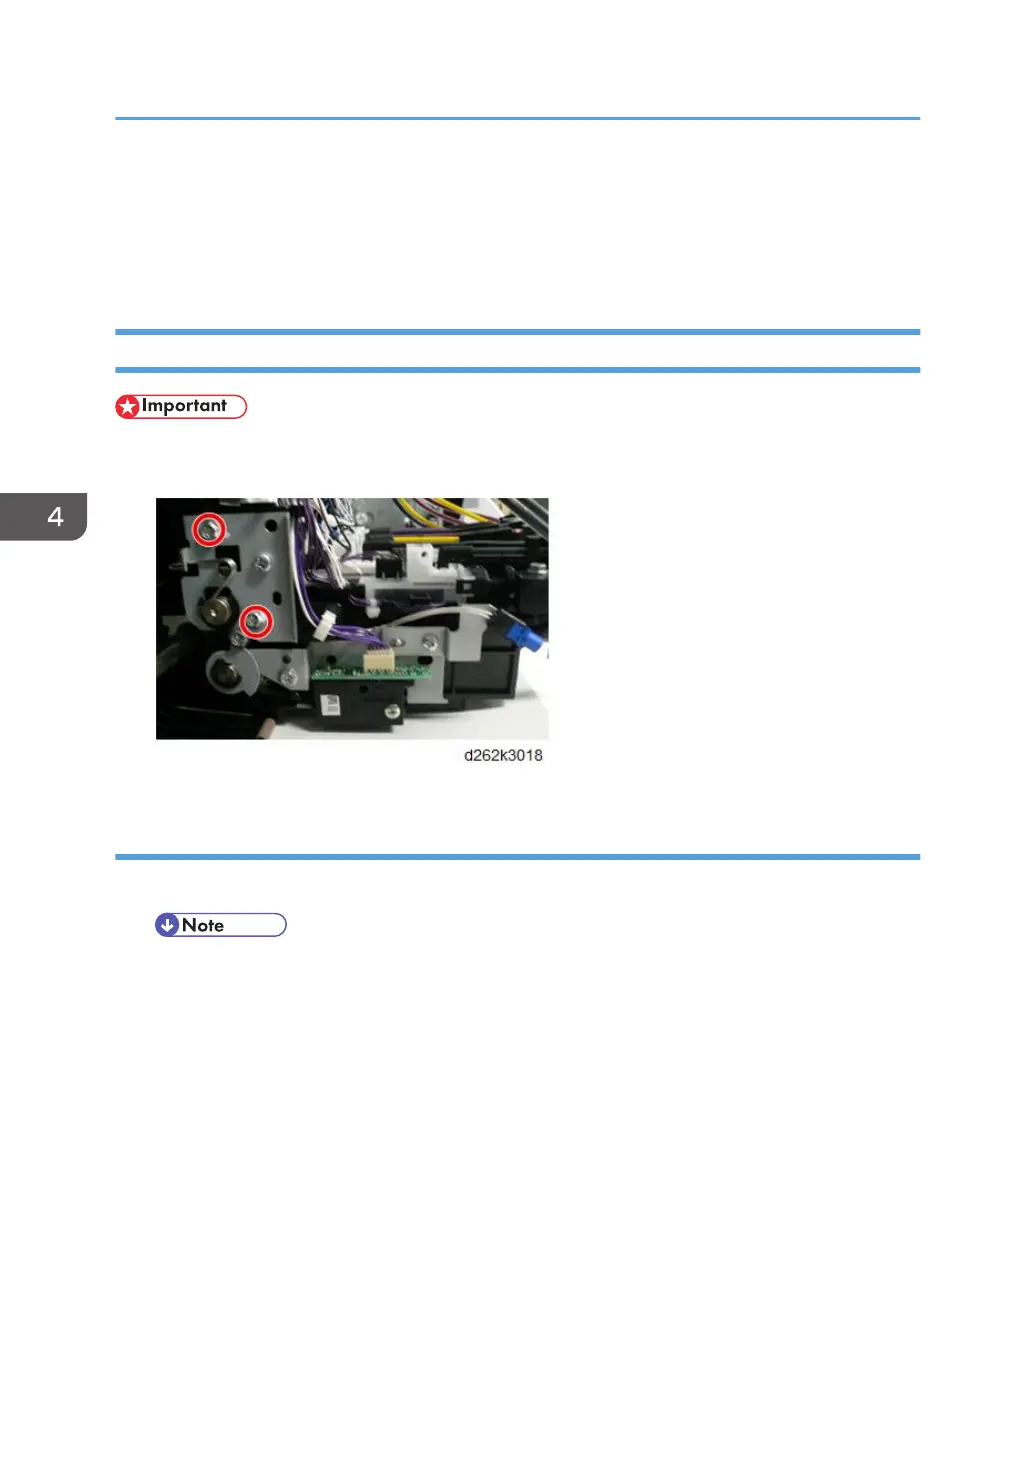
• To remove the LED, never loosen nor remove the two screws shown below (the figure below shows
the main unit with the carriage left cover removed).
Remove
1. Uncap the print head and move the carriage unit to the left of the main unit (p.267).
• When the carriage unit is moved, ink may spill out from the print head onto the platen. To
move the carriage unit, place a sheet of plain paper under the carriage unit to protect the
platen.
• The sheet under the carriage unit should be flat, with no paper wrinkling, which could scratch
the nozzle face or cause clogging of the nozzle.
• Do not place any film under the carriage unit.
• To place the plain paper, do not pull up the paper holding lever too much (p.226).
2. Remove the left cover (p.234).
3. Open the front cover.
4. Replacement and Adjustment
414
 Loading...