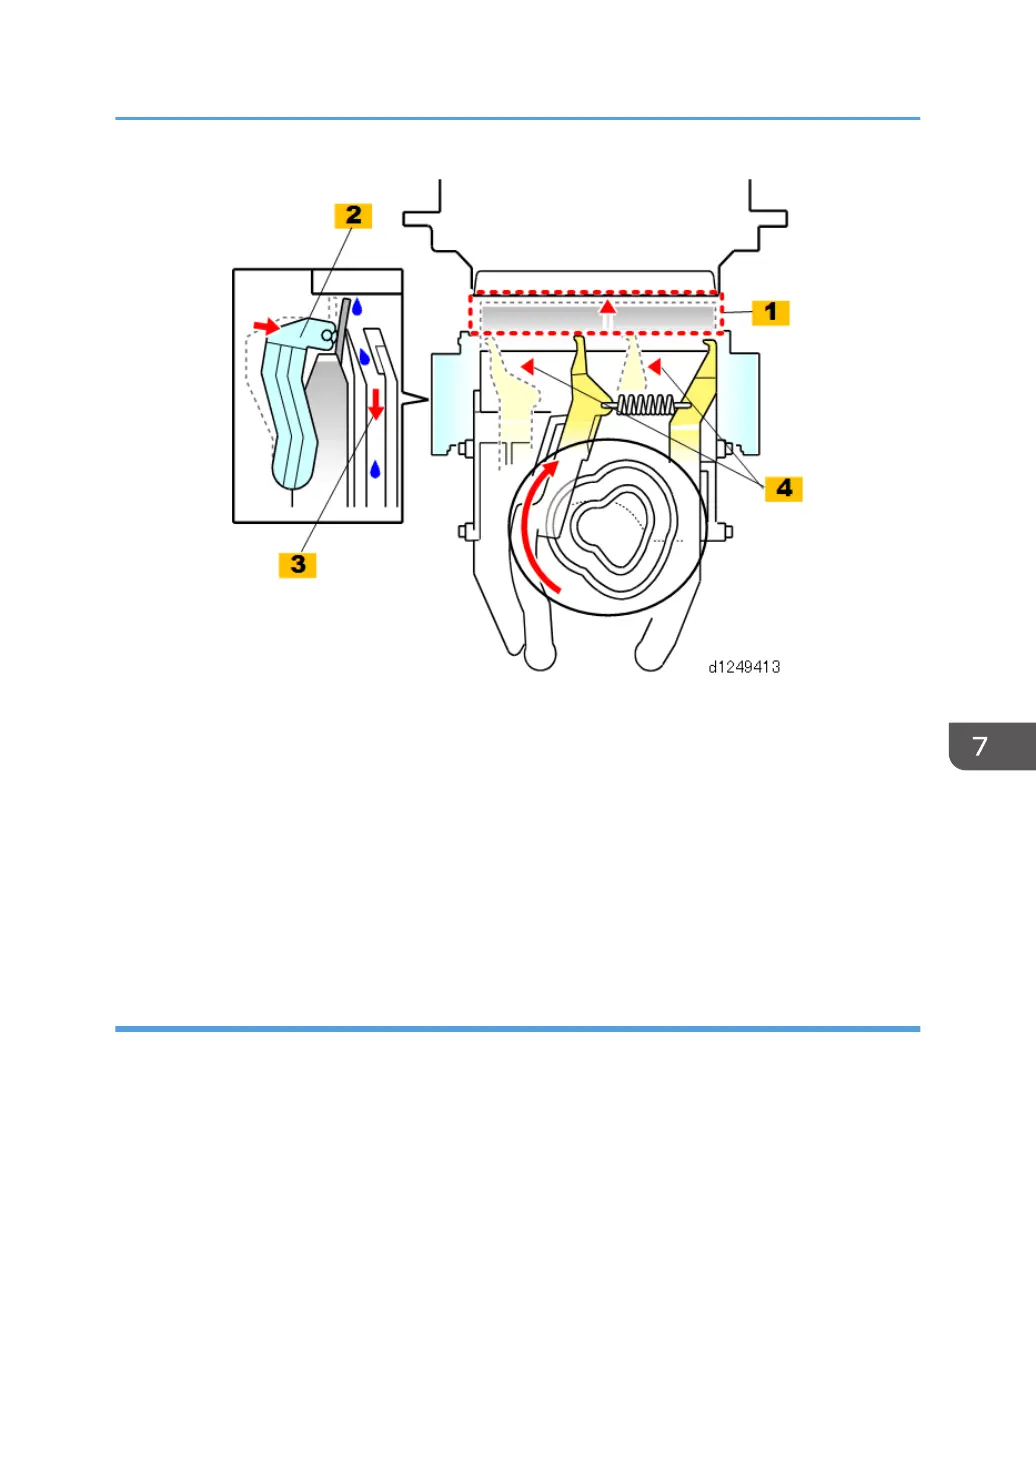
• The maintenance motor continues to rotate after lowering the suction cap, and drives the cam and
linkages that complete the cleaning cycle at this step.
• The rubber scraper [1] is raised to the surface of the print head.
• The knock lever [2] taps the edge of the scraper to scrape ink from the print head. The ink falls into
a vent [3] which opens over the right ink sump below the maintenance unit.
• Next, the linkage cocks the spring loaded wipers [4] to the rear, and then releases them so that
they spring forward and flick any remaining ink into the vent. This is done twice.
This completes the cleaning cycle.
Manual Print Head Cleaning and Flushing
The operator can use the User Tools to clean and flush the print heads whenever a problem with printing
occurs.
• Every execution of print head cleaning and flushing is recorded in NVRAM by a counter (0 to
999999).
• This is done so that the service technician can keep track of how many times the operator is
cleaning and flushing the print heads with SP7-212 (User Cleaning) and SP7-213 (User
Refreshing).
• Humidity can affect the number of times the print heads require cleaning and refreshing.
• For more details about manual print head cleaning and refreshing, refer to Print Head Cleaning
and Adjustment (p.876).
Printing
861
 Loading...