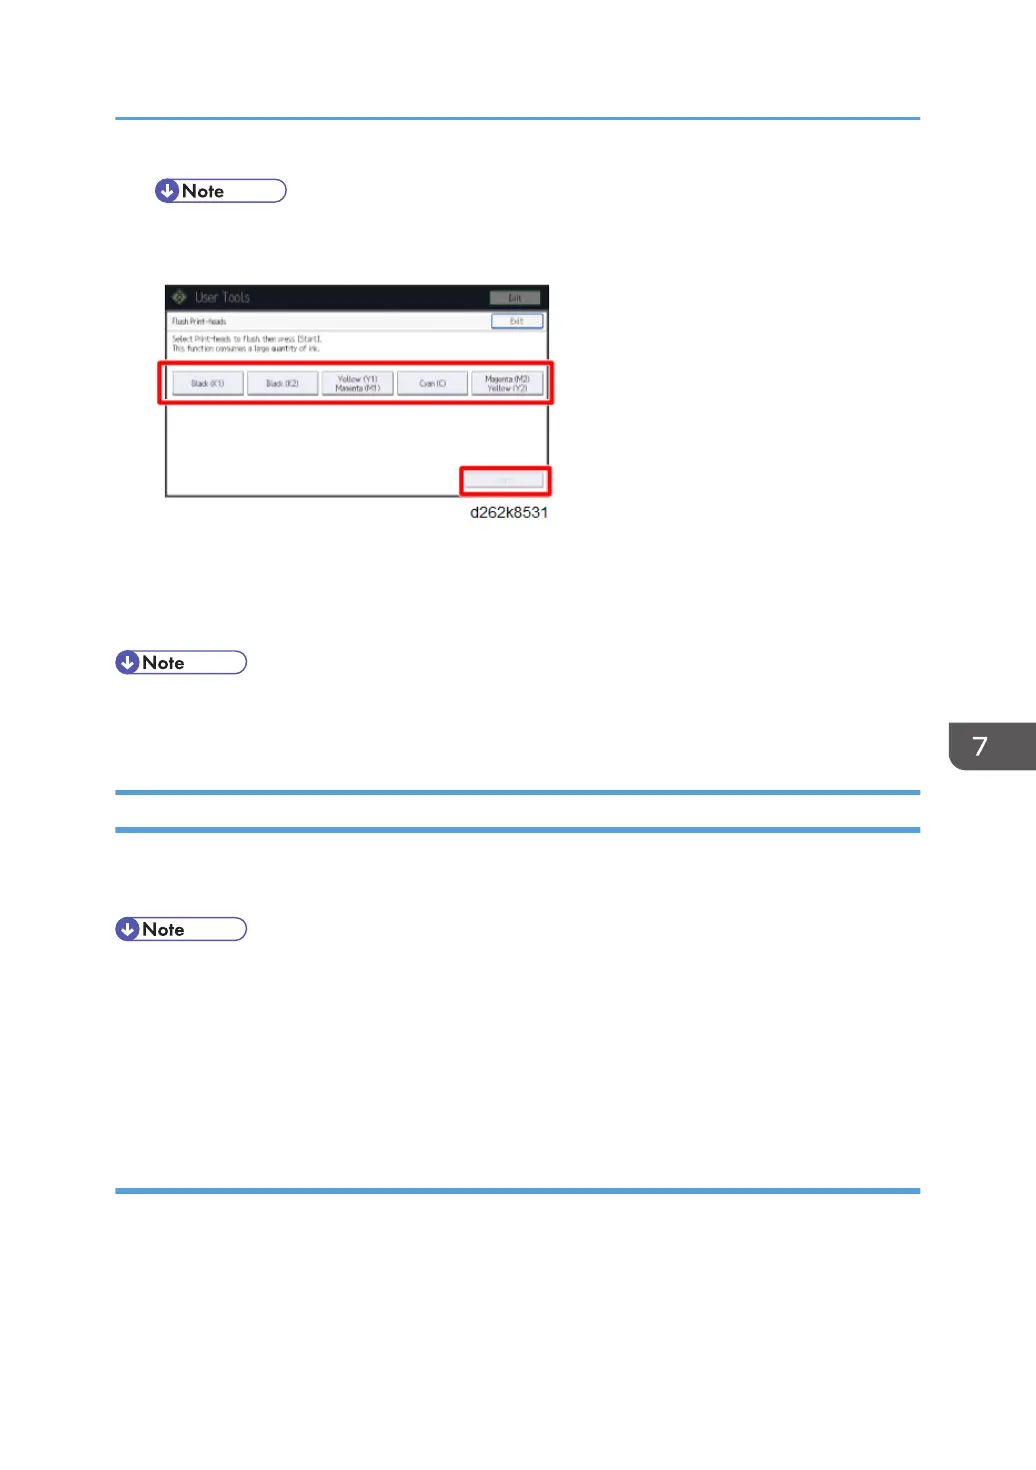
• If you touch [Start] while operating the machine, the operation is canceled (touching
operation is ignored and the beep sounds).
7. Touch [Exit].
8. Touch [User Tools] on the top right of the screen.
9. Touch [Home] at the bottom of the screen in the center.
• To check the results of flushing print heads, print the test pattern again and check it.
• If all nozzles are dropping ink and colors are not mixed, flushing ends.
Adjust Head Position
If bi-directional printing produces misaligned vertical lines or blurred colors, print the test pattern and
adjust the print head position. The test pattern differs depending on the print quality.
• Before adjustment, make sure that Prevent Paper Abrasion mode is not enabled (p.885).
• During test pattern printing, do not conduct any other operations.
• For Film (Matte), the head position cannot be adjusted automatically. Adjust it manually.
• For the bypass paper feed location, the head position cannot be adjusted automatically. Adjust it
manually.
Automatic Adjust Head Position
1. Touch [Home] at the bottom of the screen in the center.
2. Flick the screen to the left, and then touch the User Tools icon.
3. Touch [Machine Features].
4. Touch [Maintenance].
Print Head Cleaning and Adjustment
879
 Loading...