EasyManua.ls Logo

Ricoh J011 User Manual

Ricoh J011
670 pages
To Next Page IconTo Next Page
To Previous Page IconTo Previous Page
Page #37 background imageLoading...
Page #37 background image
PREPARATION
SM 1-5 J001/J003
Installation
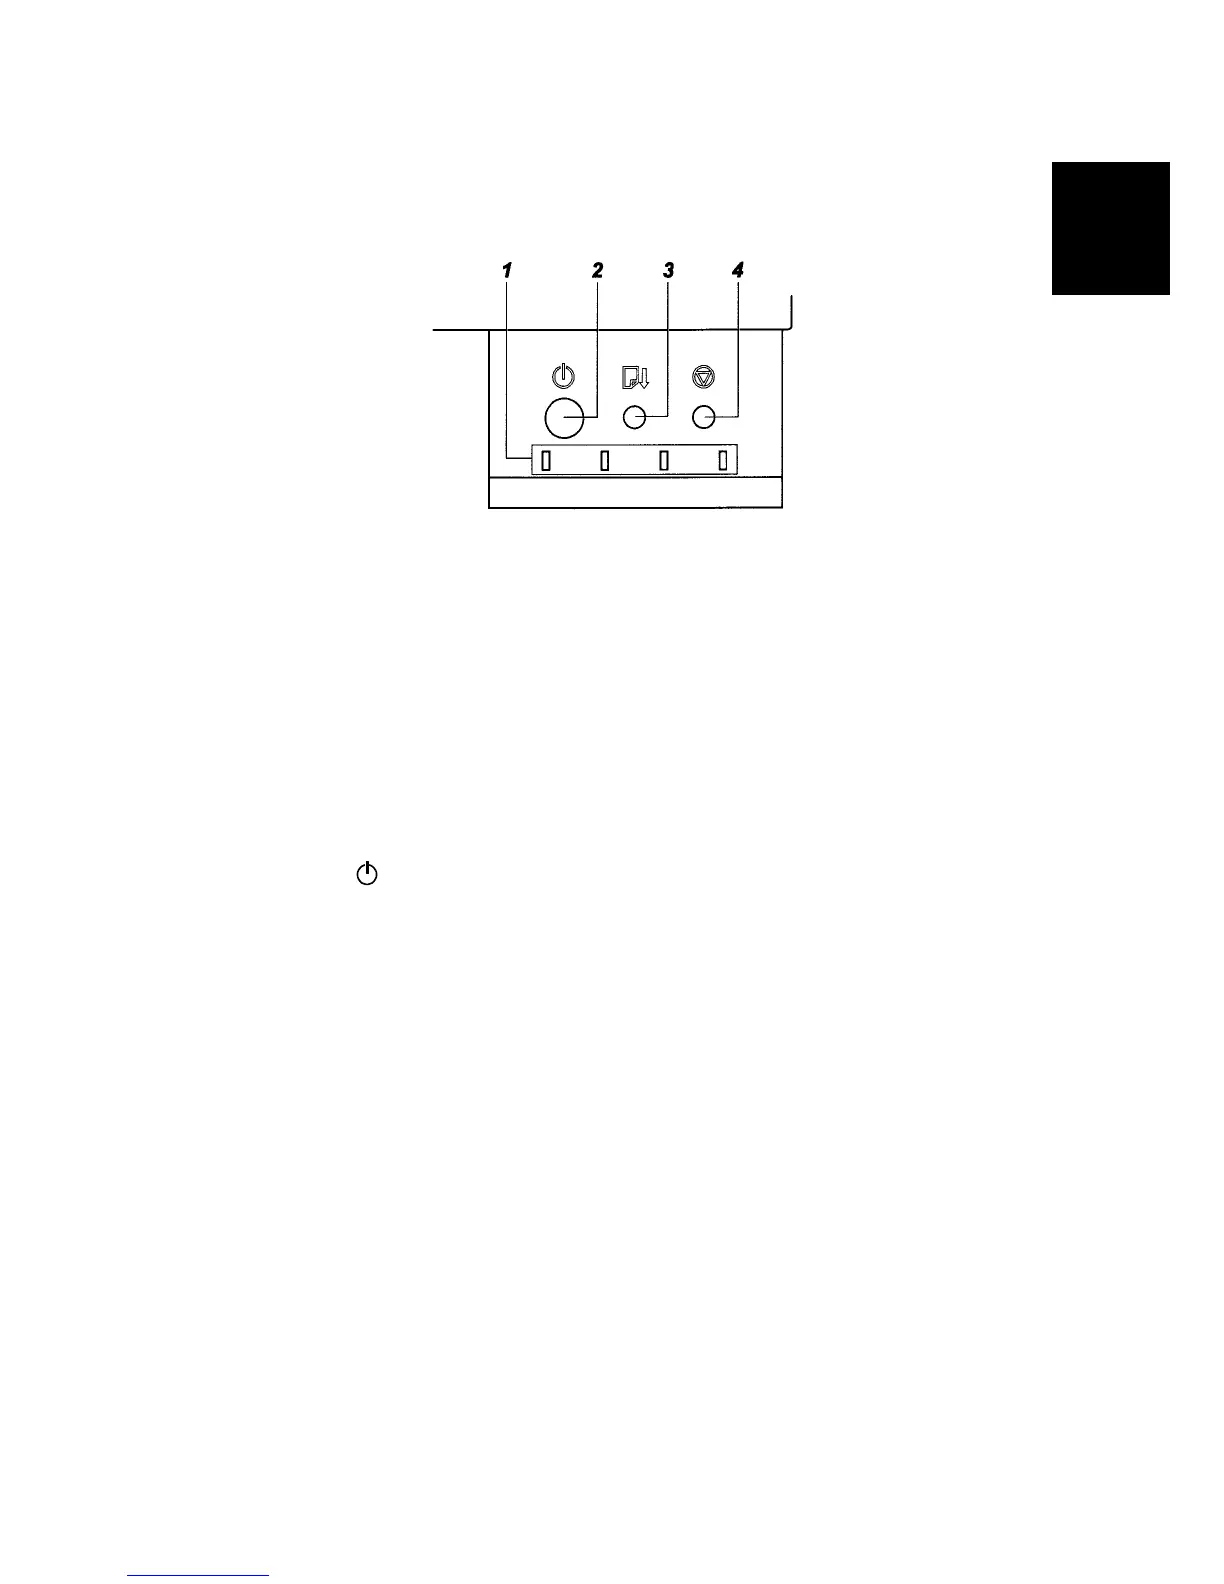
1.1.6 USING THE OPERATION PANEL
Here is a brief description of how to use the keys on the printer operation panel.
1. Low Ink Indicators
Each LED shows the position of each Print cartridge in the printer:
K (Black), C (Cyan), M (Magenta), and Y (Yellow).
Flashing
The cartridge is empty. You can use the printer for a short time. Replace the
cartridge as soon as possible.
On
There is no ink in the printer. At this time, you cannot print. Replace the ink
cartridge.
All On
A Print cartridge is not in the machine, or, is not installed correctly. Open the right
front door. Check all the cartridges.
2. [Power] key
To turn the printer on and off
1. To turn the printer on, press and hold the [Power] key for at least 1 sec.
The [Power] key flashes and stays in this condition until the printer warms
up.
When the printer is ready for operation, the [Power] key goes on and stays
in this condition. At this time the printer is in standby mode and ready to
print.
2. Press the [Power] key once to turn the printer off. The power LED flashes
slowly for a few moments. Then it goes off.
To print a Sample Print
1. Press the [Power] key to switch the printer off. Wait for the power LED to go off.
2. Press and hold down the [Cancel] + [Paper Feed] Keys. Then press the
[Power] key for at least 3 seconds
3. Release the keys when the low ink indicators LEDs show red.
G707I904.BMP
CÓPIA NÃO CONTROLADA

Table of Contents

Other manuals for Ricoh J011

Questions and Answers:

Ricoh J011 Specifications

General IconGeneral
BrandRicoh
ModelJ011
CategoryPrinter
LanguageEnglish

Summary

1. Installation

1.1 Preparation

Details on preparing the printer for installation, including environmental factors.

1.2 Installation Procedure

Step-by-step guide for installing the printer and its components.

2. Preventive Maintenance

3. Replacement and Adjustment

3.2 Basic Removal Procedures

Step-by-step instructions for basic component removal.

3.7 Image Adjustment

Procedures for adjusting print quality and image alignment.

4. Troubleshooting

4.2 Self-Diagnostic Test Flow

Flowchart for diagnosing printer issues using self-diagnostic tests.

4.3 Service Call Errors

Lists and explains service call errors and their typical causes.

4.4 General Troubleshooting

Troubleshooting common problems like poor image quality and paper misfeeds.

4.4.2 Paper Misfeed

Detailed information on diagnosing and resolving paper misfeed issues.

4.4.3 Error Displays

Explains error messages indicated by LEDs and the display.

4.4.4 Poor Printer Performance (Miscellaneous)

Addresses various issues affecting printer performance.

4.5 Cleaning the Print Heads

Procedures for cleaning print heads to improve print quality.

7. Specifications

7.1 Specifications

General printer engine base specifications.

7.1.1 Printer Engine Base Specifications

Lists basic configuration, printing method, ink, and print head details.

7. Specifications (continued)

2. Paper Specifications

Details supported paper types, sizes, and feed sources for North America.

8. Displayed Messages

8.1 Jam Errors

Detailed troubleshooting for paper jams in Tray 1.

Related product manuals