Image Correction
J007/J010/J011 4-24 SM
4.5 IMAGE CORRECTION
You can see the image adjustment features on the “Maintenance” menu of the printer
operation panel.
The test prints and adjustments described in this section can also be done with
the printer driver.
For more details about doing these test prints and adjustments with the printer
driver, please refer to the printer User Guide.
4.5.1 PREPARING FOR TEST PRINTING
1. Make sure A4 size or LTR size paper is loaded in the printer.
2. Make sure the printer is ready to print.
4.5.2 ADJUST PAPER FEED
Print the ‘Adjust Paper Feed Test Pattern’ and do this adjustment if you see broken
horizontal lines or uneven colors in the printouts:
1. Push [Menu], select "Maintenance", then push [#Enter].
2. Select "Adj. Paper Feed" and push [#Enter].
3. Select "Pr. Test Print" and push [#Enter]. The test pattern prints.
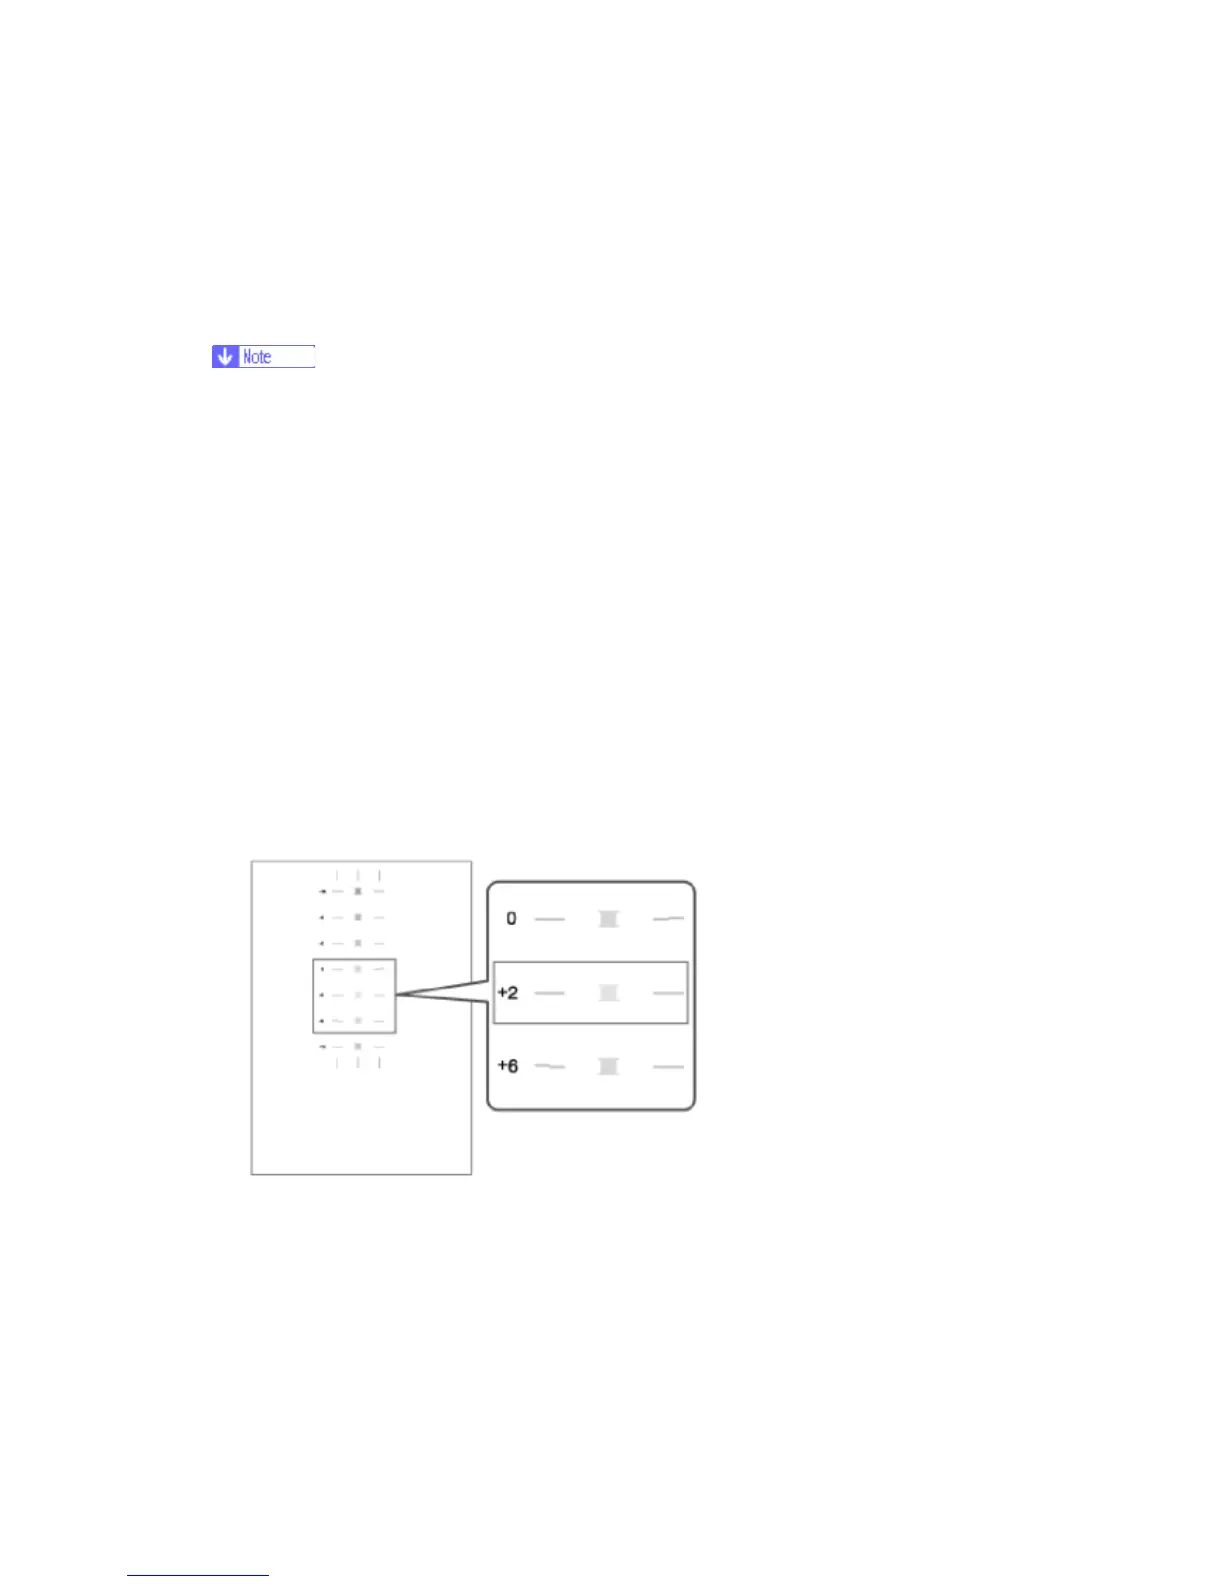
4. Examine the test print. Note the number of the best pattern. The best pattern is
the pattern where the horizontal lines should be perfectly flat.
5. Select "Adjustment" and push [#Enter].
6. Enter the number of the pattern you selected in Step 4 and push [#Enter]. This
completes the adjustment.
7. Push [Online] to leave the menu mode.
 Loading...