502
Cross-Point Settings (Xpt Assign Menu)
Chapter 19 Control Panel Setup (Panel)
Exporting Source Names and
Destination Names
To send the source names and destination names to the S-
Bus, use the following procedure.
1
In the Panel >XPT Assign menu, press [Name Export].
The Name Export menu appears.
2
Turn the knob to set the station ID.
a) If set to 255, the information is sent to all stations (with display of
“All”).
3
Press [Src Name Export].
This exports the source names to the station selected in
step 2.
4
Press [Dest Name Export].
This exports the destination names to the station
selected in step 2.
Since destination names cannot be selected freely,
fixed names are used.
Making Settings for Audio Mixer
Enabling the function to link the audio
mixer
For audio mixer operations in this system, it is necessary
to set Mixer ESAM-II for the DCU 9-pin serial port.
For details, see “Serial Port Settings (Serial Port Assign
Menu)” (page 559).
1
In the Panel >Xpt Assign menu, using any of the
following methods, select the M/E bank or bus.
• Press directly on the list on the left of the status area.
• Press the arrow keys in the list on the left, to scroll
the reverse video cursor.
• Turn the knob.
2
Press [Audio Follow].
“Enable” appears in the “Audio Follow” column.
Setting the audio mixer cross-points
To assign an audio mixer cross-point to a switcher cross-
point pair (video/key), carry out the following procedure.
1
In the Panel >Xpt Assign menu, press [Mixer Xpt
Assign].
The Mixer Xpt Assign menu appears.
2
In the list on the left, select the number for the setting.
3
In the list on the right, select the audio mixer cross-
point (machine number).
4
Press [Set].
The audio mixer number appears in the “Mixer Xpt”
column.
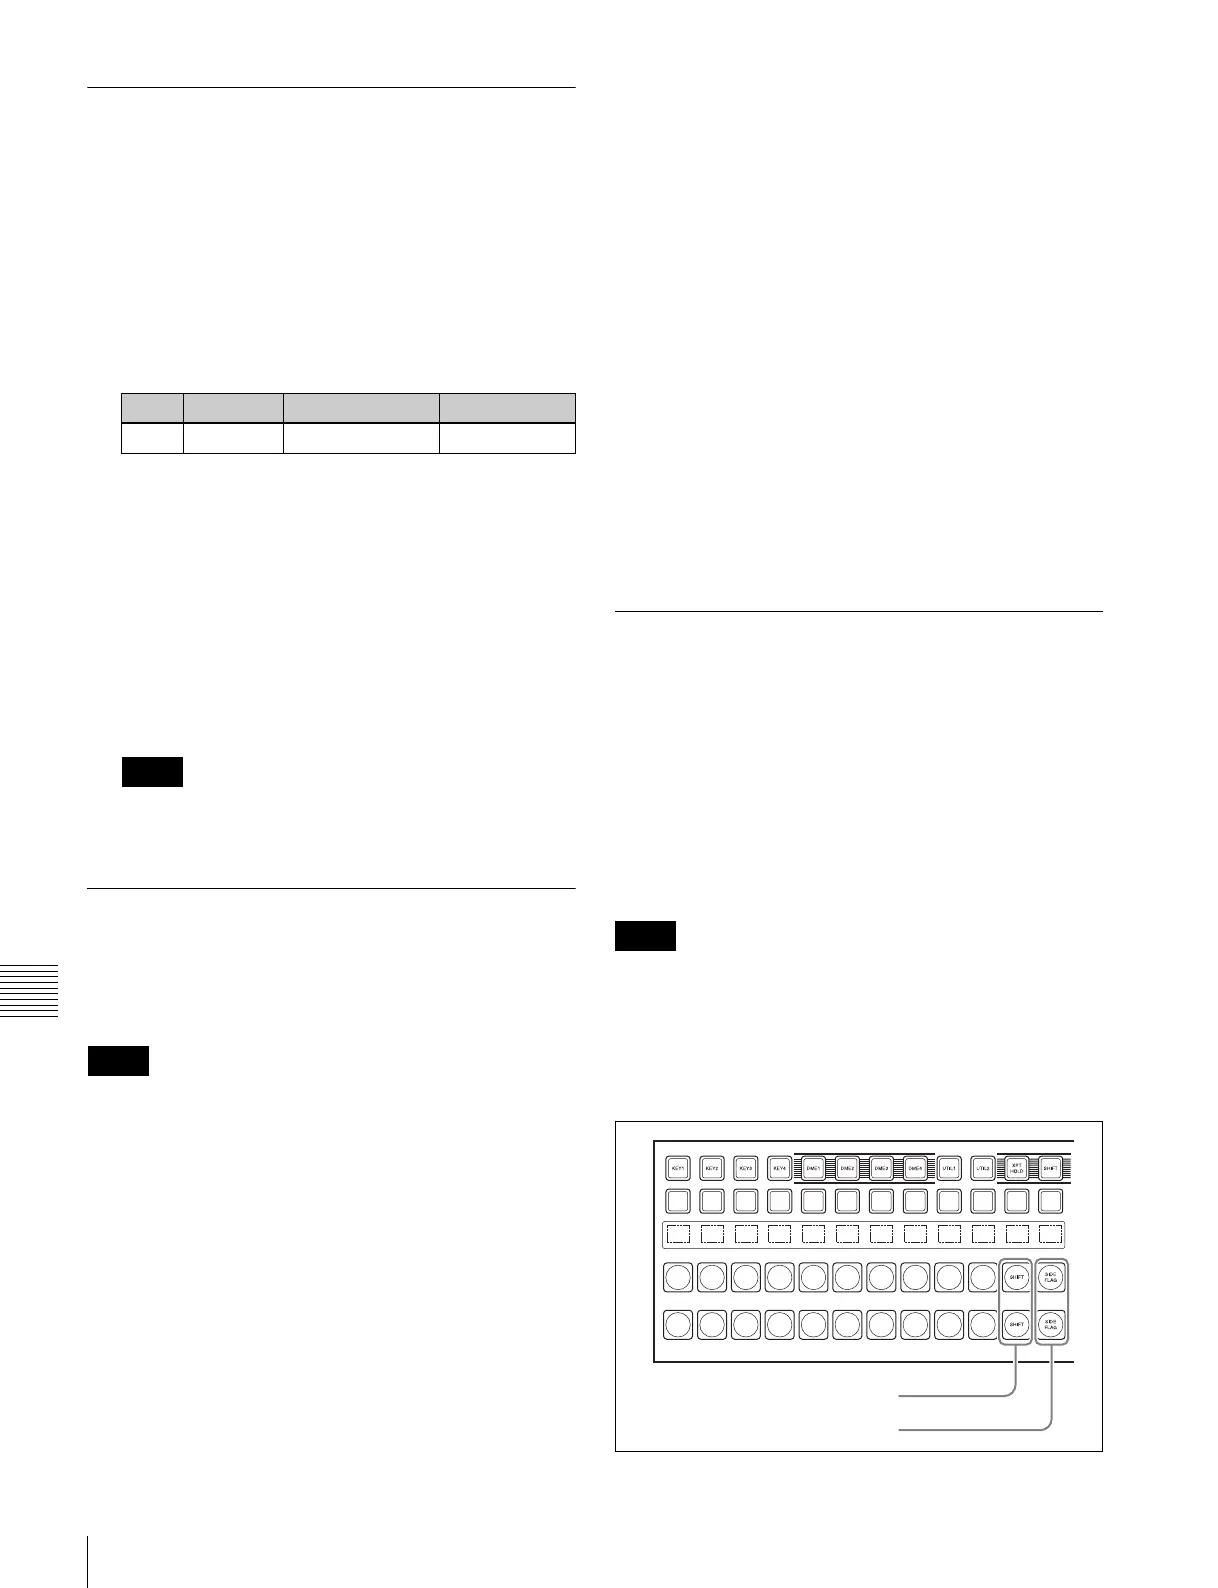
Assigning a Cross-Point Button to
Enable/Disable Side Flags
By assigning the side flag function to the rightmost button
in a cross-point button row, you can use this button to
enable/disable side flags for each of the M/E and PGM/
PST banks.
This setting applies to all of the M/E and PGM/PST banks.
When you make this assignment, the SHIFT button (the
button assigned to the shift function) is moved one to the
left.
If a macro attachment is set, when you assign the button to
the side flag function, the button numbers are offset, and
therefore when you press the button this does not execute
the macro. The settings, however, are maintained, so that
when you cancel the side flag assignment, the macro can
be accessed once more.
Knob Parameter Adjustment Setting values
1 Station ID Station ID setting 1 to 255
a)
Notes
Notes
Notes
SHIFT button moves one to the left
Button for side flags enable/disable
 Loading...