79
Executing a Transition
Chapter 3 Signal Selection and Transitions
Setting the transition rate by a menu
operation
1
In the switcher bank, select first VF7 ‘Misc,’ then HF1
‘Transition.’
The Transition menu appears.
2
Select any transition type in the <Transition Type>
group.
3
Turn the knob to set the transition rate.
Displaying the transition rates in a menu
and changing the settings
For each of the M/E and PGM/PST banks, you can display
the transition rate and independent key transition rate, and
change the settings (see page 188).
Pattern Limit
When a wipe or DME wipe pattern is selected for the
transition, you can specify the range of movement of the
wipe pattern through the course of the transition, for each
bank independently.
When the pattern limit function is enabled, carrying out a
transition results in the following effect for example
settings.
• When the limit value is set to 50%, the effect at the end
of the transition is the same as when the fader lever is at
the center position in the normal case (with the pattern
limit function disabled); the wipe pattern does not
complete.
• When the limit value is set to 0%, the wipe effect is
completely disabled, and carrying out the transition
produces no change in the image.
• When the limit value is set to the maximum 100%, the
image changes in exactly the same way as when the
pattern limit function is off, but when the transition is
completed, the cross-point selections on the background
A and B buses do not interchange.
There are two ways of setting a pattern limit: either by
operating the fader lever to save the fader position, or by
using the Wipe menu or DME Wipe menu to access the
Edge/Direction menu for the M/E or PGM/PST bank.
• A pattern limit only applies when a wipe or DME wipe
is selected as the transition type.
• A pattern limit cannot be applied to an independent key
transition (see page 84).
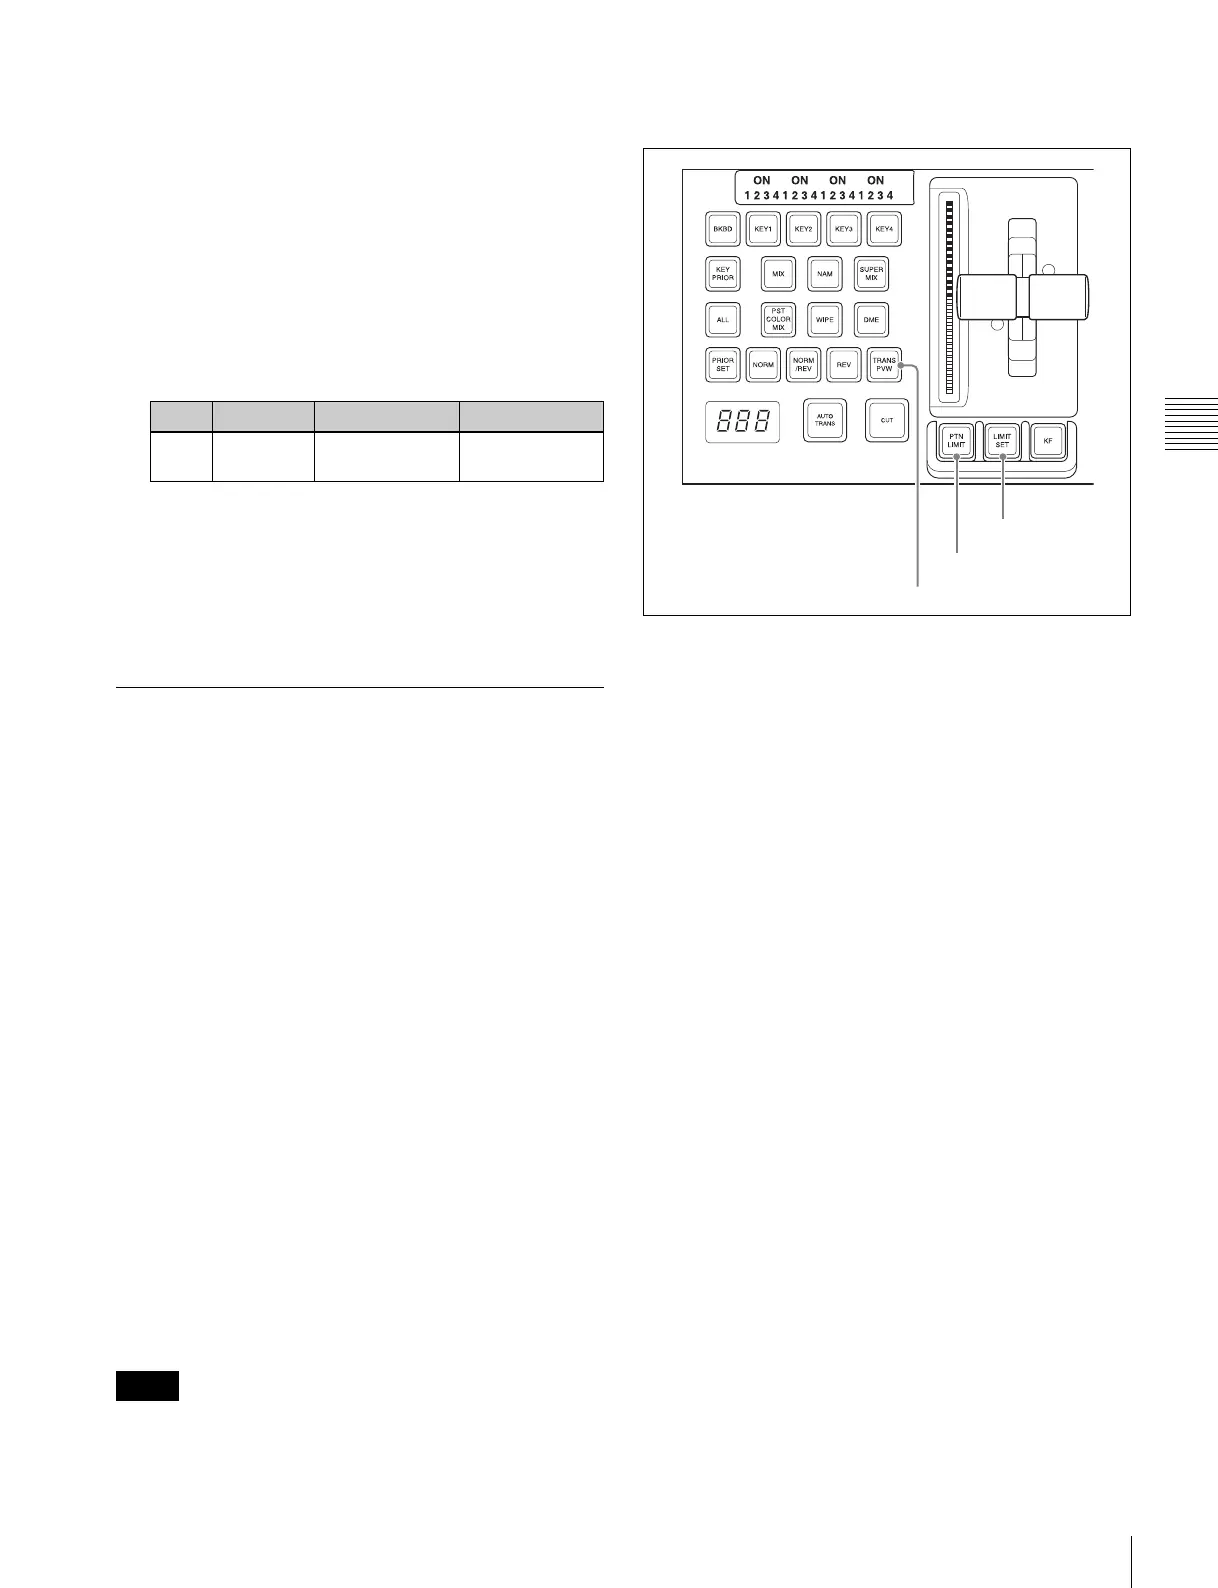
Transition control block
Setting the pattern limit with the fader
lever
1
Move the fader lever to the position corresponding to
a particular pattern size.
• First make sure that the [PTN LIMIT] button is off.
• To check the pattern size on the preview monitor,
first press the [TRANS PVW] button, to select the
transition preview mode (see page 83).
2
Press the [LIMIT SET] button.
This sets the current fader lever position as the pattern
limit.
Setting the pattern limit by a menu
operation
1
When a wipe is selected as the transition type, in the
M/E or PGM/PST menu, select first VF5 ‘Wipe,’ then
HF4 ‘Edge/Direction.’
When a DME wipe is selected as the transition type, in
the M/E or PGM/PST menu, select first VF6 ‘DME
Wipe,’ then HF4 ‘Edge/Direction.’
The Edge/Direction menu appears.
2
Press the [Pattern Limit] button, turning it on.
3
Turn the knobs to adjust the following parameters.
Knob Parameter Adjustment Setting values
1Transition
Rate
Transition Rate 0 to 999 (frame
count)
Notes
TRANS PVW button
PTN LIMIT button
LIMIT SET button
 Loading...