82
Executing a Transition
Chapter 3 Signal Selection and Transitions
• If the fader lever is moved in the direction away from the
lit LEDs, this carries out the next transition, over the
remaining part of the fader lever travel.
• Even in a non-sync state, you can carry out an auto
transition by pressing the [AUTO TRANS] button.
During the auto transition, the indicators show the
transition progress in the usual way, but when the
transition completes, they once again indicate the non-
sync state.
Fader Lever Operation in Bus Fixed
Mode
Flip-flop mode and bus fixed mode
The following describes the difference between flip-flop
mode and bus fixed mode, taking an M/E bank as an
example; the functionality is the same, however, on the
PGM/PST bank.
Normally, when a background transition is carried out on
an M/E bank, the signals selected on the A and B rows of
cross-point buttons are interchanged at the end of the
transition. That is to say, except during a transition, the
background output is always from the background A bus.
This is called “flip-flop mode.”
The alternative is known as “bus fixed mode,” in which
there is no bus interchange. In this mode, when the fader
lever is at the top of its travel the output from the A bus is
always 100%, and when the fader lever is at the bottom of
its travel the output from the B bus is 100%.
Flip-flop mode and bus fixed mode
In the bus fixed mode there is a fixed relationship between
the position of the fader lever and the signal output on each
bus. Depending on the direction of the transition, the fader
lever must therefore always be moved in a particular
direction, as shown in the following table. This does not
affect an auto transition, which is executed regardless of
the fader lever direction.
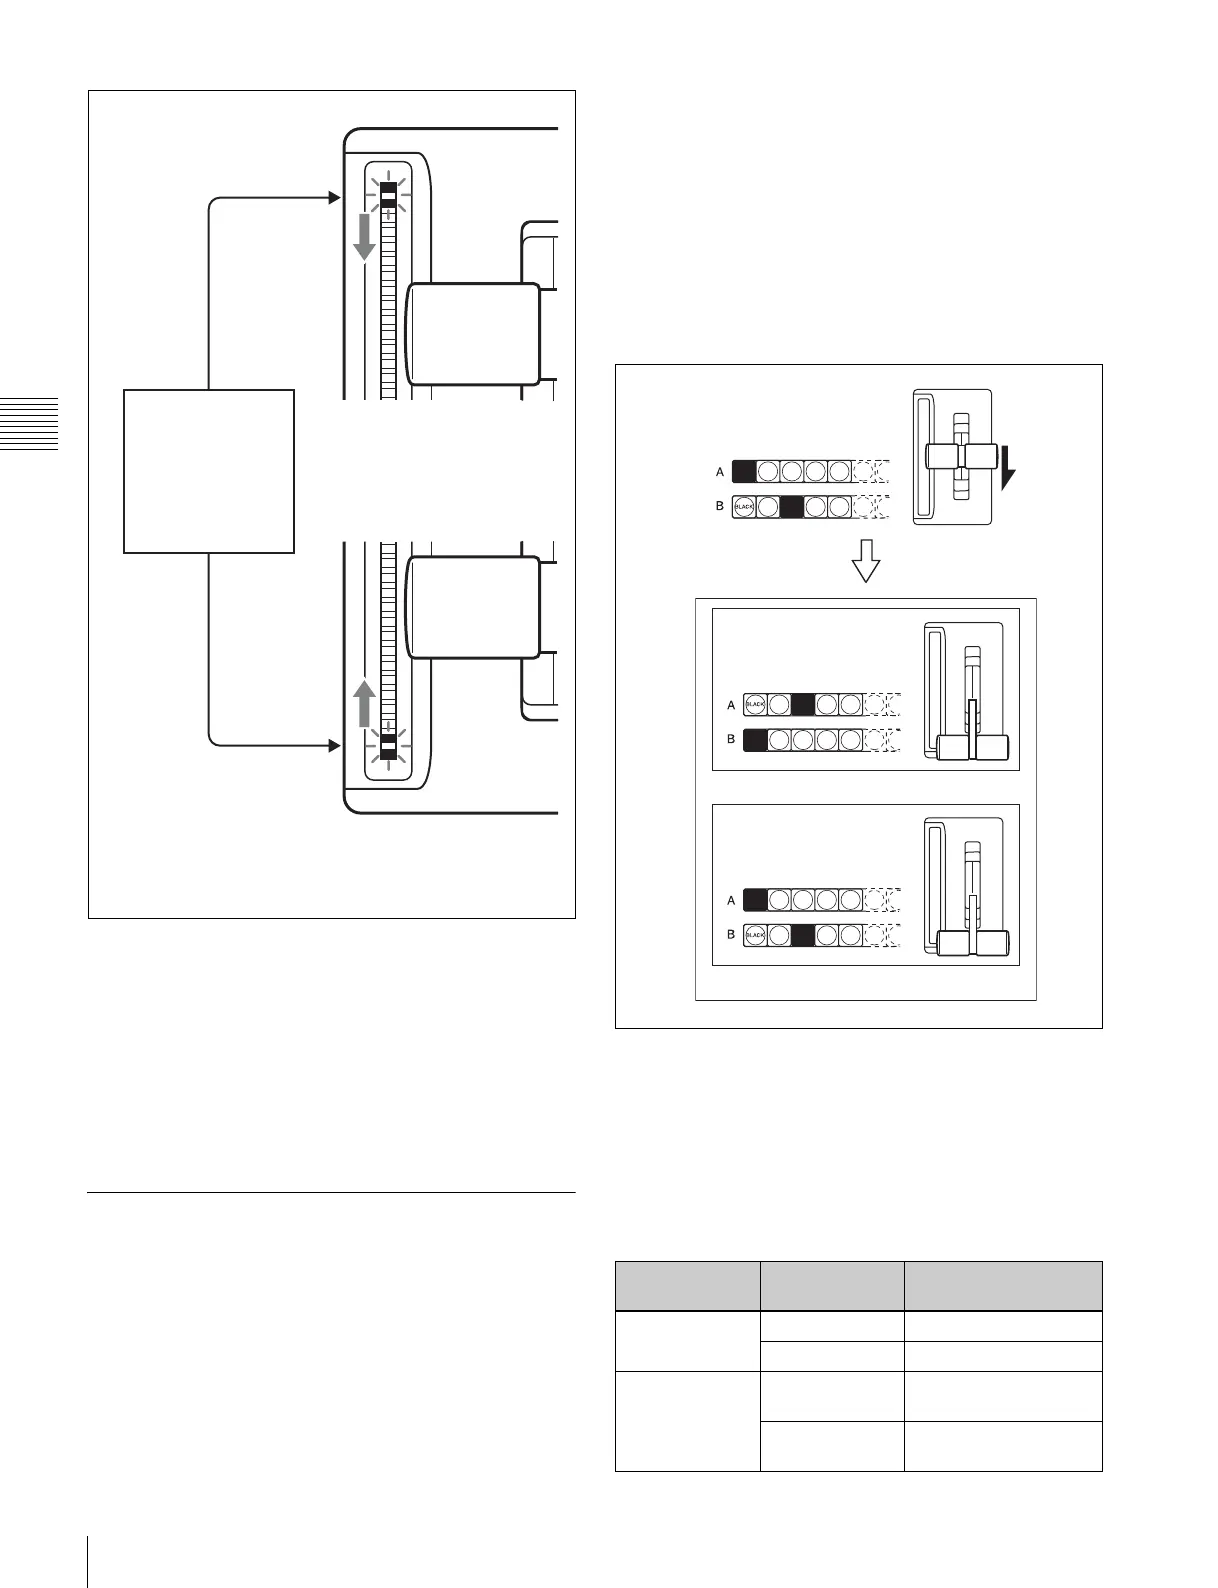
Manual transition completed
as auto transition when
moving the fader lever upward:
Top two LEDs light.
Manual transition completed
as auto transition when
moving the fader lever
downward: Bottom two LEDs
light.
Once the fader lever
is moved to this
position, the non-sync
state ends, and the
next transition
(direction shown by
the arrow) is possible.
Next transition Transition
direction
Fader lever
movement
Background A t B Downward
B t AUpward
Keys 1, 2, 3, 4,
5, 6, 7, and 8
On t Off
(deletion)
Downward
Off t On
(insertion)
Upward
Buttons lit
Flip-flop mode
Bus fixed mode
Fader
lever