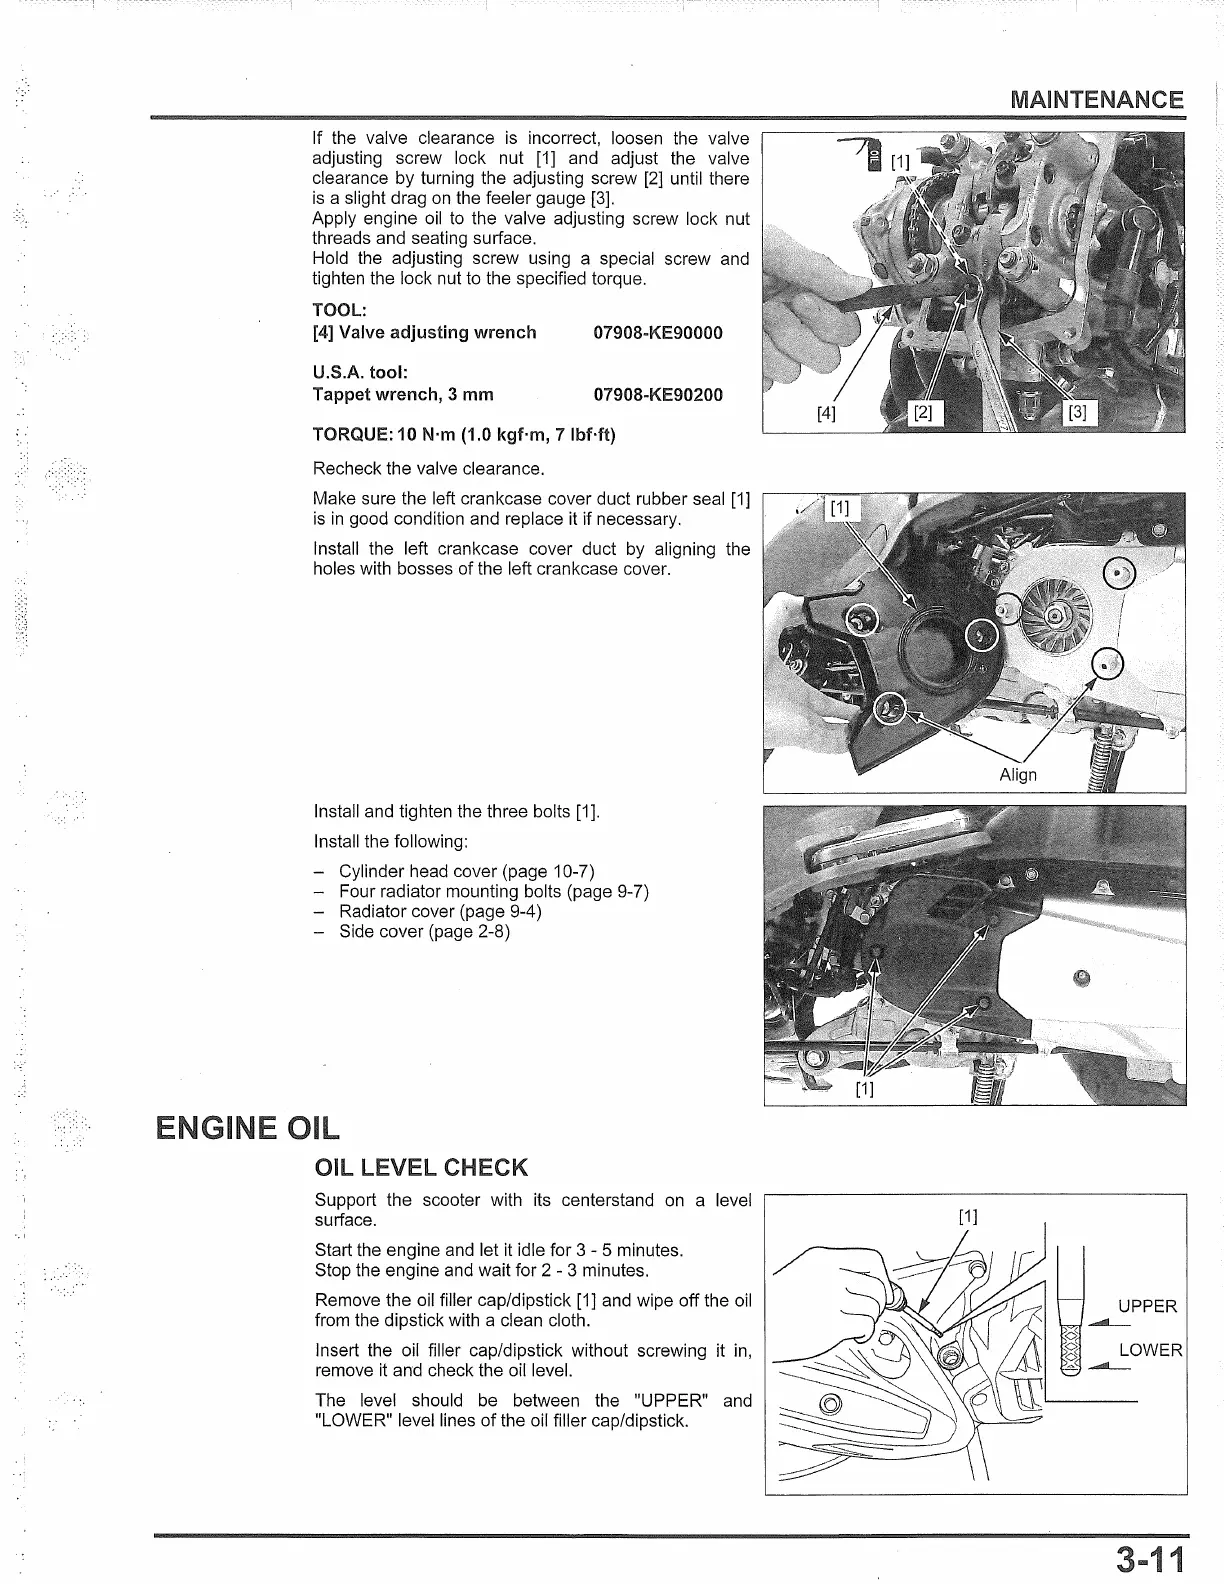
If
the valve clearance is incorrect, loosen the valve
adjusting screw lock nut [1] and adjust the valve
clearance
by
turning the adjusting screw [2] until there
is a slight drag on the feeler gauge
[3].
Apply engine oil to the valve adjusting screw lock nut
threads and seating surface.
Hold the adjusting screw using a special screw and
tighten the lock nut to the specified torque.
TOOL:
[4]
Valve adjusting wrench
U.S.A. tool:
Tappet wrench,
3 mm
07908-KE90000
07908-KE90200
TORQUE: 10 N·m (1.0 kgf·m, 7
lbHt)
Recheck the valve clearance.
Make sure the left crankcase cover duct rubber seal [1]
is
in
good condition and replace it
if
necessary.
Install the left crankcase cover duct by aligning the
holes with bosses
of
the left crankcase cover.
Install and tighten the three bolts
[1
].
Install the following:
- Cylinder head cover (page 10-7)
- Four radiator mounting bolts (page 9-7)
- Radiator cover (page 9-4)
- Side cover (page 2-8)
OIL LEVEL CHECK
Support the scooter with its centerstand on a level
surface.
Start the engine and let it idle for 3 - 5 minutes.
Stop the engine and wait for 2 - 3 minutes.
Remove the oil filler cap/dipstick [1] and wipe
off
the oil
from the dipstick with a clean cloth.
Insert the oil filler cap/dipstick without screwing it in,
remove it and check the oil level.
The level should be between the "UPPER" and
"LOWER" level lines
of
the oil filler cap/dipstick.
MAINTENANCE
UPPER
......_
LOWER
1
 Loading...