3. Grasp the sides of the lower impeller tray and slide it out of the chassis. (See Figure
112 on page 263.)
Figure 112: Removing the Lower Impeller Tray
Impellers
Craft interface display
Screws
g004144
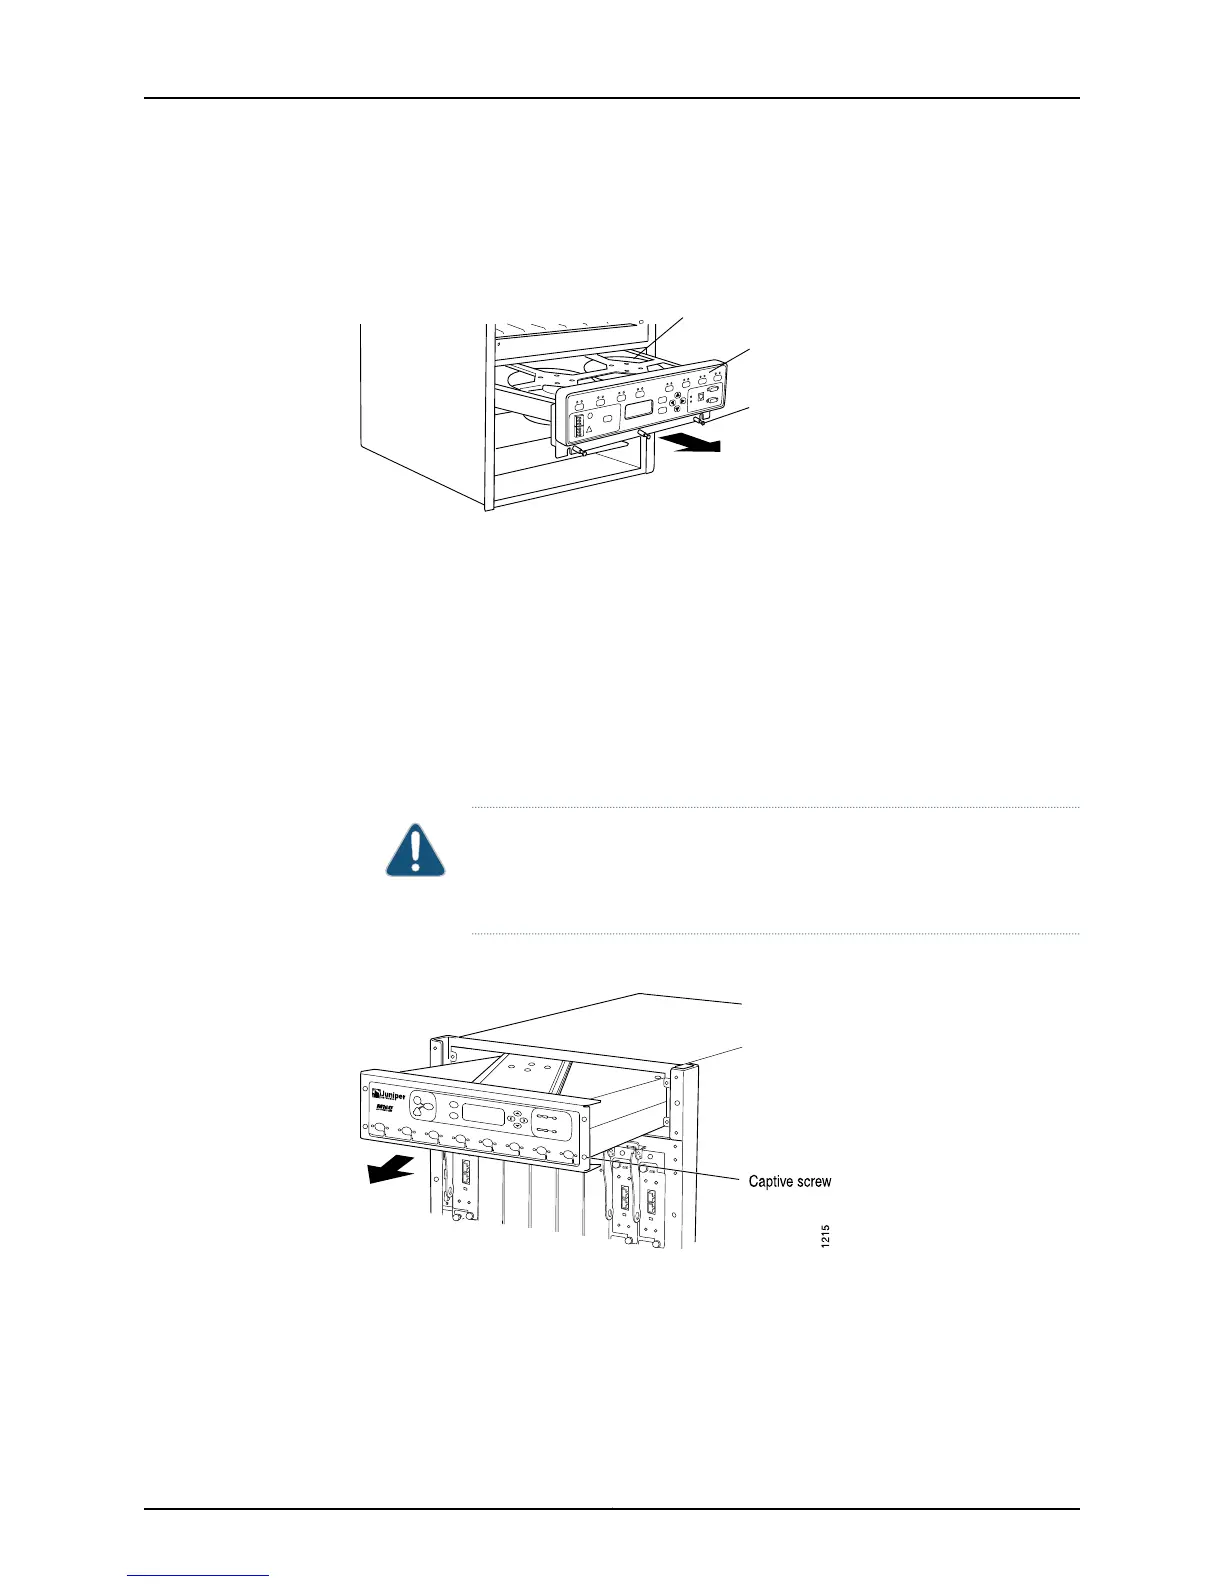
Replacing the M40e and M160 Router Craft Interface
The craft interface is attached to the upper impeller assembly (front top blower).
1. Attach an ESD strap to your bare wrist, and connect the strap to one of the two ESD
points on the chassis.
2. Unscrew the captive screws at the corners of the impeller assembly (the craft
interface).
3. Grasp the impeller assembly and pull it halfway out of the chassis. (See Figure 113 on
page 263.)
CAUTION: If the impeller is still spinning, do not put your fingers or any
tool into the impeller assembly as you pull it out. To avoid injury, wait until
the impeller stops spinning before removing the assembly.
Figure 113: Removing the Front Upper Impeller Assembly
4. Pull the impeller assembly completely out of the chassis.
5. Place the assembly top-side down (the lettering on the craft interface is upside down)
on an antistatic mat on a flat, stable surface.
6. Using a Phillips screwdriver, loosen and remove the four screws that secure the bottom
of the craft interface housing to the impeller assembly.
263Copyright © 2012, Juniper Networks, Inc.
Chapter 9: Monitoring the Craft Interface

 Loading...


