NOTE: Removing the front upper fan tray before you remove the craft
interface might make it easier to grasp the craft interface as you remove it.
For instructions on removing a front fan tray, see the appropriate router
hardware guide.
1. Attach an ESD strap to your bare wrist, and connect the strap to one of the ESD points
on the chassis.
2. Remove the upper cable guards by loosening the three captive screws on each cable
guard.
3. Completely loosen the four captive screws that attach the craft interface to the
chassis.
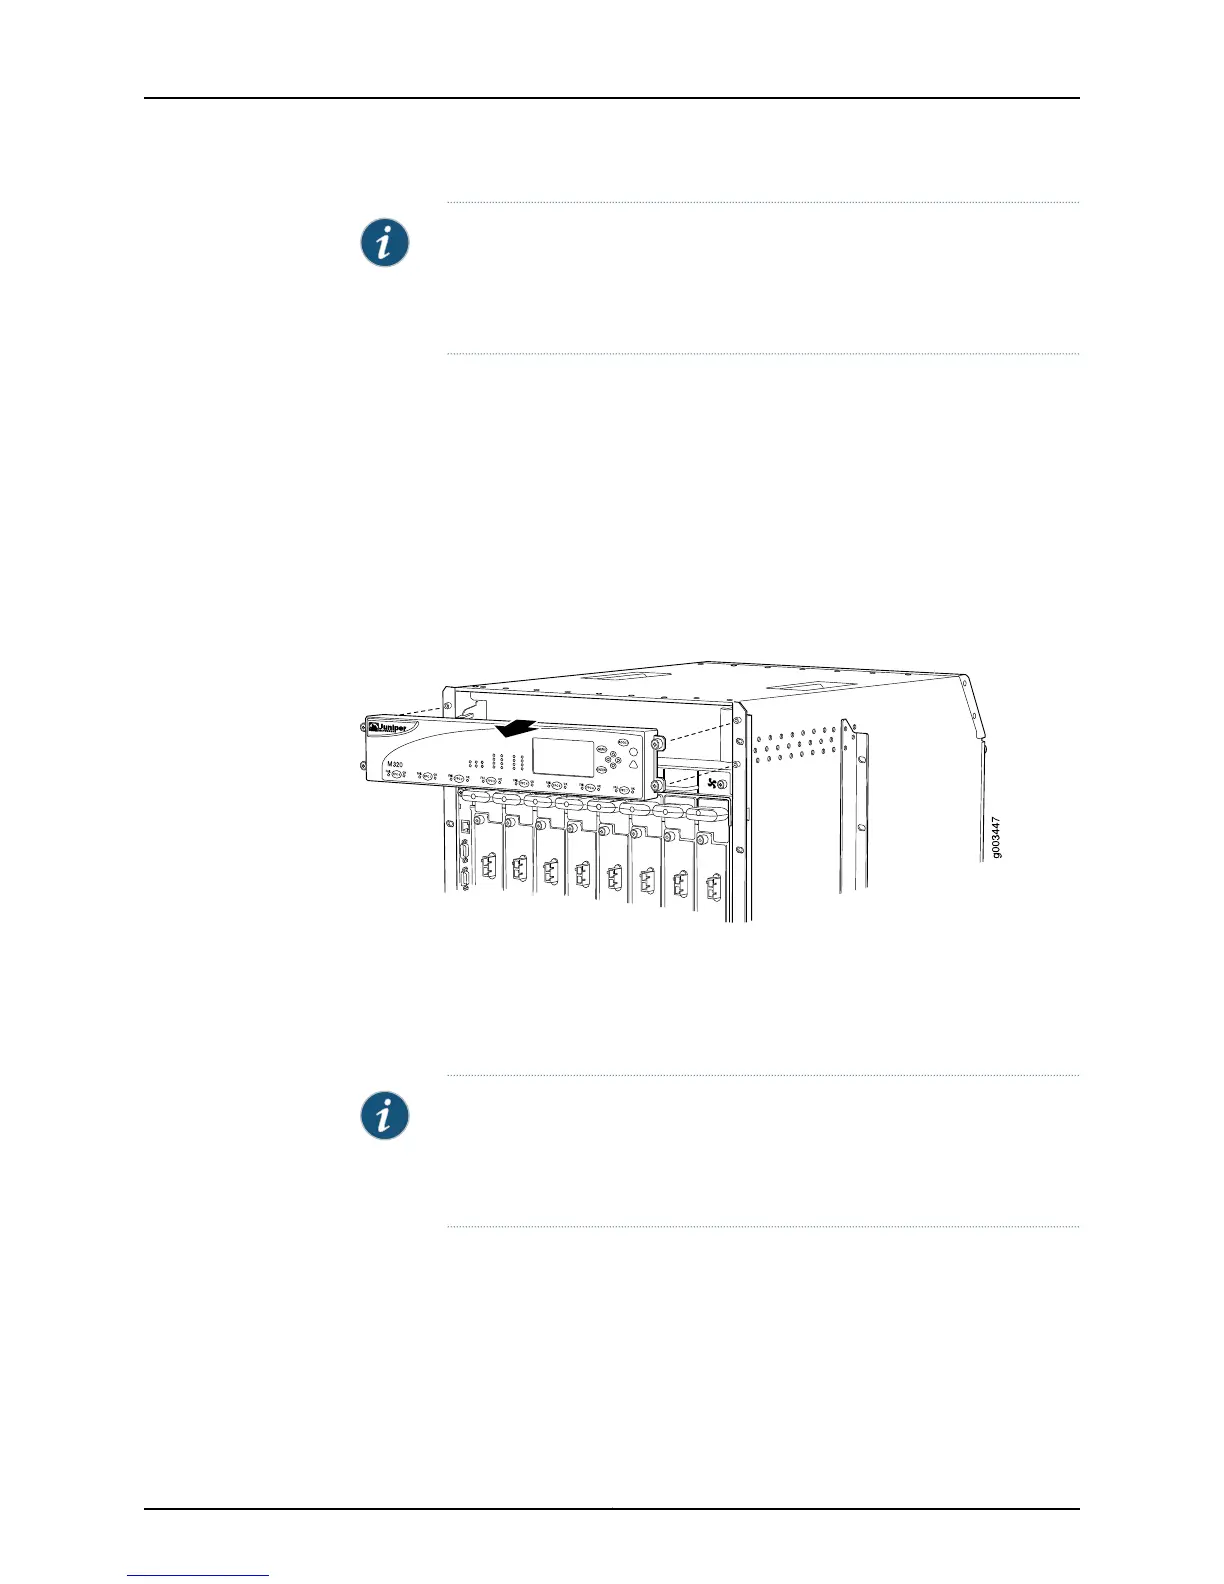
4. Grasp the craft interface by the left and right flanges and carefully pull it straight out
of the chassis. (See Figure 115 on page 265.)
Figure 115: Removing the M320 Router Craft Interface
Replacing the T320, T640, and T1600 Router Craft Interface
The craft interface is located on the front of the chassis above the FPC card cage.
To remove the craft interface:
NOTE: Removing the front upper fan tray before you remove the craft
interface might make it easier to grasp the craft interface as you remove it.
For instructions on removing a front fan tray, see the appropriate router
hardware guide.
1. Attach an ESD strap to your bare wrist, and connect the strap to one of the ESD points
on the chassis.
2. Completely loosen the screws at the four corners of the craft interface.
3. Insert the blade of a flat-blade screwdriver into the slot on one side of the craft
interface, then gently pry that side out from the chassis.
265Copyright © 2012, Juniper Networks, Inc.
Chapter 9: Monitoring the Craft Interface

 Loading...


