Rear Suspension: 2C-8
• Apply grease to the lip of outer dust seal (4).
: Grease 99000–25160 (Water resistance
grease or equivalent)
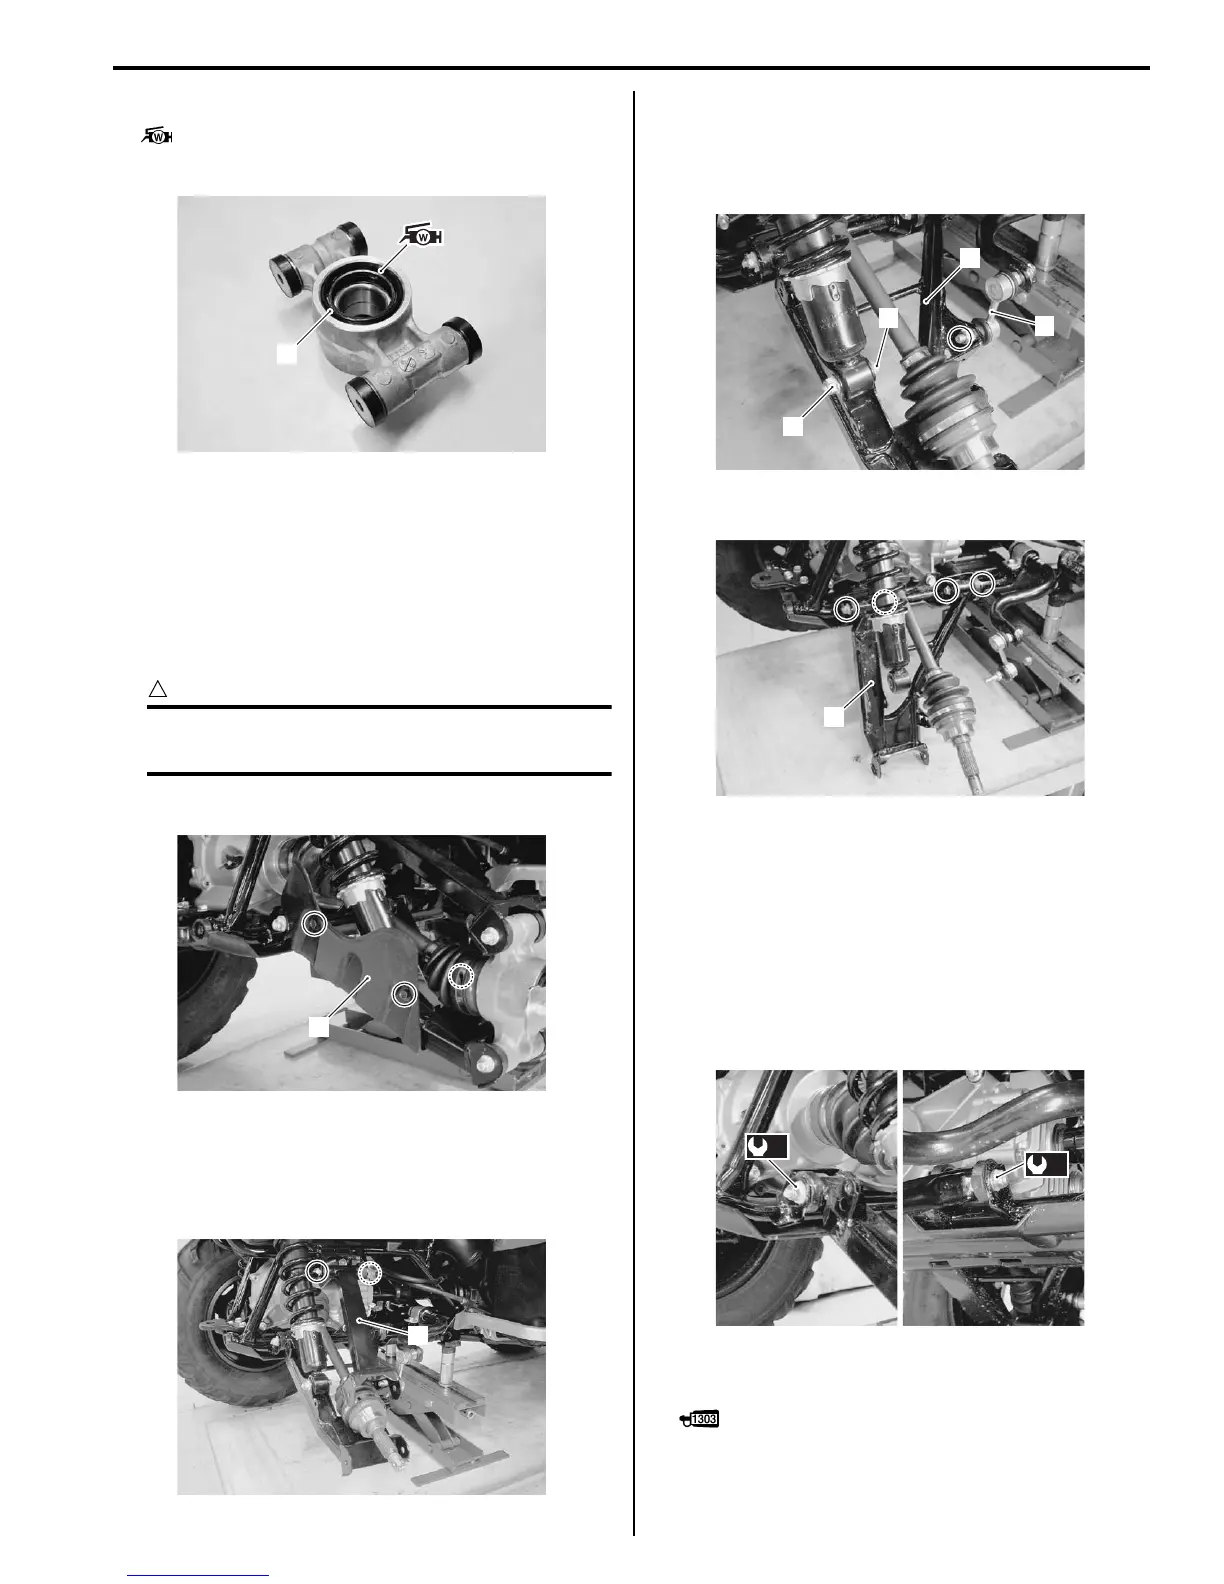
Rear Suspension Arm Upper / Lower Removal
and Installation
B931G22306010
Removal
1) Remove the rear wheel assembly. Refer to “Front /
Rear Wheel Removal and Installation in Section 2D
(Page 2D-2)”.
CAUTION
!
Make sure that the vehicle is supported
securely.
2) Remove the rear drive shaft cover (1).
3) Remove the rear suspension knuckle. Refer to “Rear
Wheel Hub / Suspension Knuckle Removal and
Installation (Page 2C-4)”.
4) Remove the rear upper suspension arm (2).
5) Disconnect the stabilizer joint (3) from the rear
suspension lower arm (4).
6) Remove the shock absorber mounting lower bolt (5)
and nut (6).
7) Remove the rear suspension lower arm (4).
Installation
Install the suspension arms in the reverse order of
removal. Pay attention to the following points.
• Tighten the suspension arm pivot nuts to the specified
torque.
Tightening torque
Suspension arm lower pivot nut (a): 60 N·m (6.0
kgf-m, 43.5 lbf-ft)
• Apply thread lock to the shock absorber mounting
bolts.
: Thread lock cement 99000–32030
(THREAD LOCK CEMENT SUPER 1303 or
equivalent)
4
I831G1230023-02
1
I831G1230024-01
2
I831G1230025-01
3
5
6
4
I831G1230026-01
4
I831G1230027-02
(a)
(a)
I831G1230028-01

 Loading...