Rear Suspension: 2C-14
2) Apply grease to the lip of the inner dust seals, spacer
(1) and inside of dust seals (2).
: Grease 99000–25160 (Water resistance
grease or equivalent)
3) Install the spacers (1), dust seals (2) and washers
(3) to the rear suspension knuckle.
Rear Stabilizer Removal and Installation
B931G22306015
Removal
1) Remove the rear wheels. Refer to “Front / Rear
Wheel Removal and Installation in Section 2D
(Page 2D-2)”.
CAUTION
!
Make sure that the vehicle is supported
securely.
2) Disconnect the stabilizer joints (1) from the rear
suspension lower arm and stabilizer bar.
3) Remove the stabilizer plates (2) and bushings (3).
4) Remove the stabilizer bar (4).
Installation
Install the stabilizer in the reverse order of removal. Pay
attention to the following points:
Applicable model
Up to 5SAAR41A197105886
Install the stabilizer in the reverse order of removal.
Pay attention to the following points:
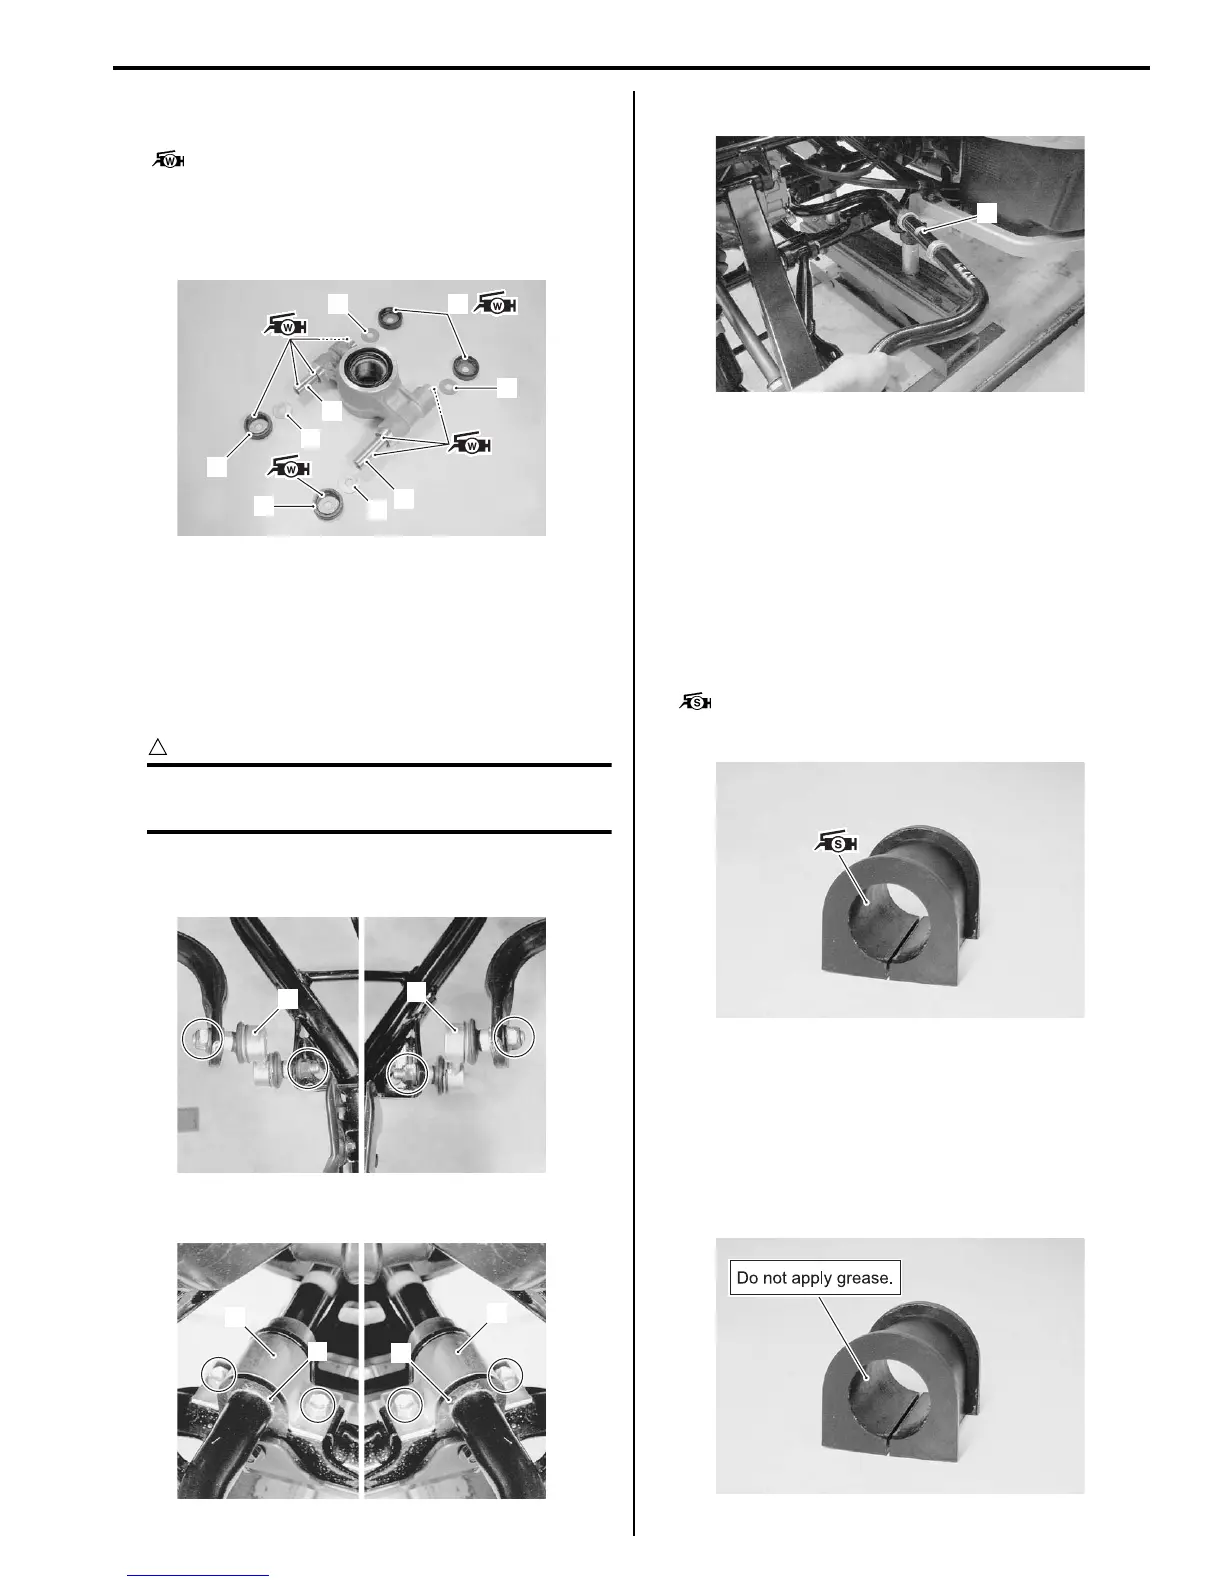
• Apply grease to the inside of stabilizer bushing.
: Grease 99000–25100 (SUZUKI SILICONE
GREASE or equivalent)
Applicable model
From 5SAAR41A197105887
Install the stabilizer in the reverse order of removal.
Pay attention to the following points:
• Do not apply grease to the inside of stabilizer bushing.
3
3
3
3
1
1
2
2
2
I831G1230050-01
1
1
I831G1230055-01
2
3
2
3
I831G1230052-02
4
I831G1230053-01
I831G1230051-03
I931G1230002-02
 Loading...