e-STUDIO556/656/756/856(Ver03) © 2012 TOSHIBA TEC CORPORATION All rights reserved
DISASSEMBLY AND REPLACEMENT
4 - 8
4.2.2 DSP board (DSP)
(1) Take off the control panel unit.
( P.4-6 "4.2.1 Control panel unit")
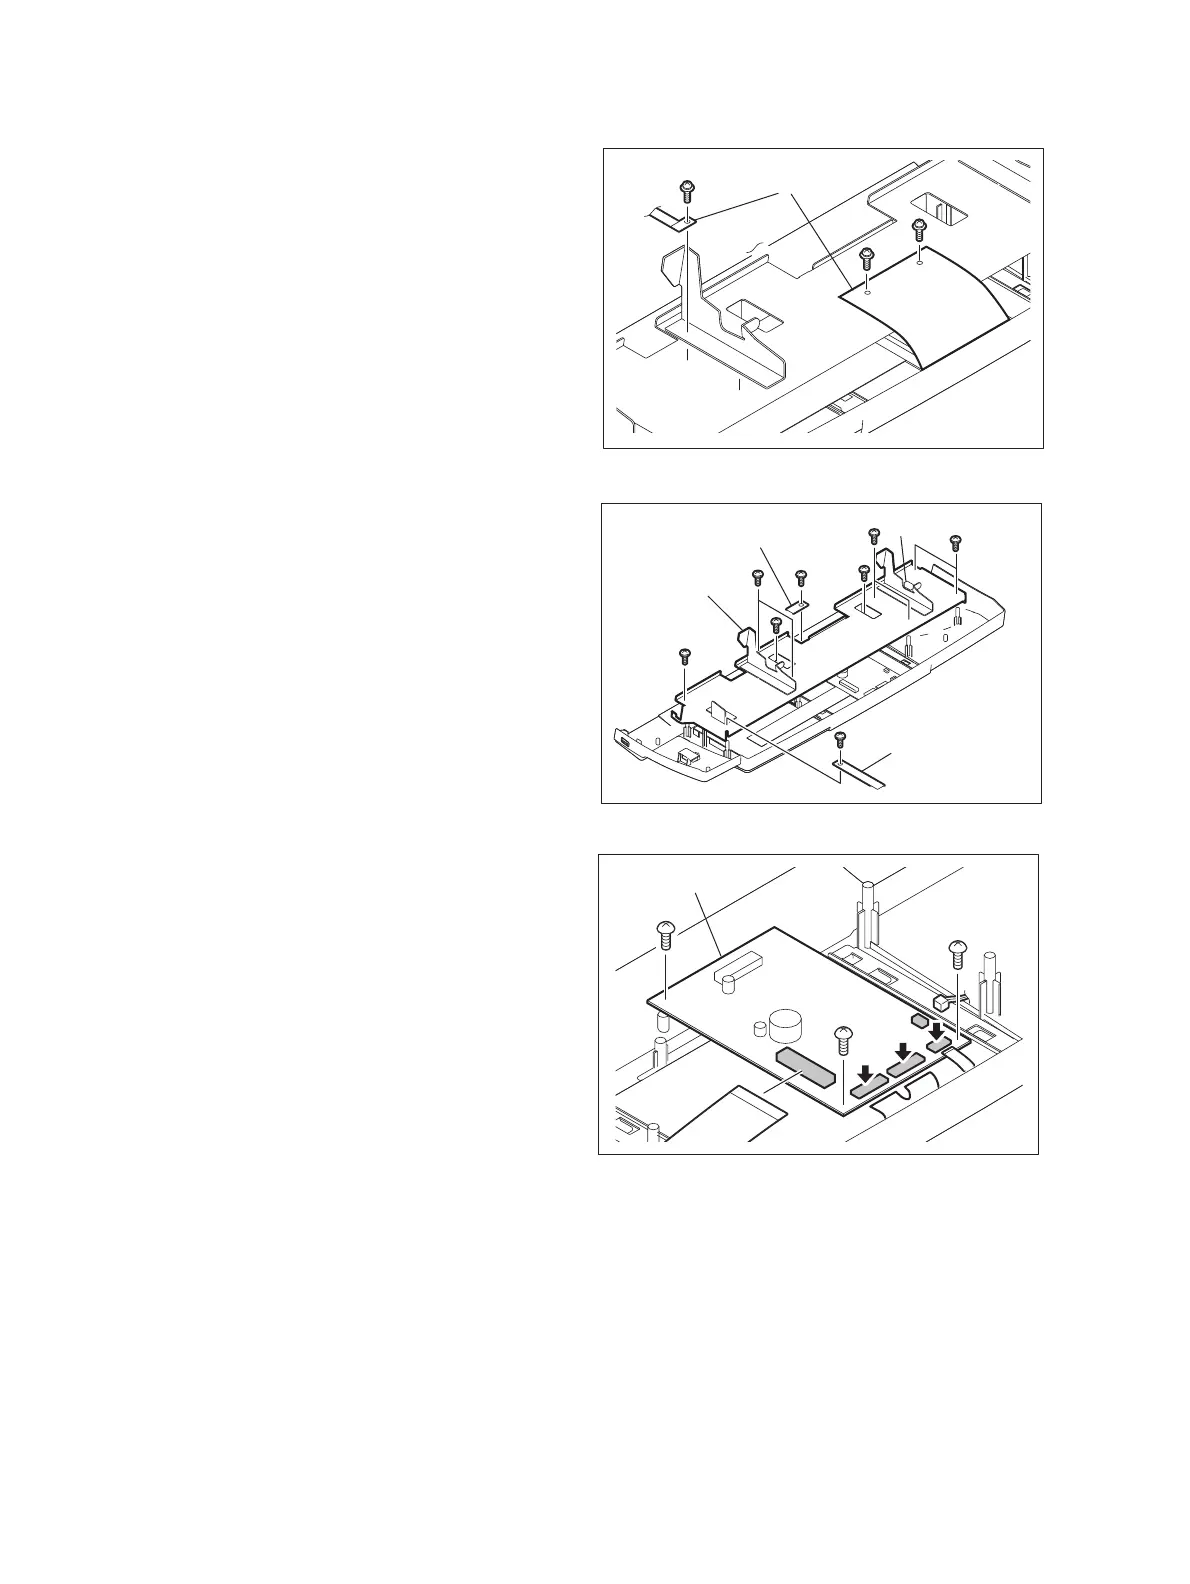
(2) Remove 3 screws and disconnect 2 shielding
wire[1].
Fig. 4-21
(3) Remove 11 screws and then disconnect 2
shielding wire[1] and 1 connector[2]. Then
take off the base stay[3].
When assembling, do not forget to connect
the connector and shielding wire.
Fig. 4-22
(4) Disconnect 5 connectors. (3 of the 5
connectors are equipped with a lock.)
(5) Remove 3 screws and take off the DSP
board and the sheet.
Fig. 4-23
[1]
[1]
[2]
[3]
[1]

 Loading...


