e-STUDIO556/656/756/856(Ver03) © 2012 TOSHIBA TEC CORPORATION All rights reserved
DISASSEMBLY AND REPLACEMENT
4 - 20
4.3.10 Lens unit
(1) Take off the lens cover.
( P.4-11 "4.3.2 Lens cover")
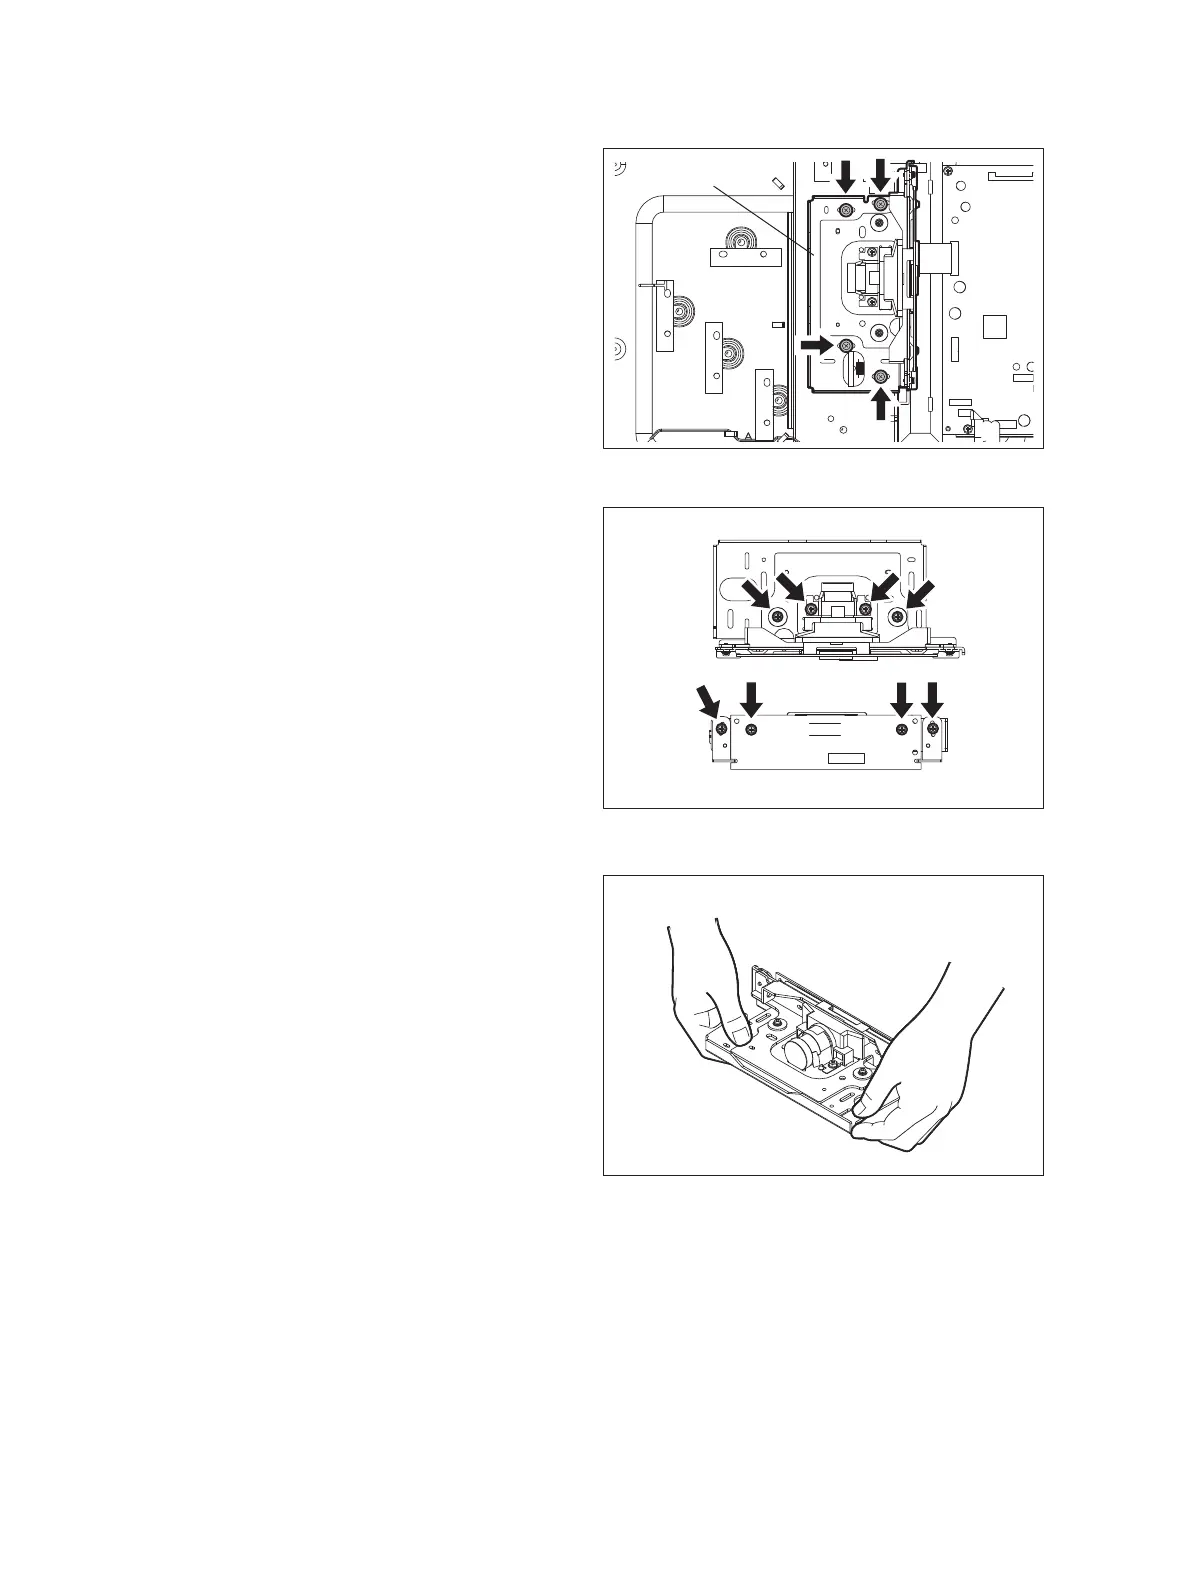
(2) Disconnect 1 connector, remove 4 screws,
then take off the lens unit.
Fig. 4-55
• When installing the lens unit, fix it while
pushing it to the rear direction.
• he lens unit must not be readjusted and
some part of its components must not be
replaced in the field since the unit is
precisely adjusted. If any of the
components is defective, replace the
whole unit.
• Do not touch 8 screws shown with the
arrows when replacing the lens unit.
• Handle the unit with care. Do not touch
the adjusted area and lens. (Hold the unit
as the right figure.).
Fig. 4-56
Fig. 4-57
Lens unit

 Loading...


