4
© 2012 TOSHIBA TEC CORPORATION All rights reserved e-STUDIO556/656/756/856(Ver03)
DISASSEMBLY AND REPLACEMENT
4 - 15
4.3.6 Exposure lamp (EXP)
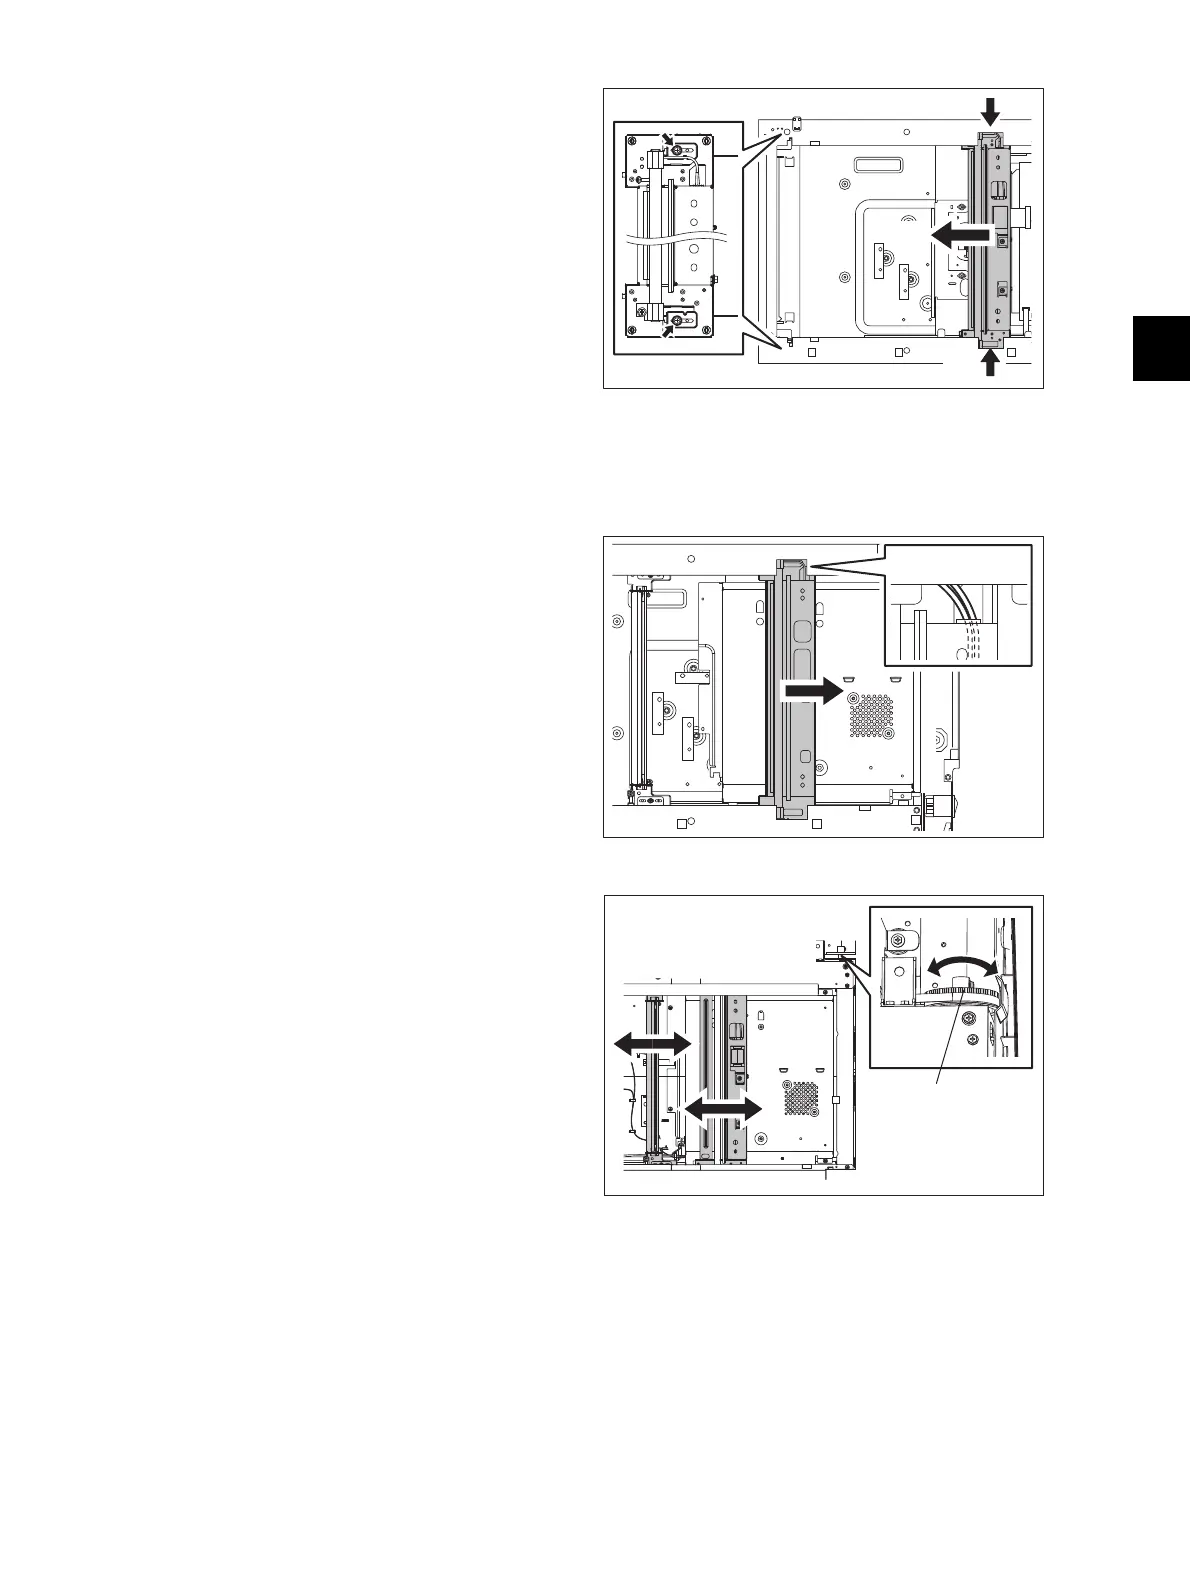
When installing the carriage-1, fix its bracket
temporarily at the cutout of the frame. After
that, move the carriage until it touches the
left side of the frame, and then tighten 2
screws to fix it permanently.
Fig. 4-40
(1) Take off the top rear cover.
( P.4-3 "4.1.6 Top rear cover")
(2) Take off the original glass.
( P.4-11 "4.3.1 Original glass")
(3) Move the carriage-1 to the center position.
Fig. 4-41
Rotate the drive pulley to move the carriage.
Fig. 4-42
(
B
)
(
A
)
(
A
)
Drive pulley

 Loading...


