4
© 2012 TOSHIBA TEC CORPORATION All rights reserved e-STUDIO556/656/756/856(Ver03)
DISASSEMBLY AND REPLACEMENT
4 - 9
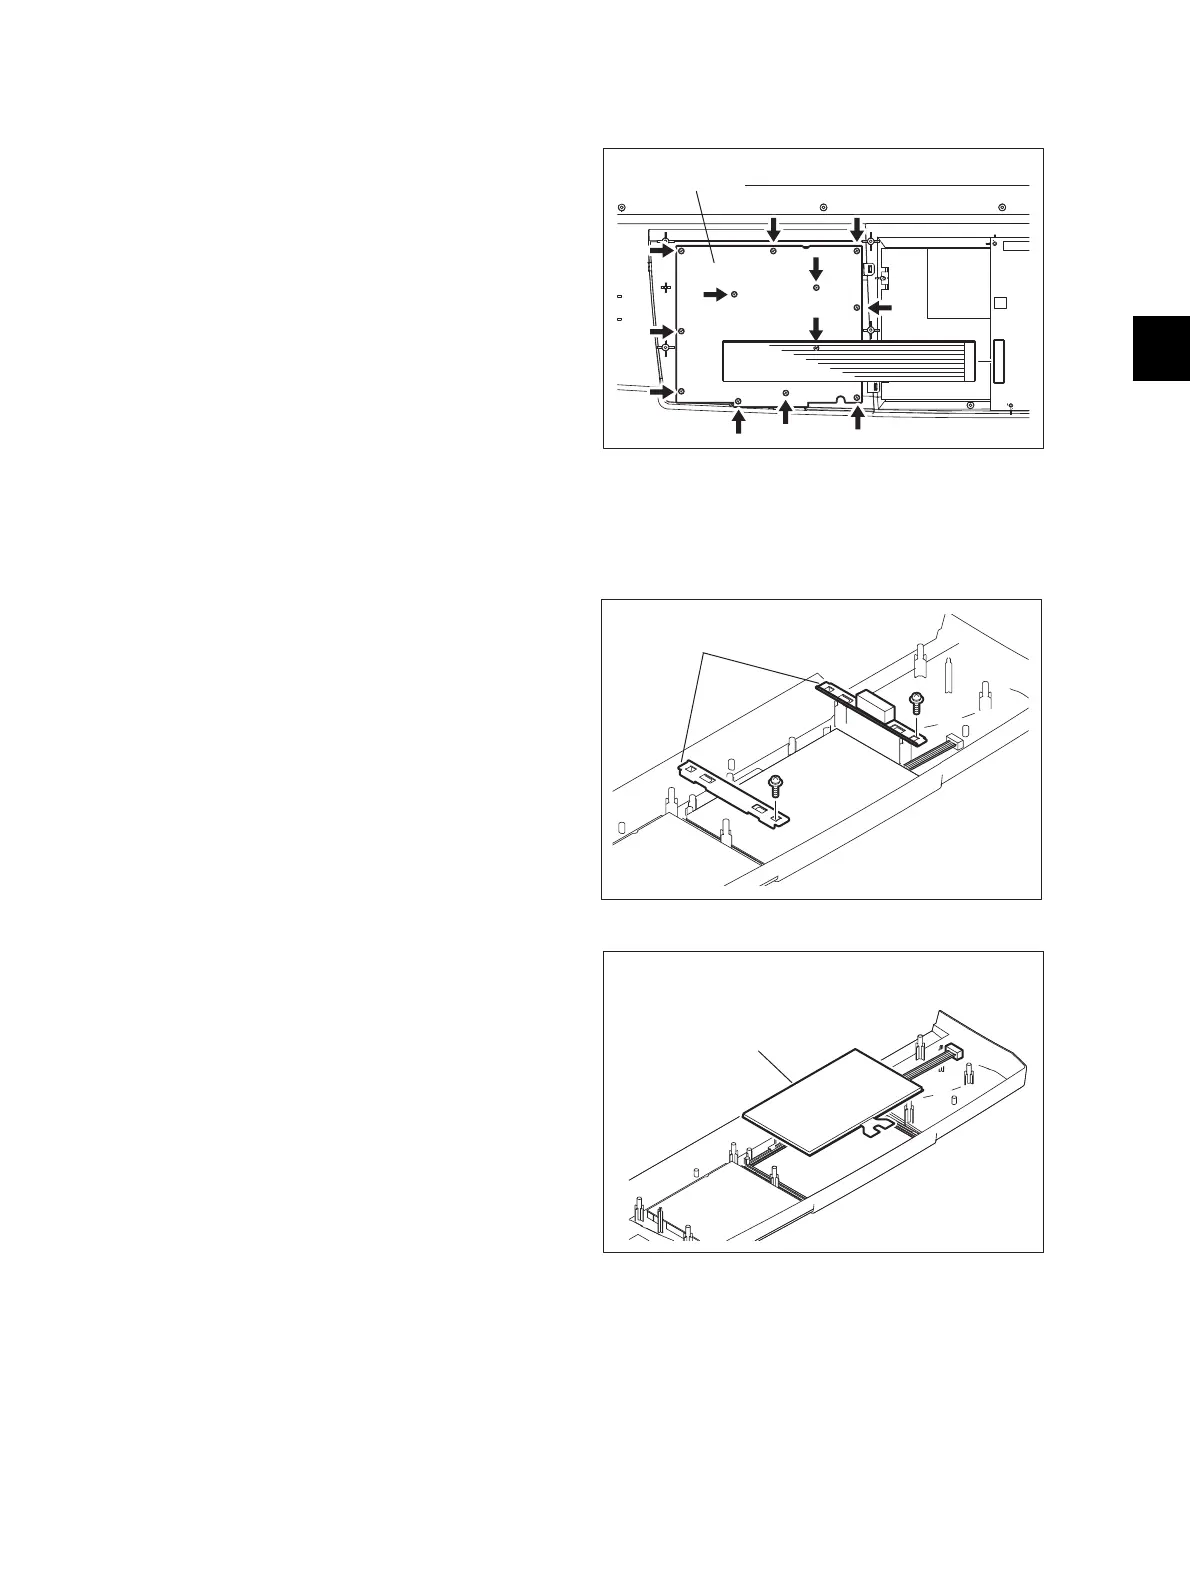
4.2.3 KEY board (KEY)
4.2.4 LCD panel (LCD) / Touch panel (TCP)
(1) Take off the base stay.
( P.4-6 "4.2.1 Control panel unit")
(2) Disconnect 1 connector and remove 12
screws. Take off the KEY board.
Fig. 4-24
(1) Remove the DSP board.
( P.4-8 "4.2.2 DSP board (DSP)")
(2) Remove 2 screws and take off the 2
brkects[1].
(3) Remove 2 screws and take off the LCD.
Fig. 4-25
(4) Take off the LCD panel/touch panel[1].
Be sure that no dust or stain is on the LCD
panel or the touch panel before the
installation.
Fig. 4-26
KEY board
[1]
[1]

 Loading...


