e-STUDIO556/656/756/856(Ver03) © 2012 TOSHIBA TEC CORPORATION All rights reserved
FIRMWARE UPDATING
11 - 48
11.5.8 Fax unit firmware (GD-1250)
• Before updating the FAX ROM, make sure to print out the current Function list for
maintenance, Function list (ADMIN), Address book list and Group number information. In
case the updating is failed and the registered information of the users is lost for some reason,
re-register the user information referring to the lists and recover it.
• Confirm the following items before turning OFF the power of the equipment. Turning OFF the
power may clear the data below.
- Confirm that the “MEMORY RX” LED is OFF and there are no memory reception data.
- Print the “Mailbox/Relay box report” and then confirm that there are no F code data.
- Press the [JOB STATUS] button to display the screen and then confirm that there are no
memory transmission data.
[A] Firmware update
(1) Install the ROM to the download jig (K-PWA-DLM-320).
Make sure the direction is correct.
(2) Press the [ON/OFF] button on the control panel to shut down the equipment.
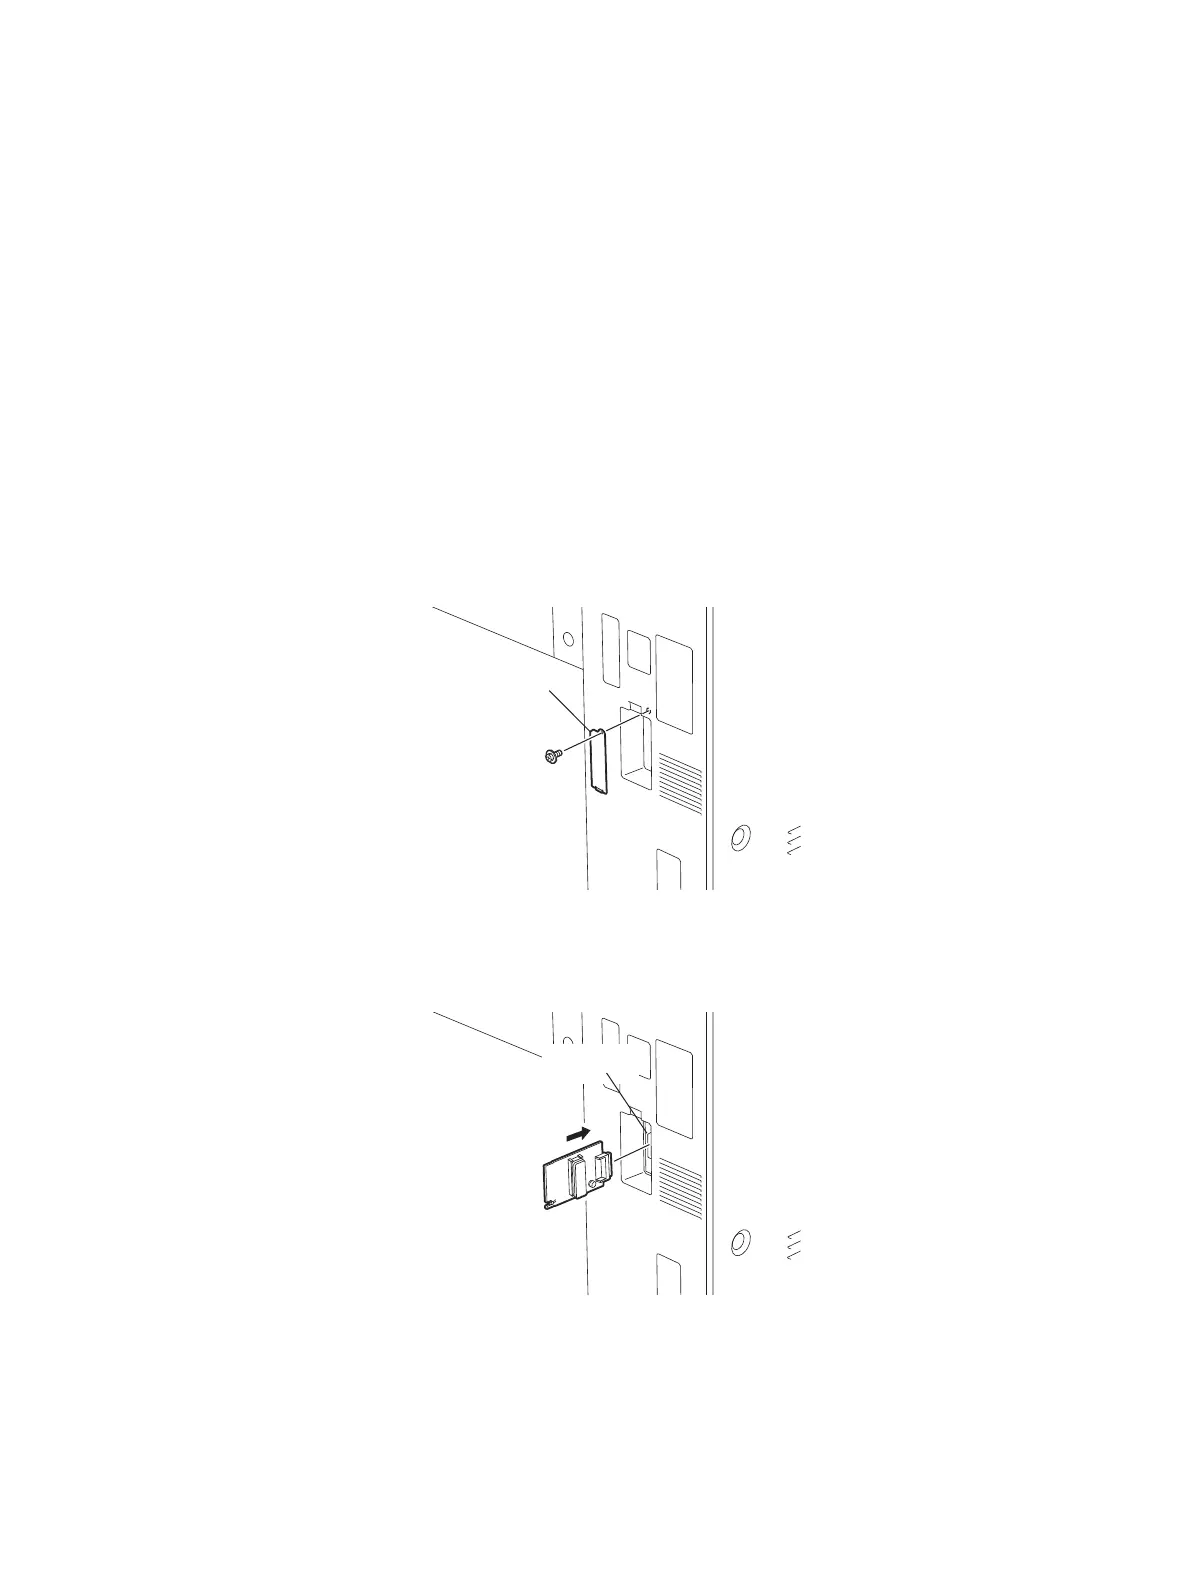
(3) Remove the cover plate.
Fig. 11-23
(4) Connect the download jig with the jig connector (CN602) on the FAX board.
Fig. 11-24
(5) Press the [ON/OFF] button while simultaneously holding down the [0] and [8] buttons.
Updating starts automatically and the LED on the download jig lights.
Connector

 Loading...


