e-STUDIO556/656/756/856(Ver03) © 2012 TOSHIBA TEC CORPORATION All rights reserved
DISASSEMBLY AND REPLACEMENT
4 - 56
4.6.2 Wire cleaner drive unit / Wire cleaner drive motor (M12)
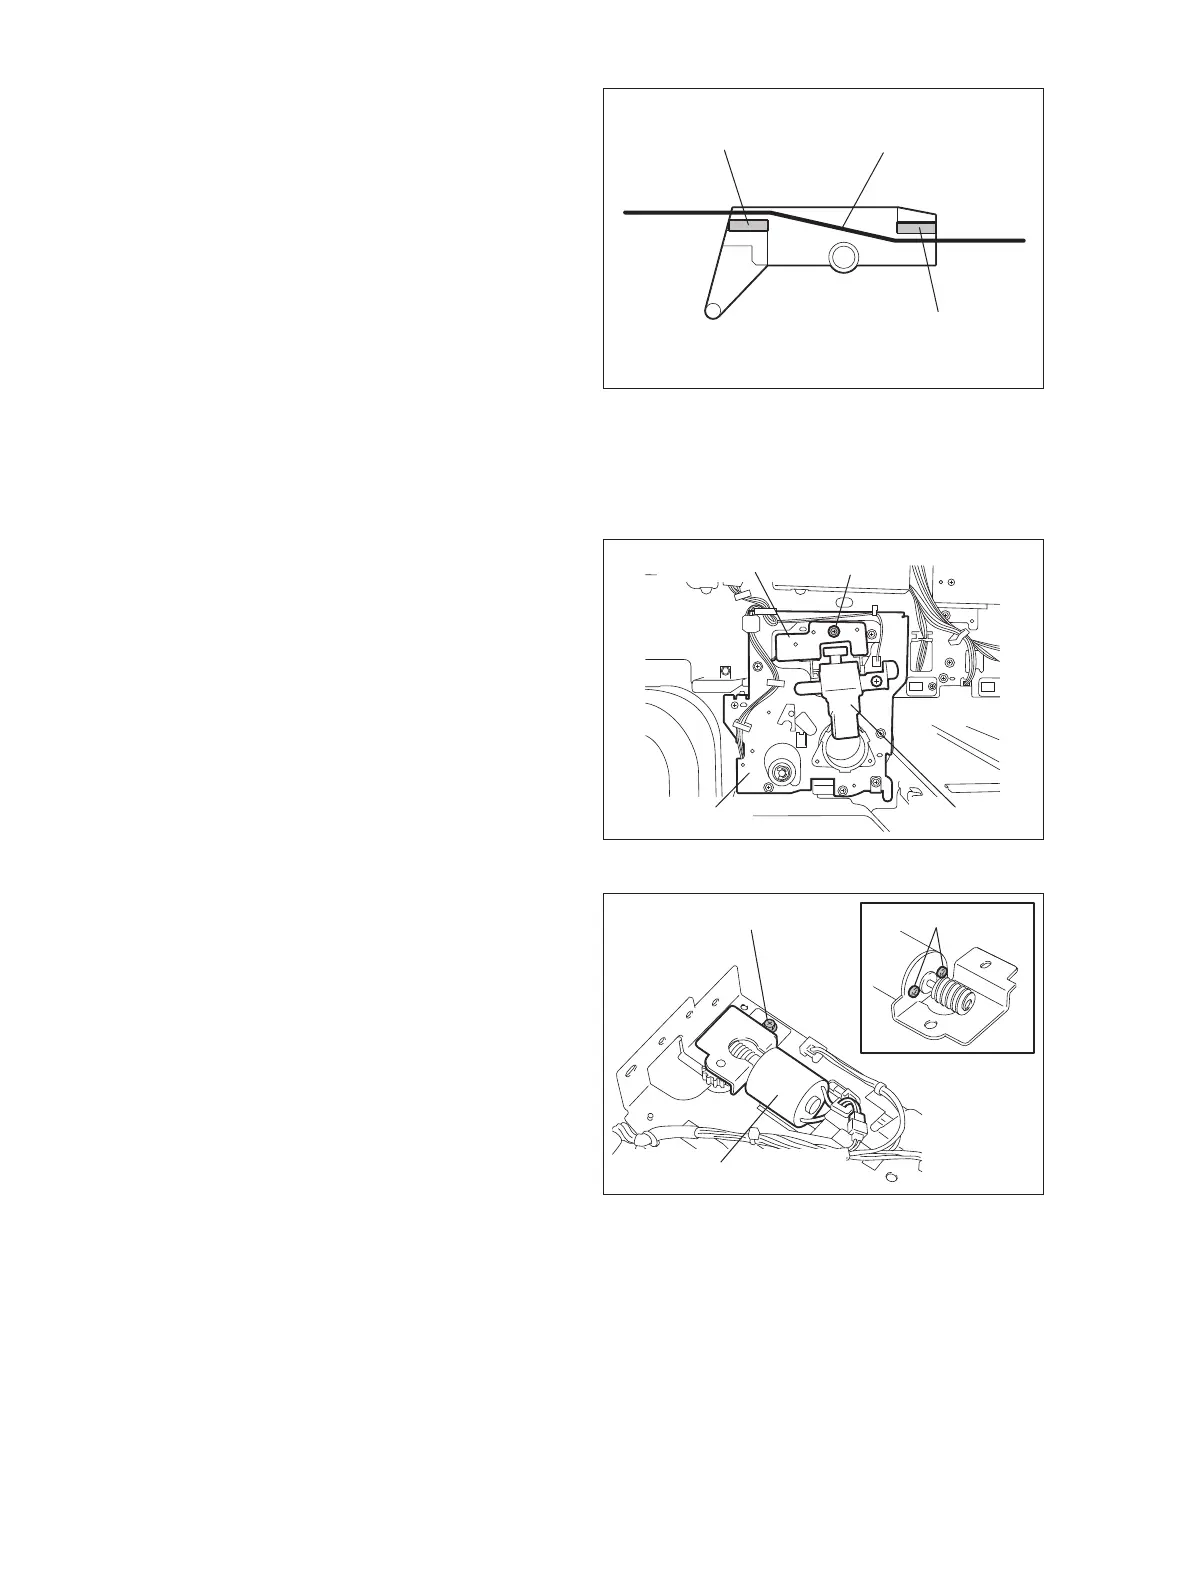
When assembling the main charger, install it
so that the charger wire passes through the
center of the pad.
Fig. 4-158
(1) Take off the cleaner unit.
( P.4-61 "4.7.1 Cleaner unit")
(2) Disconnect 1 connector, remove 1 screw,
and then take off the wire cleaner drive unit.
Fig. 4-159
(3) Disconnect 1 connector, remove 1 screw,
and then take off the wire cleaner drive motor
(M12) with the bracket.
(4) Remove 2 screws and take off the wire
cleaner drive motor.
Pay attention to the size (length) of the
screws. If incorrect ones are used, the motor
could be damaged.
Fig. 4-160
Cleaning pad
Charger wire
Cleaning pad
Charger guide
Main charger
Cleaner unit
Screw
Screw
Screw
Wire cleaner drive motor

 Loading...


