e-STUDIO556/656/756/856(Ver03) © 2012 TOSHIBA TEC CORPORATION All rights reserved
ADJUSTMENT
6 - 60
6.12.2 Adjustment procedure
• If the transfer belt deviates towards the front side:
Pull out the transfer/transport unit to perform adjustment.
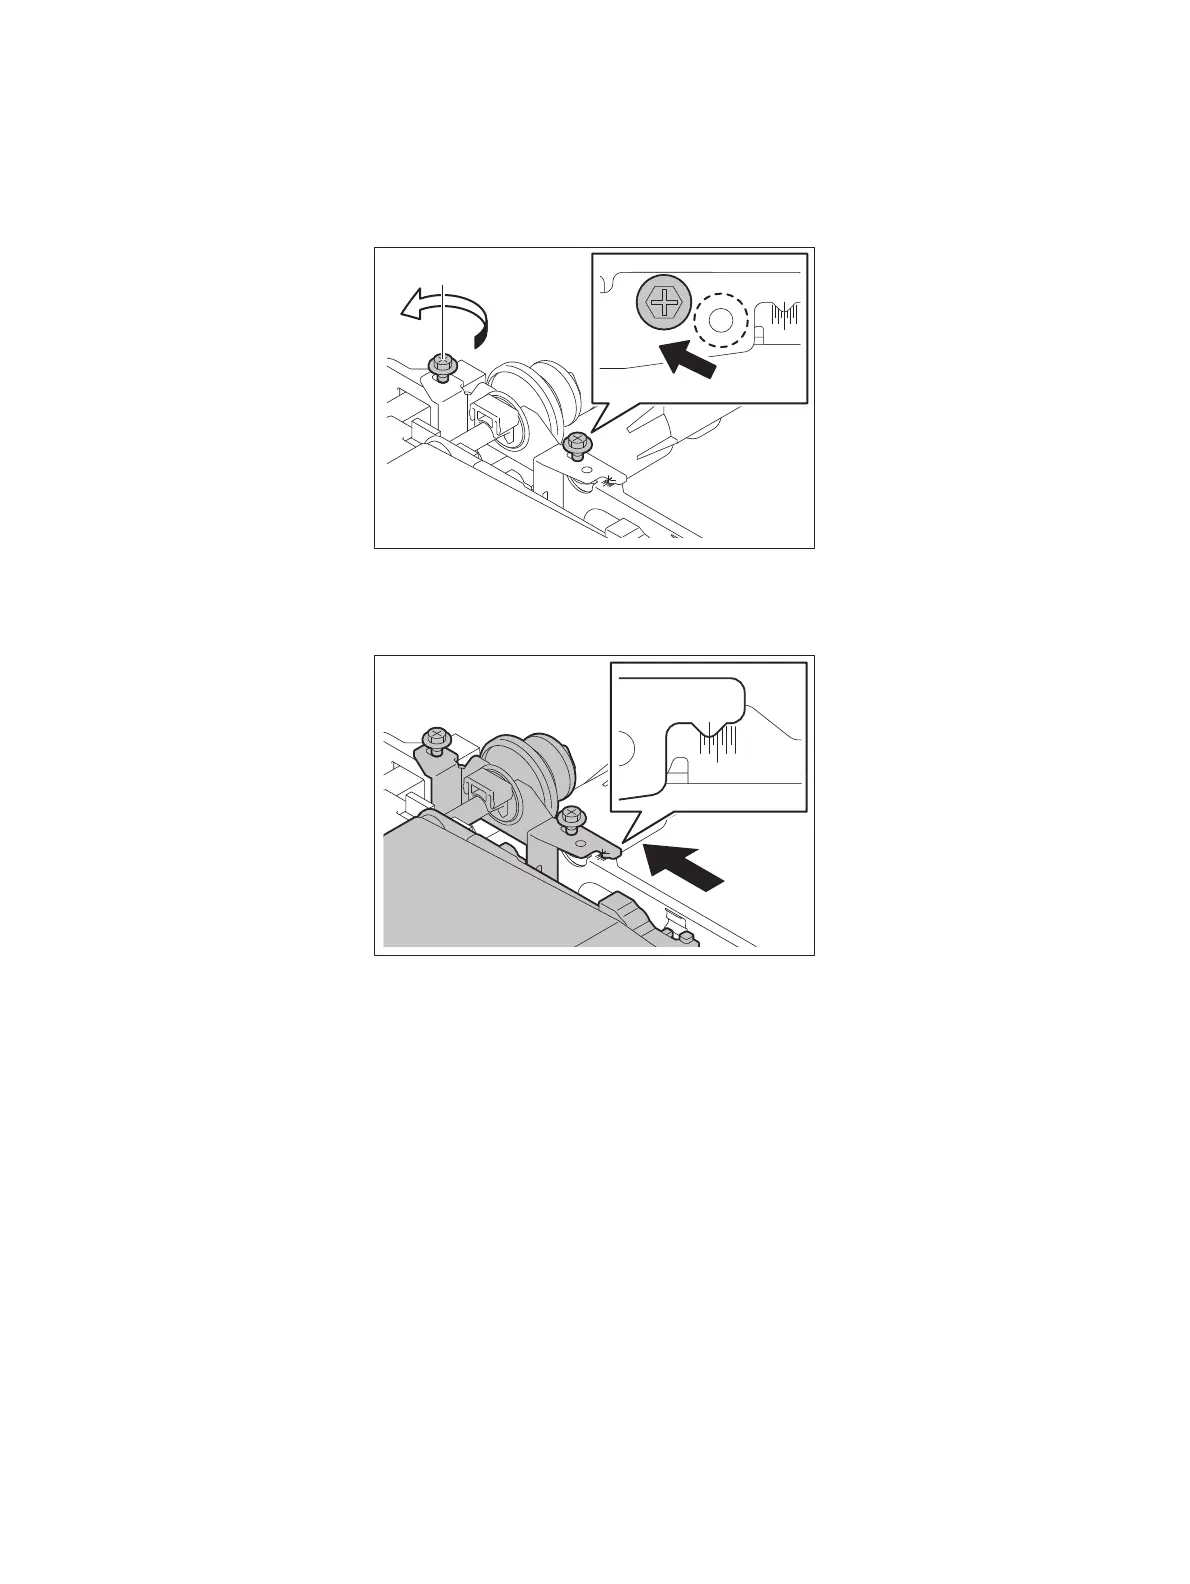
(1) Move the screw installed in the fixing hole to the adjustment hole, and temporarily fix it.
(2) Loosen the screw on the other side so that the bracket can be adjusted.
Fig. 6-53
(3) Move the bracket somewhat to the left-hand side (fuser unit side), and tighten the 2 screws.
Fig. 6-54
(4) If the transfer belt still deviates towards the front side after copying, move the belt to the center
manually and make a copy again.
(5) If it still deviates, change the position of the bracket (scale) and adjust it again.
• If the belt still deviates towards the front side after the adjustment: Move the bracket to the
left-hand side (fuser unit side) and make copies.
• If the belt still deviates towards the rear side after the adjustment: Move the bracket to the
right-hand side (drum side) and make copies.
 Loading...


