EasyManuals Logo

Toshiba e-STUDIO556 User Manual

Toshiba e-STUDIO556
1094 pages
To Next Page IconTo Next Page
To Previous Page IconTo Previous Page
Page #292 background imageLoading...
Page #292 background image
e-STUDIO556/656/756/856(Ver03) © 2012 TOSHIBA TEC CORPORATION All rights reserved
DISASSEMBLY AND REPLACEMENT
4 - 146
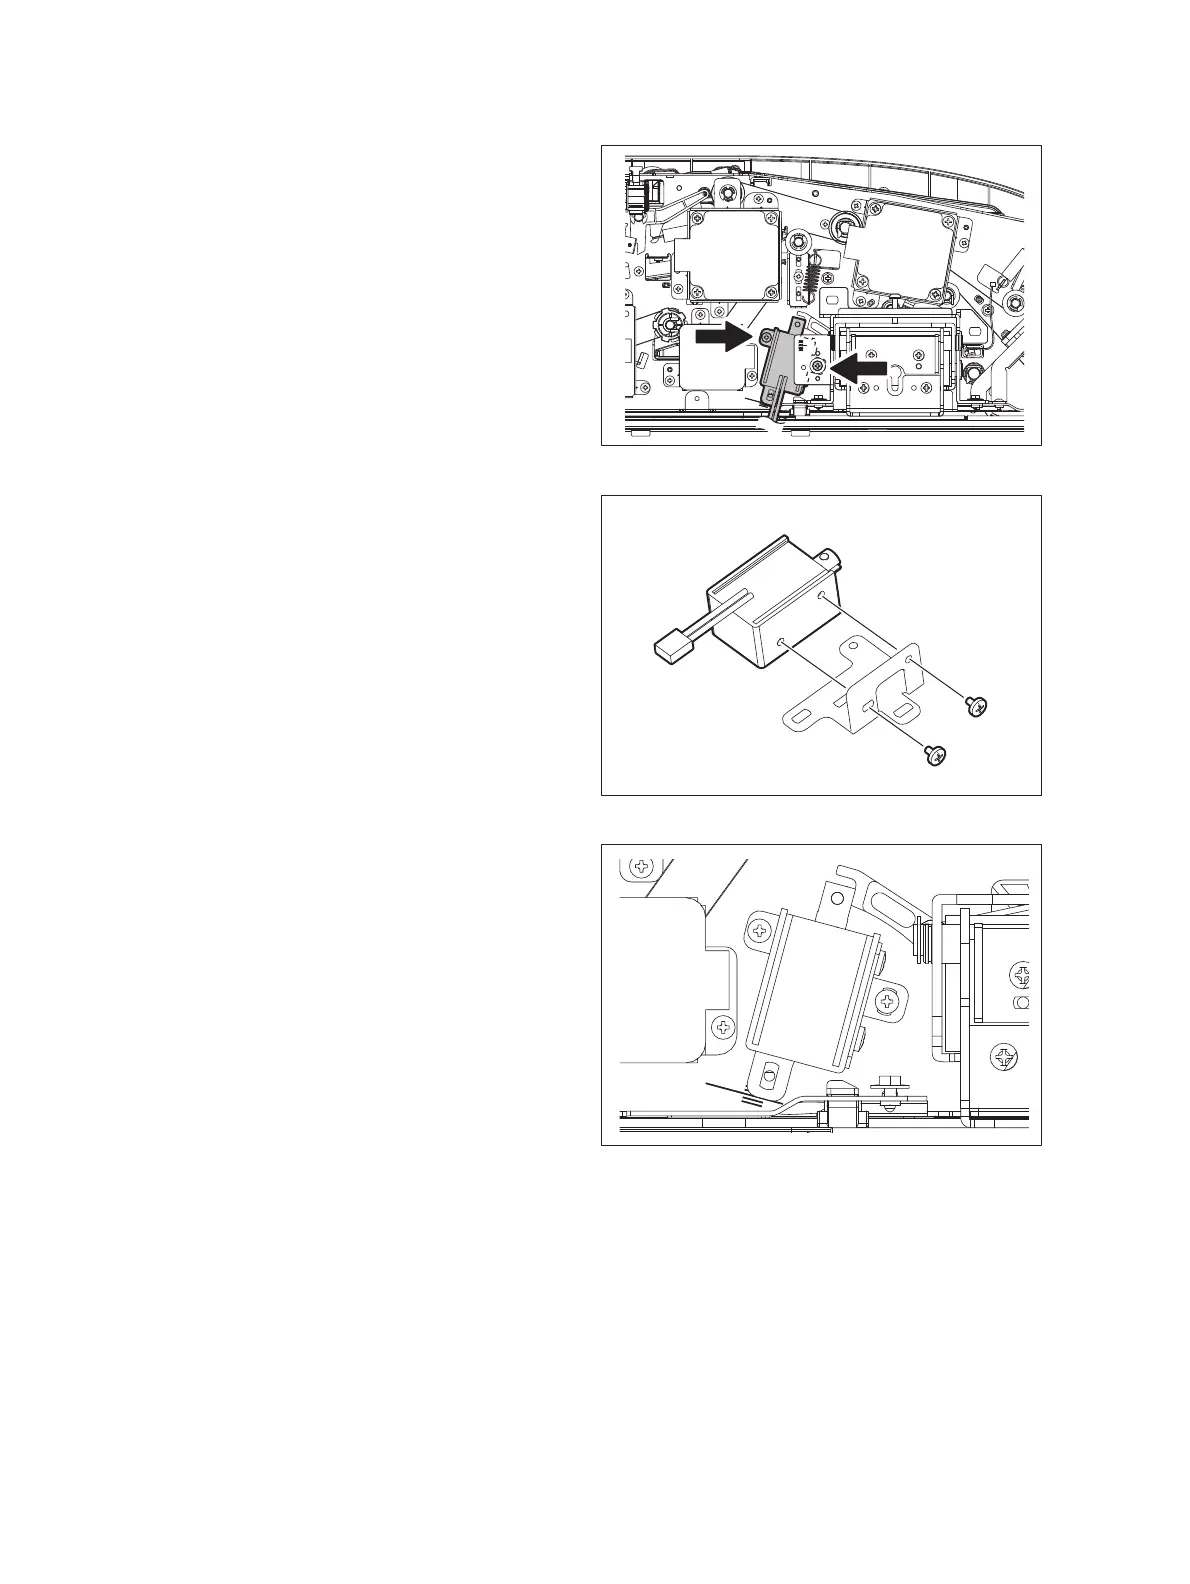
4.12.32 Original reverse solenoid (SOLR2)
(1) Take off the RADF rear cover.
( P.4-117 "4.12.3 RADF rear cover")
(2) Disconnect 1 connector.
(3) Remove 2 screws and take off the original
reverse solenoid with the bracket.
Fig. 4-414
(4) Remove 2 screws and take off the bracket
from the original reverse solenoid.
Fig. 4-415
Note:
Before taking off the solenoid, read the scale.
When reinstalling, align it with the
corresponding position on the scale.
Fig. 4-416

Table of Contents

Other manuals for Toshiba e-STUDIO556

Questions and Answers:

Question and Answer IconNeed help?

Do you have a question about the Toshiba e-STUDIO556 and is the answer not in the manual?

Toshiba e-STUDIO556 Specifications

General IconGeneral
BrandToshiba
Modele-STUDIO556
CategoryAll in One Printer
LanguageEnglish

Related product manuals