4
© 2012 TOSHIBA TEC CORPORATION All rights reserved e-STUDIO556/656/756/856(Ver03)
DISASSEMBLY AND REPLACEMENT
4 - 21
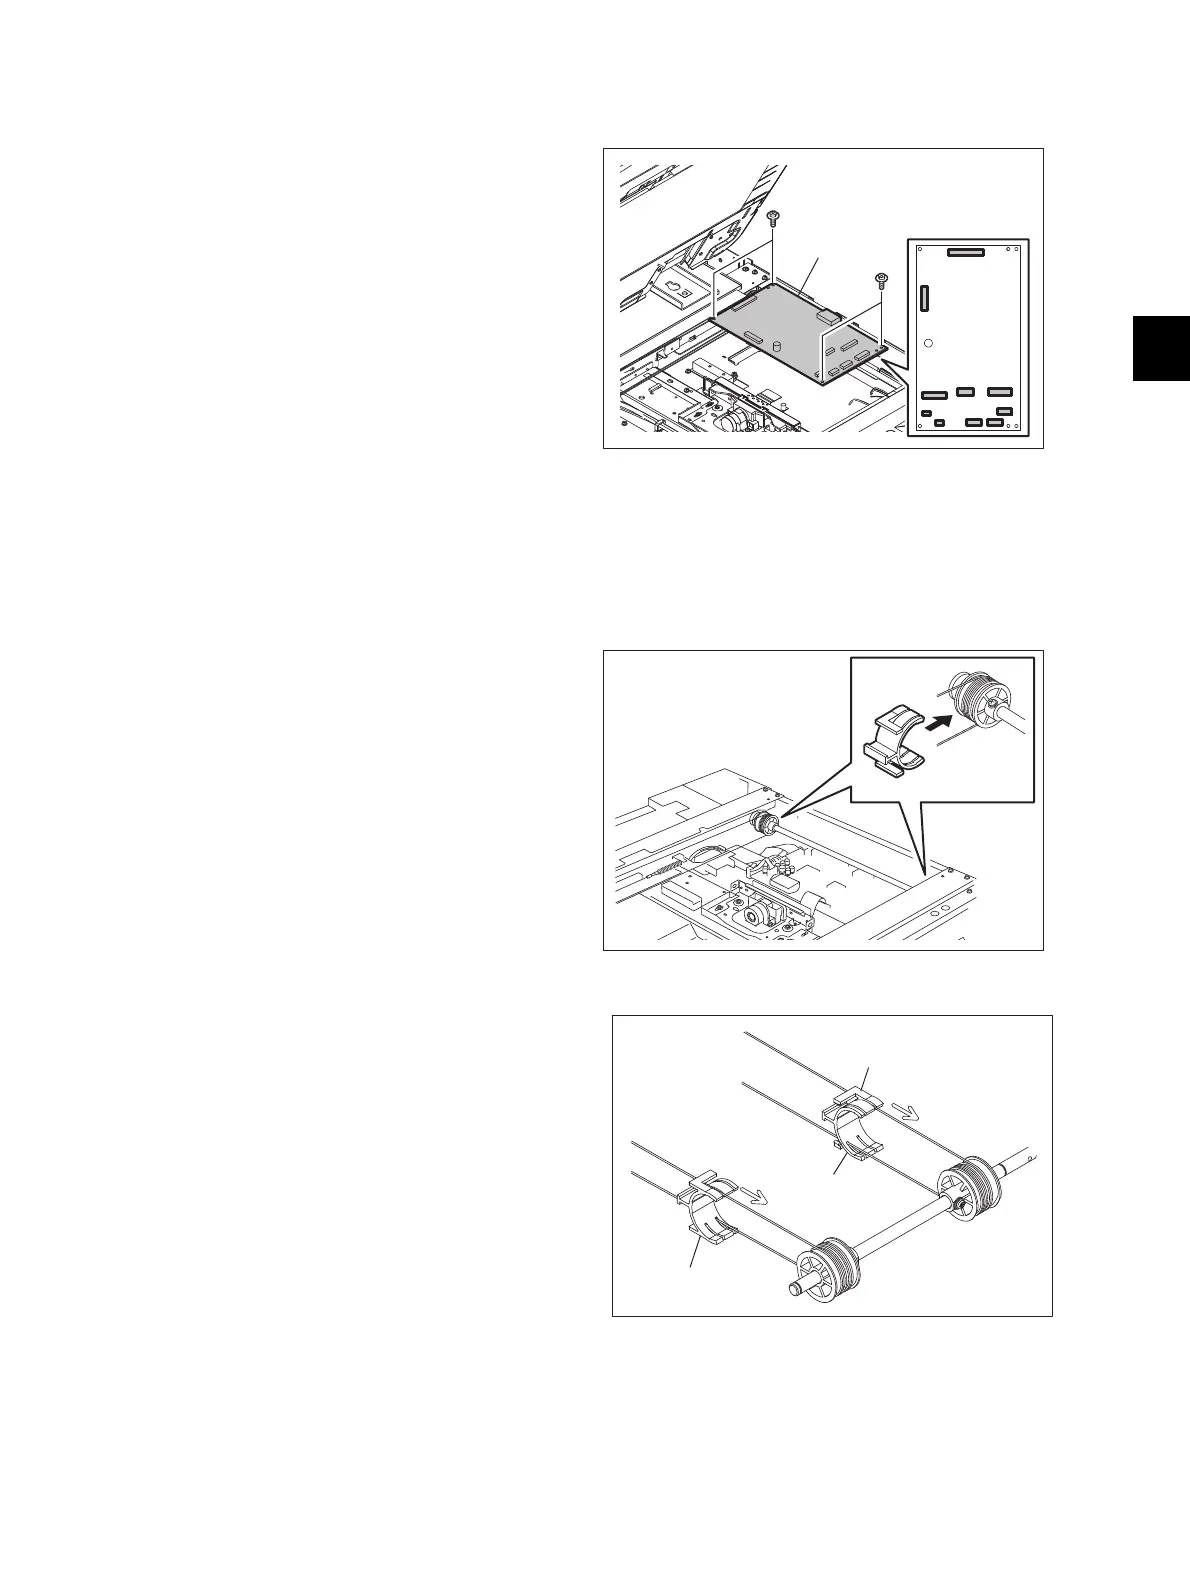
4.3.11 Scanning section control PC board (SLG)
4.3.12 Carriage wire / Carriage-2
[A] Carriage wire / carriage-2
(1) Take off the lens cover.
( P.4-11 "4.3.2 Lens cover")
(2) Disconnect 10 connectors and remove 4
screws to take off the SLG board.
Fig. 4-58
(1) Take off the carriage-1.
( P.4-13 "4.3.5 Carriage-1")
(2) Attach the wire holder jigs to the pulleys to
prevent the wires from loosening.
Fig. 4-59
• When the wire holder jig is attached,
make sure that the wire is not shifted or
loosened.
• The wire should come out of the slot of
the wire holder jig and be passed under
the arm of it.
Fig. 4-60
SLG board
Arm
Wire holder jig
Wire holder jig

 Loading...


