4
© 2012 TOSHIBA TEC CORPORATION All rights reserved e-STUDIO556/656/756/856(Ver03)
DISASSEMBLY AND REPLACEMENT
4 - 13
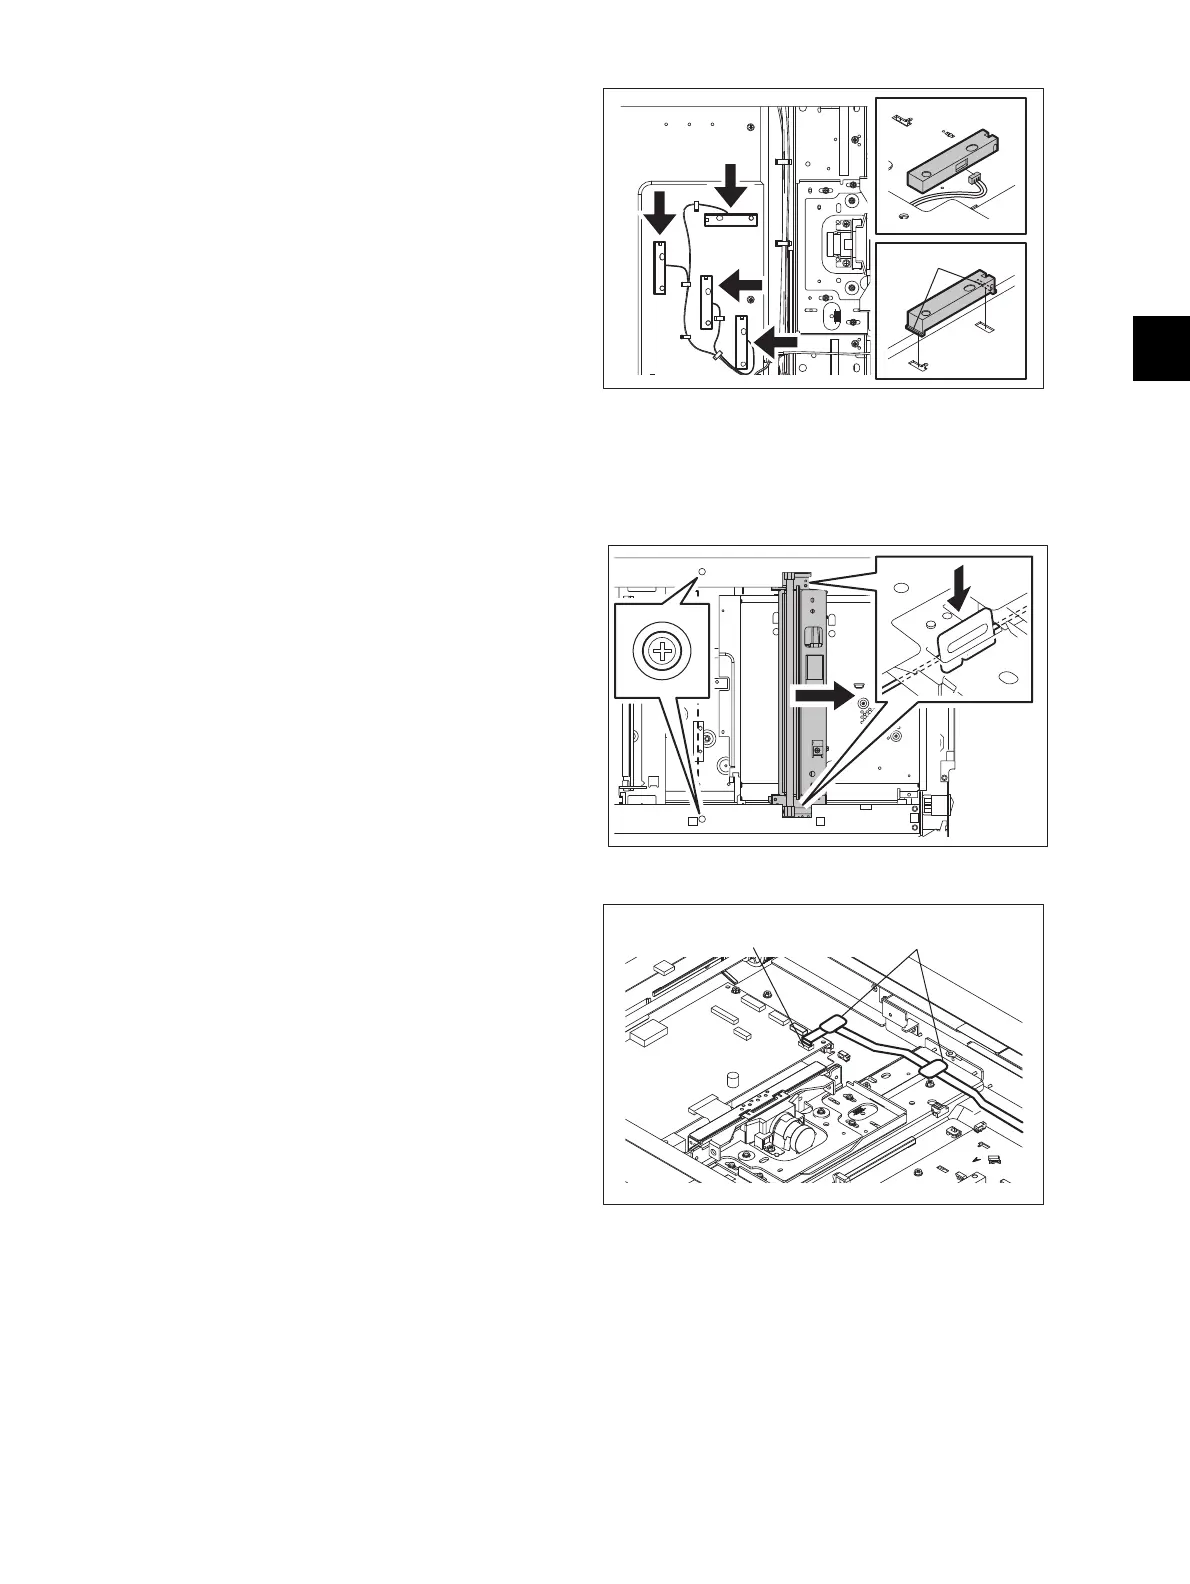
4.3.5 Carriage-1
(3) Disconnect 1 connector each, release 2
latches each and take off 4 APS sensors.
Fig. 4-34
(1) Take off the original glass.
( P.4-11 "4.3.1 Original glass")
(2) Take off the top rear cover.
( P.4-11 "4.3.2 Lens cover")
(3) Take off the control panel unit.
( P.4-6 "4.2.1 Control panel unit")
(4) Move the carriage and position the holes of
the carriage to the holes of the frame.
(5) Remove 2 screws and take off the brackets
fixing the carriage-1 to the wire.
Fig. 4-35
(6) Remove the square seal fixing the lamp
harness to the base. Disconnect the
connector of the lamp harness from the SLG
board
Fig. 4-36
Latch
Seal
Connector

 Loading...


