6
© 2012 TOSHIBA TEC CORPORATION All rights reserved e-STUDIO556/656/756/856(Ver03)
ADJUSTMENT
6 - 73
6.14.3 RADF image skew adjustment
First check if the image adjustment has been performed properly and then start this adjustment
for the RADF. Also, the RADF position and height shall be adjusted correctly.
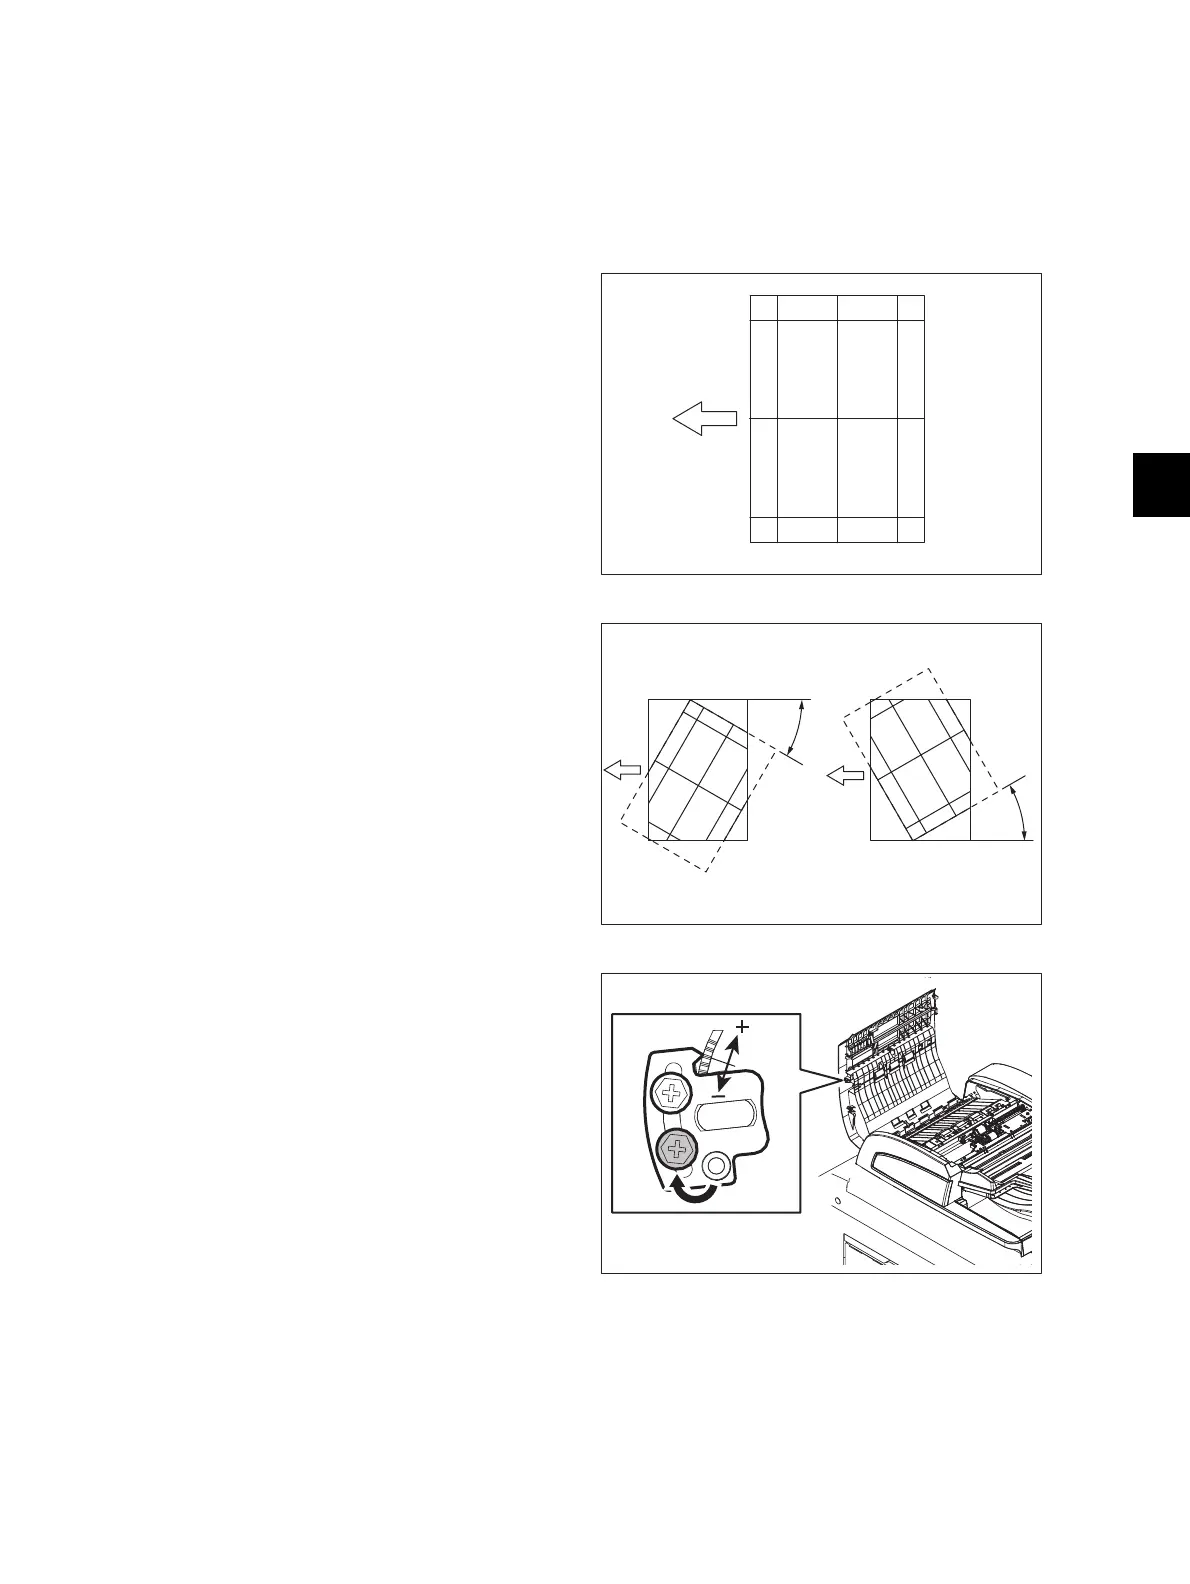
[A] Simplex copying:
(1) Check the image using the chart (original)
with vertical and horizontal lines in the
following procedure.
Place the chart provided as an original with
its face up on the original tray of the RADF,
select [1 Sided -> 1 Sided] and make copies.
Fig. 6-77
(2) Superimpose the chart on the copy and
check the inclination of the copy image.
Fig. 6-78
(3) If the adjustment is necessary, open the
original jam access cover and change the
position of the lower screw fixing the plate.
Loosen the screw, and then if the image
skew is “C” as shown in the figure above,
shift the aligning plate in the direction of “+”,
and if “D”, shift it to “-”.
Fig. 6-79
Chart
C
D

 Loading...


