4
© 2012 TOSHIBA TEC CORPORATION All rights reserved e-STUDIO556/656/756/856(Ver03)
DISASSEMBLY AND REPLACEMENT
4 - 91
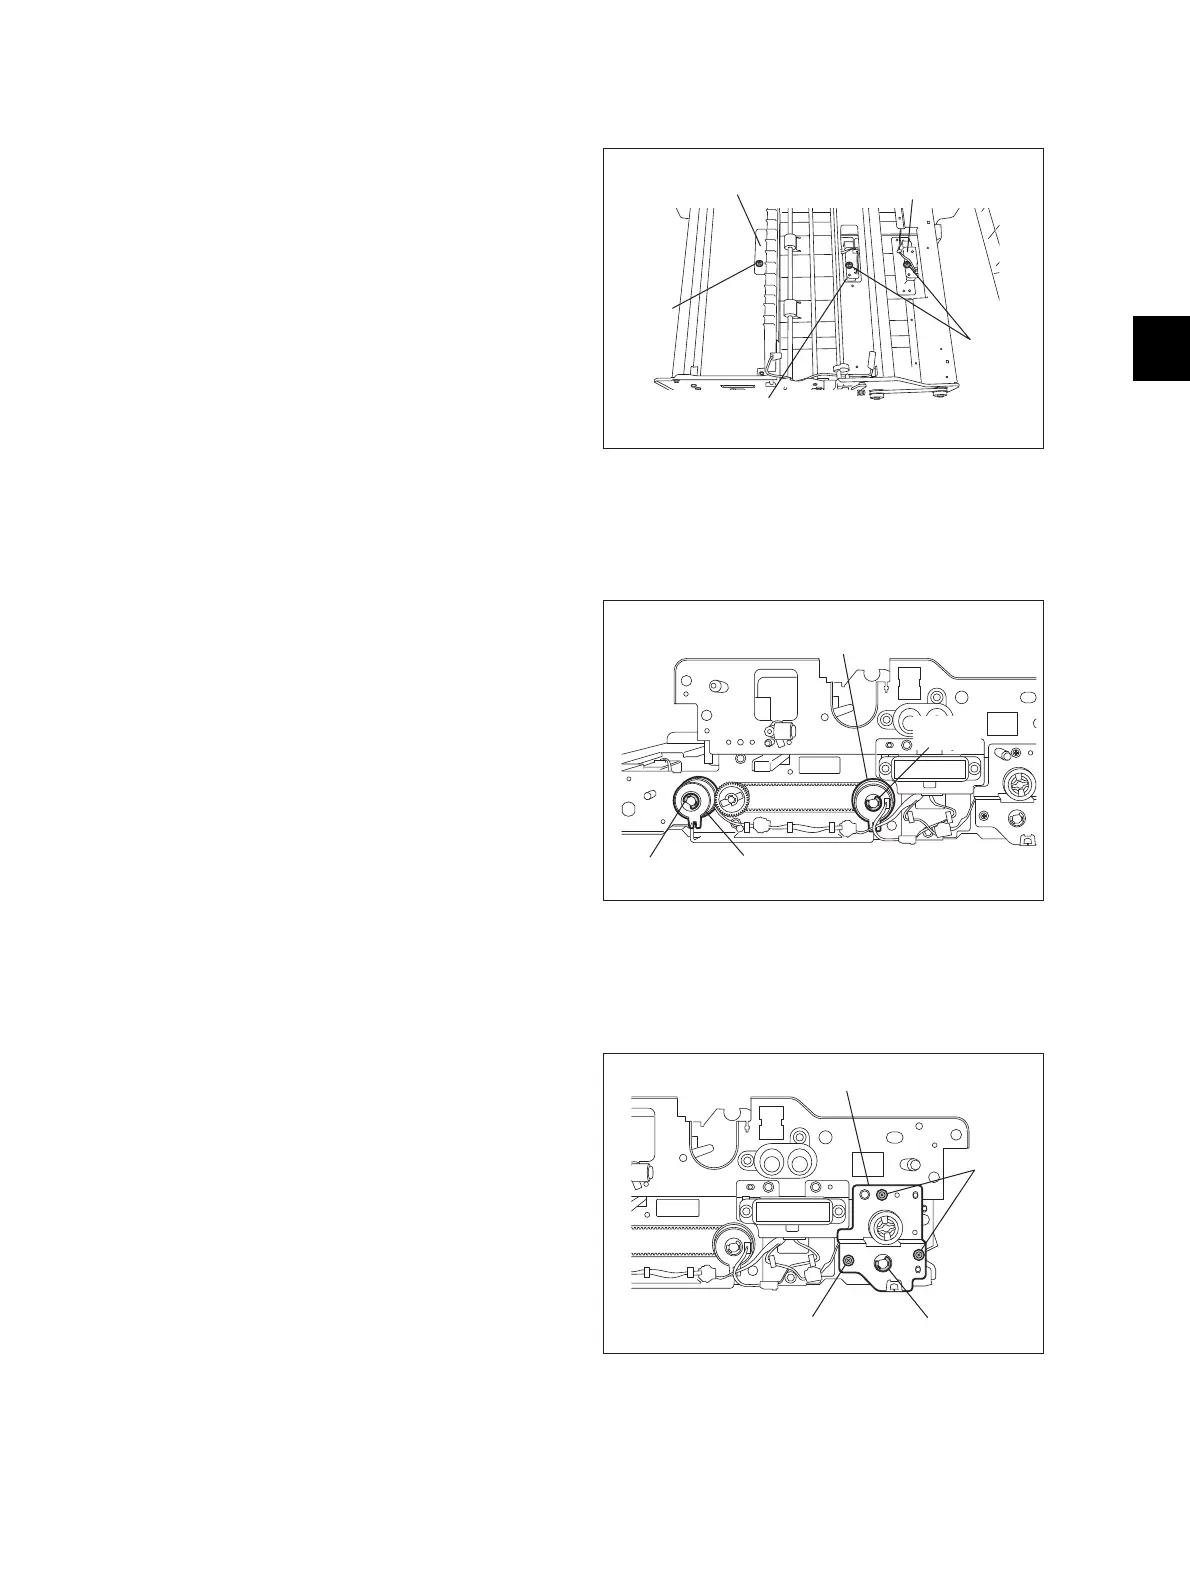
4.9.6 Horizontal transport sensor-1, -2 and -3 (S19, S20, S21)
4.9.7 Horizontal transport section driving clutch-2 (CLT2)/ -3 (CLT3)
4.9.8 Horizontal transport section driving clutch-1 (CLT1)
(1) Take off the transfer unit.
( P.4-85 "4.9.1 Transfer unit")
(2) Take off the fuser unit.
( P.4-96 "4.10.2 Fuser unit")
(3) Remove 1 screw to take off each sensor with
its bracket.
(4) Disconnect 1 connector and release the latch
to take off each sensor.
The horizontal transport sensor-3 (S21) can
be replaced without the transport unit being
taken off.
Fig. 4-257
(1) Remove the transfer/transport unit.
( P.4-89 "4.9.5 Transfer/Transport unit")
(2) Disconnect 1 connector and remove 1 E-ring
to take off the each clutch.
Fig. 4-258
(1) Take off the transfer/transport unit.
( P.4-89 "4.9.5 Transfer/Transport unit")
(2) Disconnect 1 connector.
(3) Remove 1 E-ring and 3 screws to take off the
bracket.
Fig. 4-259
Horizontal transport
sensor-1
Horizontal transport
sensor-2
Horizontal transport
sensor-3
Screw
Screw
Horizontal transport section
driving clutch-2
Horizontal transport section
driving clutch-3
E-ring
E-ring

 Loading...


