9
© 2012 TOSHIBA TEC CORPORATION All rights reserved e-STUDIO556/656/756/856(Ver03)
REPLACEMENT OF PC BOARDS / HDD
9 - 5
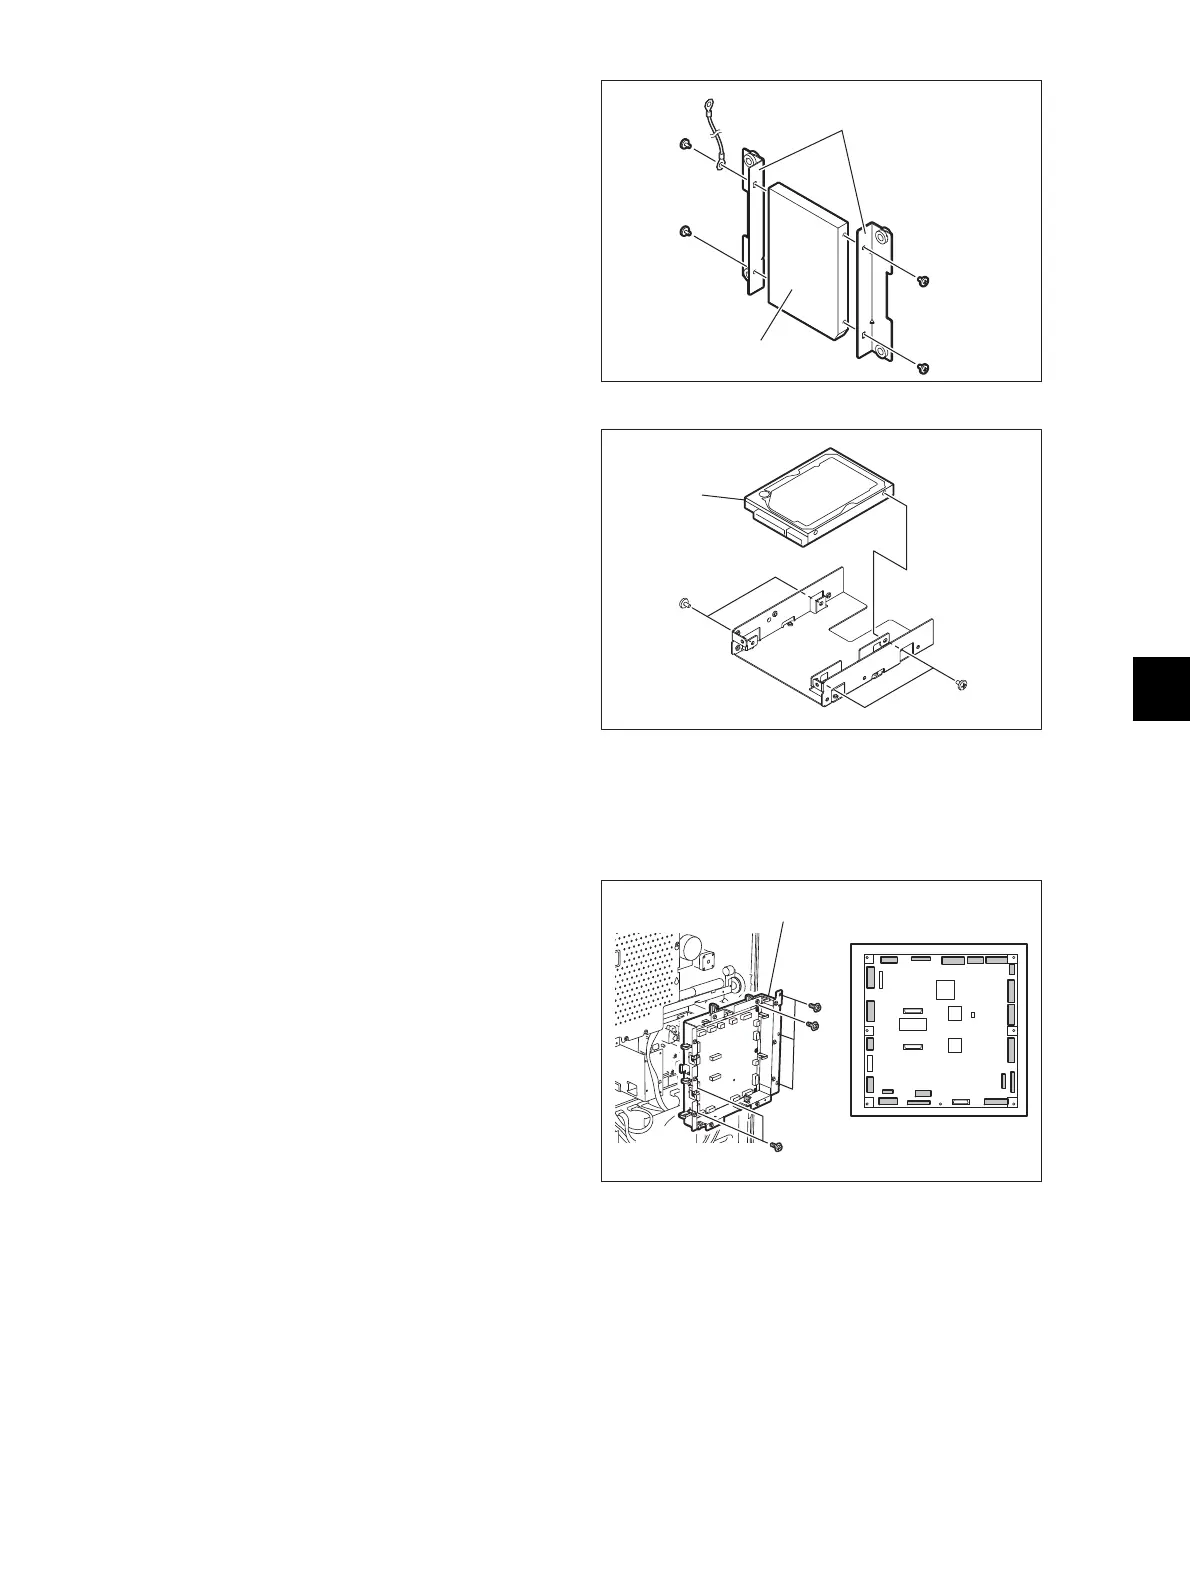
9.1.6 LGC board case
(5) Remove 4 screws and take off the HDD and
the ground wire from the brackets.
Fig. 9-12
(6) Remove 4 screws and take off the hard disk
[1].
Fig. 9-13
(1) Take off the rear cover.
P.4-5 "4.1.13 Rear cover"
(2) Take off the LGC board cover.
P.9-3 "9.1.4 Logic PC board (LGC board)"
(3) Disconnect 20 connectors of the LGC board.
(4) Remove 7 screws and release the hook to
take off the LGC board case with the board.
Fig. 9-14

 Loading...


