6
© 2012 TOSHIBA TEC CORPORATION All rights reserved e-STUDIO556/656/756/856(Ver03)
ADJUSTMENT
6 - 47
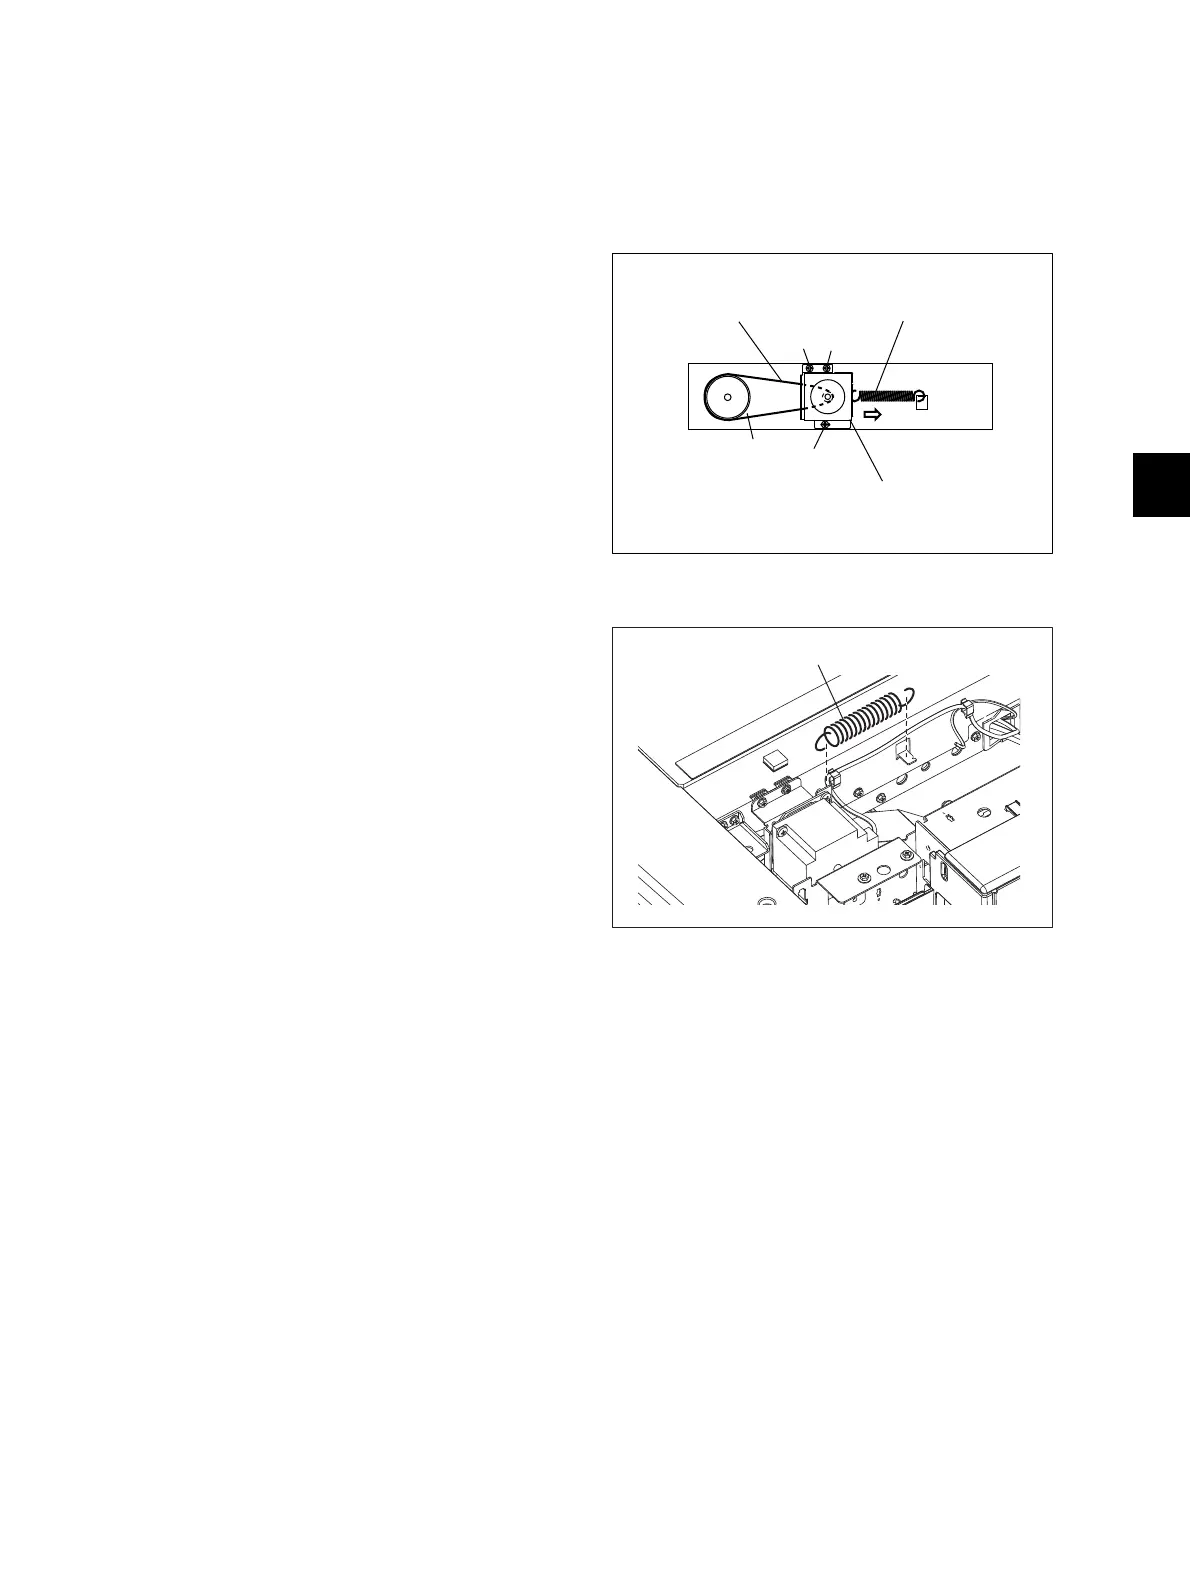
6.9.2 Belt tension adjustment of the Scan motor
When the scan motor has been installed again, adjust the belt tension in the following procedure.
<Procedure>
6.9.3 Carriages
[A] Installing carriage wires
When replacing the carriage wires, refer illustrations below:
[Front side]
(1) Hook the belt tension jig to the motor bracket
and the flame.
(2) Loosen screw-A and -C. (There is no need to
loosen screw-B, since it is a shoulder screw.)
(3) The scan motor is pulled by the belt tension
jig. Fix screw-A and then -C at the stopped
position.
Fig. 6-30
(4) Remove the belt tension jig.
Fig. 6-31
C
A
B
Pully
Timing belt
Scan motor
Belt tension jig
Belt tension jig

 Loading...


