190-01115-01 G3X™/G3X Touch™ Avionics Installation Manual
Rev. AV Page 17-9
17.4.5 Pneumatic Connections
The following steps should be used to aid in the fabrication of pneumatic hose connections and in attaching
the aircraft pitot pressure source and aircraft static pressure source to the GSU 25.
CAUTION
If the AOA port is unused, connect it to the static port to avoid overpressuring (and
causing damage to) the internal AOA sensor.
CAUTION
When the GSU 25 is used in conjunction with the GAP 26 pitot/AOA probe to perform
Part 43 Appendix E altimeter tests, the probe adapter from the pitot-static tester must
completely cover the pitot and AOA ports and drain holes on the GAP 26 to avoid
overpressuring (and causing damage to) the internal AOA sensor of the GSU 25. If the
GAP 26 is installed but AOA is unused (i.e., the AOA port of the GAP 26 is not connected
to the AOA port of the GSU 25) then the GAP 26 AOA port must be connected to the same
pressure port as the pitot port during pitot-static testing.
*Note: If the AOA is unused and connected to the static port (as described in the
preceding Caution statement) it can remain connected to the static port for the pitot-static
test.
CAUTION
Use of different colored tubing is recommended for static, pitot, and AOA plumbing to
avoid plumbing connection errors. Incorrect plumbing connections will result in
erroneous air data information calculated by the GSU 25.
See the following cautions when connecting pneumatic lines:
1. Make sure the aircraft static pressure port is plumbed directly to the unit static pressure input port
and the aircraft pitot pressure port is plumbed directly to the unit pitot pressure input port. The
AOA port must be plumbed directly to the AOA pressure port or, if unused, directly to the aircraft
static port.
2. Seal the threads of pneumatic fittings at the connector ports. Use caution to make sure there are no
pneumatic leaks.
3. Use care to avoid getting fluids or particles anywhere within the pneumatic lines connected to the
GSU 25.
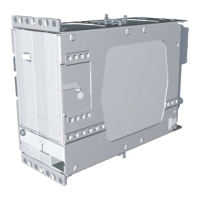
The installer must fabricate any additional mounting equipment needed. Use outline and installation
drawings Figure 17-4
and Figure 17-5 for reference.
 Loading...