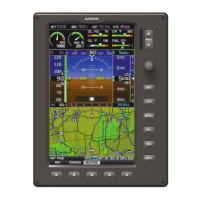
190-01115-01 G3X™/G3X Touch™ Avionics Installation Manual
Rev. AV Page 6-6
6.6 Mounting Requirements
Refer to Section 6.7 (GDU 45X), Section 6.8 (GDU 46X), and Section 6.9 (GDU 470) for outline and
installation drawings.
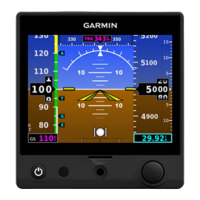
6.6.1 Unit Installation
The GDU 4XX is installed by holding the unit flush with the instrument panel and fastening the four 3/32”
hex socket head screws to the panel as shown in Figure 6-5
(GDU 45X), Figure 6-8 (GDU 46X), and
Figure 6-11
(GDU 470).
6.6.2 Panel Cutout Template
The GDU 45X Nut Plate (115-01725-00), GDU 46X Nut Plate (115-01725-01), or GDU 470 Nut Plate
(115-01725-04) can be used as a template when marking the panel for cutout. See Figure 6-6
(GDU 45X),
Figure 6-9
(GDU 46X), and Figure 6-12 (GDU 470), (dimensions on the figures are to verify accuracy of
printout only) for complete cutout dimensions. For .dxf versions of these drawings, see
https://support.garmin.com/support/manuals
.
6.6.3 GDU 470 Panel Drilling Guide
The GDU 470 Drill Guide (115-01725-04) can be used as a template when marking the panel for cutout
(Figure 6-15,
dimensions on the figure are to verify accuracy of printout only). See Figure 6-12 for
complete dimensions. The drill guide is especially useful when updating from the GDU 37X to the GDU
470, as the rivet holes on the GDU 470 drill guide and nut plate match the GDU 37X nut plate rivet holes.
The drill guide is attached to the panel using the existing GDU 37X nutplate holes, and is used to make the
panel modifications and drill the new mounting holes. The corners of the existing GDU 37X panel cutout
must be slightly enlarged using the drilling guide as a template. The nut plate is then used to mount the
GDU 470 to the updated panel opening.
 Loading...