COPYRIGHT
©
2000 CANON INC. 2000 2000 2000 2000 CANON iR5000/iR6000 REV.0 JULY 2000
CHAPTER 4 IMAGE FORMATION SYSTEM
4-69 P
7.8.4 Routing the Grid for the Primary Charging Assembly
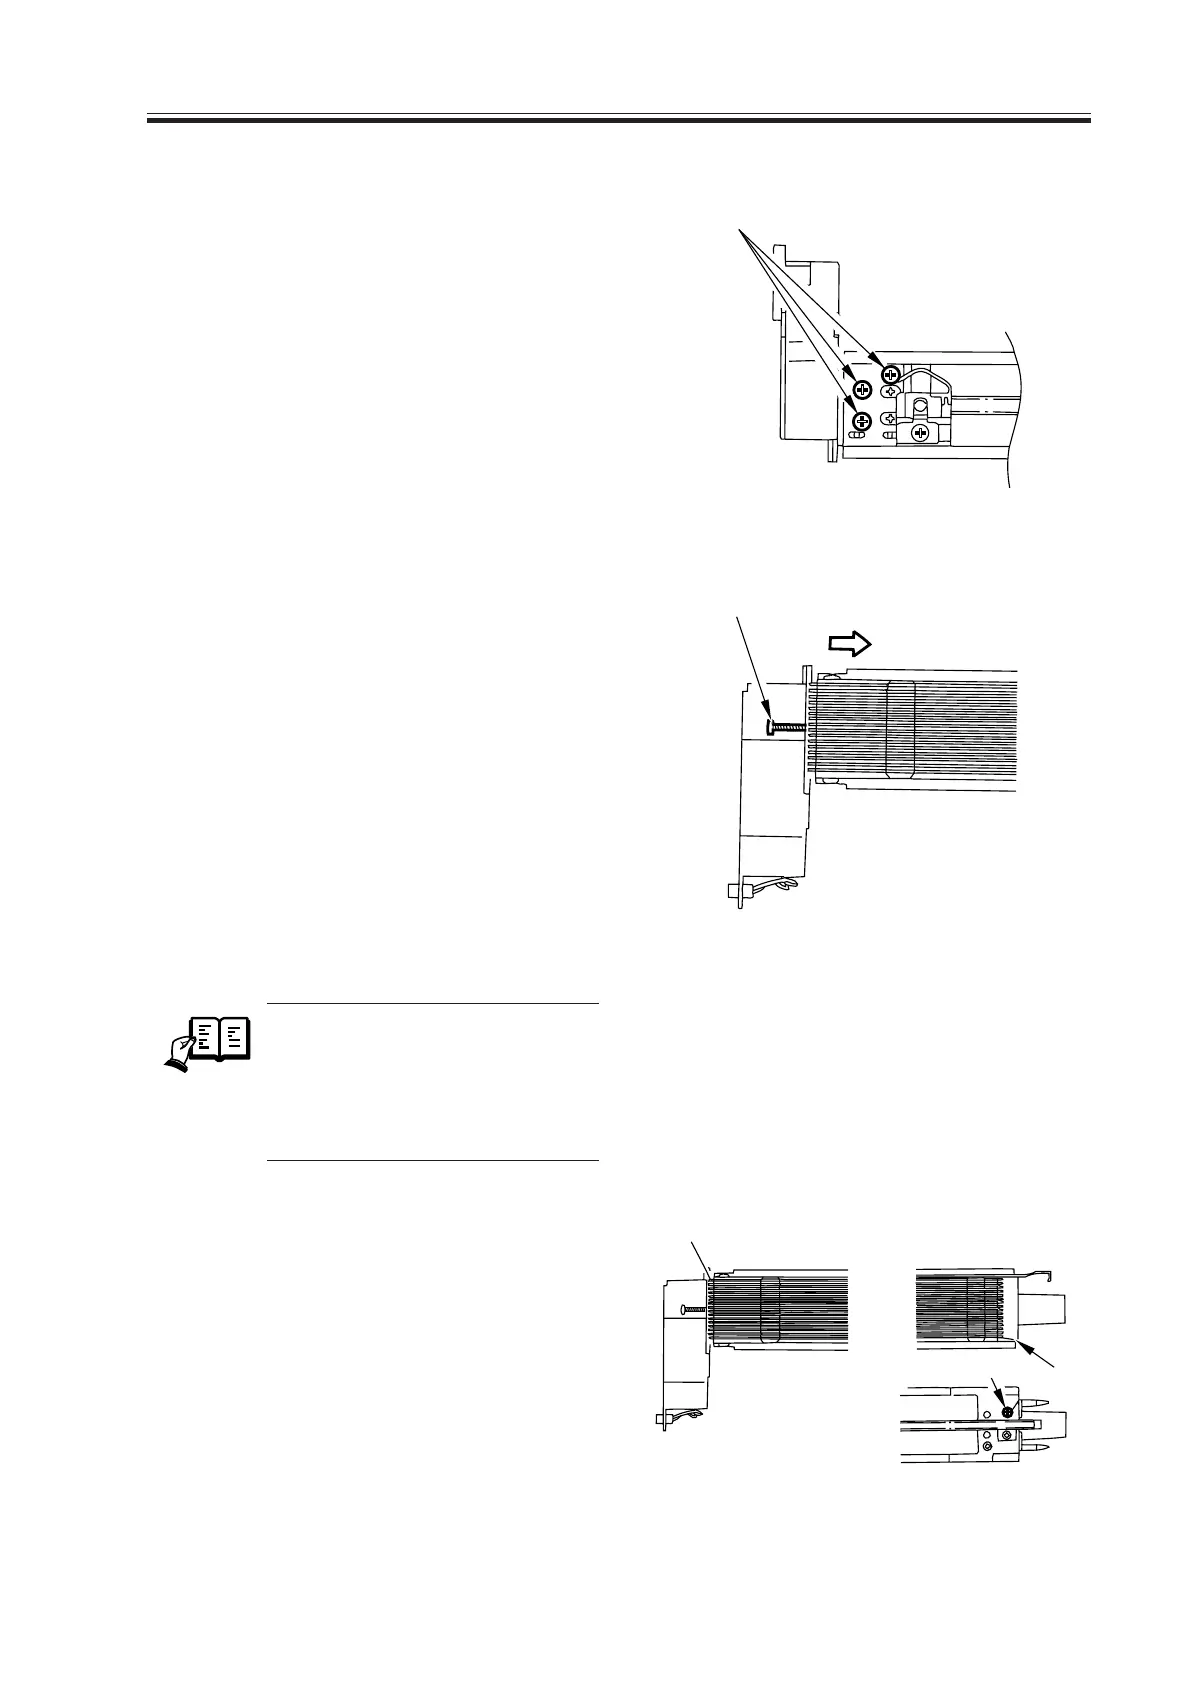
1) Loosen the two mounting screws used
to secure the left and right shielding
plates in place.
2) Loosen the three mounting screws used
to secure the motor unit in place at the
front.
F04-708-07
3) Loosen the mounting screw, and move
it in the direction indicated; then, fix it
in place temporarily.
4) Free a length of about 5 cm of charging
wire from the charging wire reel (0.1
mm in diameter), and form a loop at its
end with a diameter of about 2 mm.
F04-708-08
REF.
To form a loop, wind the charg-
ing wire around a hex key once,
and turn the hex key three to
four times; then, twist the charg-
ing wire.
5) Cut the twisted charging wire (excess)
with nippers.
6) Hook the loop on stud A.
7) After routing the wire for 31 runs, lead
it through section B, and give it a half
turn; then, put it between the washer
and the motor unit, and wind it once
around the mounting screw (clockwise),
and secure it in place with a mounting
screw.
F04-708-09
Screw
Stud A
Screw
B
Screws
Download Free Service Manual at http://printer1.blogspot.com
 Loading...